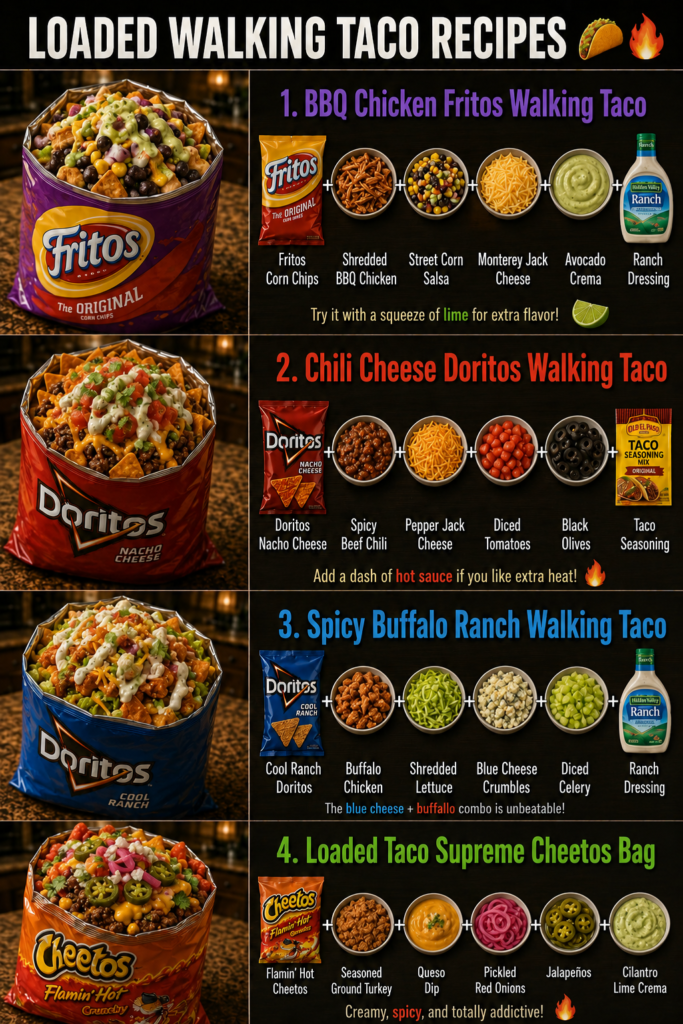
Loaded Walking Taco Recipes
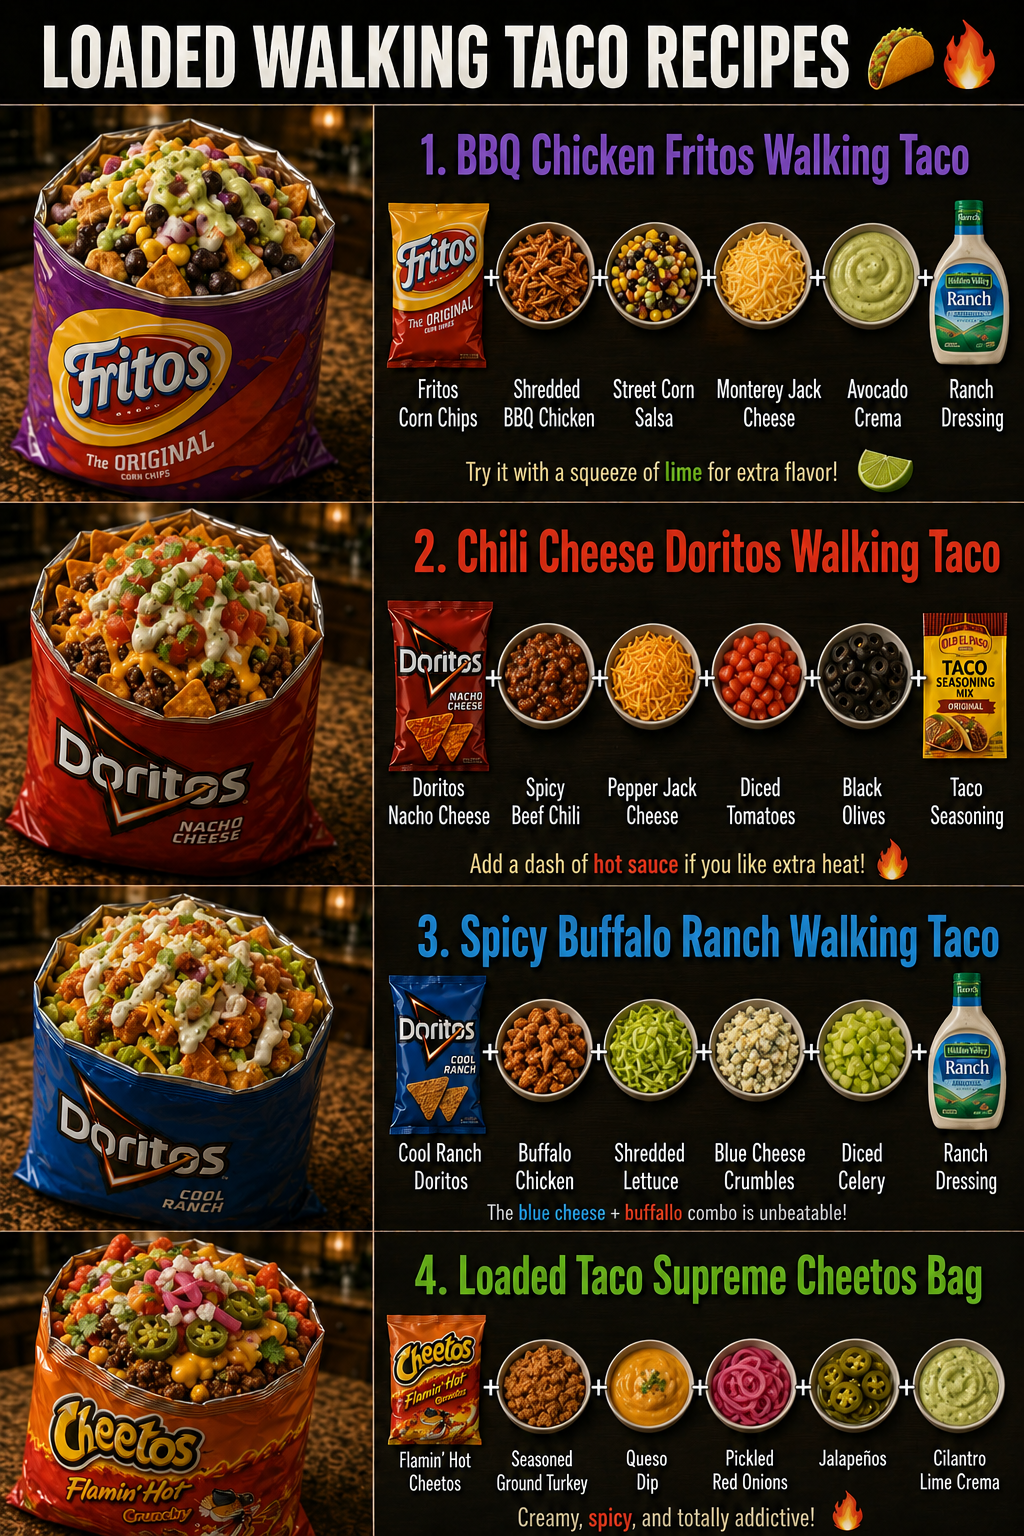
I discovered walking tacos completely by accident at a neighborhood potluck last summer. My friend Sarah showed up with a bag of Fritos, a cooler full of seasoned ground beef, and all the fixings lined up in mason jars. Everyone just grabbed a bag, crushed it up a little, opened the top, and filled it right there—no plates, no mess, no forks. It was genius. I remember standing in her backyard thinking, “Why have I never done this before?” and immediately texting myself recipe ideas before I forgot.
That day sparked an obsession with loaded walking taco recipes, and I’ve been experimenting with them ever since. What I love most is how forgiving they are. You can make them fancy or keep them simple, prep everything ahead, and let people build their own. They’re perfect for game day, picnics, camping trips, or when you just want dinner without the cleanup. The best part? Everyone goes home happy, and I’m not scrubbing dishes for an hour.
Walking tacos work because they’re interactive and customizable. You’re not locked into one version—you can load them with whatever proteins, veggies, and toppings you have on hand. I’ve made them with seasoned chicken, black beans, pulled pork, even breakfast sausage. The bag does double duty as your plate and your taco shell, which feels a little rebellious in the best way.
In this article, I’m sharing my favorite loaded walking taco recipes, plus all the variations I’ve tested so you can make them your own. Whether you’re feeding your family or hosting twenty people, you’ll find something here that works. Follow me on DianaCookingE on Pinterest for more crowd-pleasing recipes like this one.
Why You’ll Love This Recipe
Walking tacos are one of those rare recipes that actually get easier the more people you’re feeding. There’s no stove juggling, no timing stress, and you can prepare everything an hour or two ahead. Everyone assembles their own, so picky eaters can skip what they don’t want, and adventurous folks can load up on the good stuff.
I also love them because they’re genuinely fun to eat. There’s something satisfying about crunching through a bag of Fritos loaded with seasoned meat, cheese, and all your favorite toppings. It feels casual and festive at the same time, which is my favorite kind of food.
Plus, cleanup is minimal. You’re not washing taco shells or dealing with broken tortillas. The bag is your vessel and your trash when you’re done. That alone makes these worth making regularly in my house.
Ingredients
- 2 pounds ground beef (or ground turkey, ground chicken, or shredded chicken)
- 2 tablespoons olive oil
- 1 medium yellow onion, diced small
- 3 cloves garlic, minced
- 2 tablespoons chili powder
- 1 tablespoon ground cumin
- 1 teaspoon smoked paprika
- 1 teaspoon salt (adjust to taste)
- ½ teaspoon black pepper
- ½ teaspoon cayenne pepper (optional, for heat)
- ½ cup beef broth (or chicken broth)
- 2 tablespoons tomato paste
- 1 tablespoon lime juice
- Individual bags of Fritos corn chips (or tortilla chips of your choice—one per person)
- 2 cups shredded cheddar cheese
- 2 cups diced tomatoes (fresh or from a can, drained)
- 1 cup diced red onion
- 1 cup shredded lettuce (iceberg or romaine)
- ¾ cup sour cream (or Mexican crema)
- ¾ cup salsa (your favorite kind)
- ½ cup fresh cilantro, chopped (optional)
- 1 lime, cut into wedges
Diana’s Tip: I always buy a couple extra bags of chips because someone will want seconds, and you don’t want to run out mid-party. Plus, a few bags inevitably get crushed in the cooler, so having backups saves the day.
Optional Add-Ins and Variations
This is where loaded walking taco recipes get fun. Here are my go-to additions:
- Jalapeños (fresh, pickled, or roasted) for heat and brightness
- Black beans or pinto beans for extra protein and earthiness
- Corn kernels (fresh or frozen, thawed) for sweetness and texture
- Avocado slices or guacamole for creaminess
- Cotija cheese or crumbled queso fresco instead of cheddar
- Hot sauce or sriracha for those who like serious heat
- Crispy bacon bits for smokiness and crunch
- Grilled corn for a charred, sweet element
- Pico de gallo instead of plain diced tomatoes
- Caramelized onions for depth and sweetness
The beauty is that you can set out a few of these and let people choose. I usually go with three or four add-ins maximum so it doesn’t feel overwhelming to assemble.
Step-by-Step Method
Step 1: Brown the meat
Heat olive oil in a large skillet over medium-high heat. Once it’s shimmering, add your ground beef and cook for about 8 to 10 minutes, breaking it apart with a wooden spoon as it browns. You want it cooked through with no pink, and the edges should look a little crispy. Drain off excess fat if there’s a lot pooling in the pan—I usually leave a thin layer because it adds flavor.
Diana’s Tip: Don’t skip the browning step by using pre-cooked meat. The caramelized edges are where all the flavor lives, and it makes a real difference in the final taste.
Step 2: Add aromatics
Push the meat to the side of the pan and add the diced onion to the empty space. Let it cook for about 2 minutes, then stir it into the meat. Add the minced garlic and cook for another 30 seconds to a minute until it’s fragrant. You’ll smell it immediately—that’s how you know it’s ready.
Step 3: Build the seasoning
Sprinkle in the chili powder, cumin, smoked paprika, salt, pepper, and cayenne if you’re using it. Stir constantly for about 1 to 2 minutes so the spices toast a little and coat the meat. This step is crucial—it wakes up the spices and prevents them from tasting dusty or raw.
Step 4: Add the broth and tomato paste
Pour in the beef broth and stir in the tomato paste until it’s fully combined. The mixture should look a little saucy but not soupy. Simmer for 5 to 7 minutes, stirring occasionally, until it thickens slightly and the flavors meld together. Taste it and adjust the salt and spices if needed.
Step 5: Finish with lime juice
Turn off the heat and stir in the lime juice. This brightens everything up and adds a little tang that balances the richness of the meat and cheese. Let the meat cool to room temperature before transferring it to a serving bowl or slow cooker if you’re keeping it warm for a crowd.
What I Messed Up At First: I used to add the lime juice while the mixture was still simmering, and the heat would cook off the brightness. Now I wait until the end, and it makes a noticeable difference.
Step 6: Prep your toppings
While the meat cools, dice your tomatoes, red onion, and lettuce. Put each topping in its own small bowl or jar so people can see what they’re grabbing. I arrange them on a table in a line, starting with the protein and moving through the fresh stuff. It makes assembly faster and more organized.
Step 7: Set up the station
Arrange the bags of chips, the meat, the cheese, and all your toppings in an easy-to-reach lineup. Have small spoons or tongs available so people can serve themselves without double-dipping. I put a stack of napkins nearby because these can get a little messy—and that’s part of the charm.
Common Mistakes to Avoid
Using meat that’s too wet: If your cooked meat is swimming in grease or broth, it’ll make the chips soggy. I drain excess fat and simmer until the sauce is thick enough to cling to the meat without pooling.
Forgetting to cool the meat: Hot meat will wilt the lettuce and make the whole thing uncomfortable to eat. I always let it cool to room temperature or even chill it slightly before serving.
Overfilling the bag: It’s tempting to load everything in, but too much and the bag gets hard to manage. I tell people to fill it about three-quarters of the way, then they can add more if they want.
Using stale chips: This might seem obvious, but open those bags right before serving. Stale chips lose their crunch, and that crunch is the whole point. I buy them fresh the day of if I can.
My Tested Substitutions
For the protein: Ground turkey works beautifully and cooks the same way as beef. I’ve also used shredded rotisserie chicken (about 3 cups), which is faster and lighter. For a vegetarian version, I use seasoned black beans and lentils mixed together—the texture is surprisingly similar to ground meat.
For the chips: Tortilla chips, Doritos, or even crushed taco shells work if you don’t have Fritos. Each one brings its own flavor, so choose based on what you’re in the mood for. I’ve done a taco seasoning version with plain tortilla chips and it was delicious.
For the cheese: Monterey Jack, pepper jack, or a Mexican blend all work great. Cotija cheese is amazing if you want something more traditional and crumbly. I’ve even used a mix of cheddar and Monterey Jack for more complexity.
For the sour cream: Greek yogurt works in a pinch and adds protein. Mexican crema is richer and more authentic if you can find it. Some people prefer mayo mixed with lime juice for a different vibe.
How to Customize
The beauty of loaded walking taco recipes is that they’re completely flexible. If you’re feeding people with different preferences, set up a toppings bar and let them build their own. Someone vegan? Use seasoned beans and skip the cheese and sour cream. Someone who loves heat? Put out jalapeños, hot sauce, and cayenne pepper.
I’ve made breakfast versions with scrambled eggs, chorizo, and hash browns. I’ve done a pulled pork version that’s incredible. I’ve even done a taco seasoned chickpea version for vegetarian friends, and honestly, nobody missed the meat. The point is that once you understand the basic formula—seasoned protein plus toppings in a chip bag—you can make it work for almost any situation.
[INTERNAL LINK: Easy Taco Seasoning Recipes]
Serving Ideas
Walking tacos are perfect for outdoor gatherings, but I also serve them at indoor parties, game day watch parties, and even casual family dinners. They’re less formal than traditional tacos, which makes them feel special in a relaxed way.
I like to set everything up buffet-style so people can customize as much or as little as they want. Have napkins everywhere—and I mean everywhere. Set out small plates or napkins for people to put their assembled bags on while they eat, and have wet wipes or a hand-washing station nearby.
For a fancier crowd, I’ll add guacamole, cotija cheese, and cilantro to elevate things slightly. For kids, I keep the toppings simple—meat, cheese, salsa, and sour cream. The flexibility is what makes these so great.
Meal Prep and Storage
You can prep the seasoned meat up to two days ahead. Store it in an airtight container in the fridge, then reheat it gently in a skillet or slow cooker before serving. The toppings can be prepped and stored separately for up to one day—just keep the lettuce and avocado separate from the wet ingredients so they don’t get soggy.
If you’re bringing these to an outdoor event, transport the meat in a slow cooker on low, or in a cooler with an ice pack if it’s a short trip. Keep the toppings cool too. The chips should stay in their bags until assembly time.
Leftovers are great for lunch the next day. Store the meat and toppings separately, and you can reassemble them in a fresh bag if you have any chips left. I’ve also used leftover seasoned meat in quesadillas, nachos, or even scrambled eggs for breakfast.
Nutritional Breakdown
This varies depending on how much you load into each bag, but here’s a rough estimate per serving (assuming 8 servings of meat mixture with one bag of chips and standard toppings):
- Calories: 520
- Protein: 28g
- Carbohydrates: 32g
- Fat: 32g
- Fiber: 3g
This is an estimate and will vary based on your specific ingredients and how much you use. If you’re using leaner meat or adding more vegetables, the numbers will shift accordingly.
Frequently Asked Questions
Can I make loaded walking taco recipes ahead of time?
Yes! The seasoned meat can be made up to two days ahead and stored in the fridge. Reheat it before serving. Toppings can be prepped the day before and kept separate in the fridge. Just assemble everything right before people eat so the chips stay crispy.
What if I don’t have Fritos?
Any sturdy chip works—tortilla chips, Doritos, even crushed taco shells. The key is choosing something with enough structure to hold up to the toppings without falling apart. Avoid thin, delicate chips that’ll crumble too easily.
How do I keep the chips from getting soggy?
Make sure your meat mixture isn’t too wet, and assemble everything right before eating. Don’t let the bags sit with toppings in them for more than 10 or 15 minutes. If you’re making these for a party, have people assemble them as they’re ready to eat rather than all at once.
Can I use ground turkey instead of beef?
Absolutely. Ground turkey cooks the same way and tastes great. It’s a bit leaner, so you might want to add a little extra olive oil to the pan. The final flavor is slightly lighter but still delicious.
Are these vegetarian-friendly?
You can make a vegetarian version using seasoned black beans, lentils, or even crumbled tofu. Season them the same way you would the meat and use the same toppings. It’s just as satisfying.
Final Thoughts
Loaded walking taco recipes have become one of my go-to moves for feeding people, and I think they’ll become one of yours too. There’s something genuinely fun about them—they’re casual, interactive, and delicious. Everyone leaves happy, and you’re not stuck in the kitchen for hours.
The best part is how forgiving they are. You don’t need fancy ingredients or complicated techniques. Just good seasoning, fresh toppings, and bags of chips. That’s it. That’s the whole thing.
I’d love to hear how you make your version. Do you have a favorite topping? A protein you swear by? Drop me a comment and let me know. In the meantime, grab some chips and give these a try. Your next gathering is going to be so much easier, and your guests are going to have a blast.
Happy cooking!
Diana
—
Loaded Walking Taco Recipes
Ingredients
Method
- Heat olive oil in a large skillet over medium-high heat. Add ground beef and cook for 8 to 10 minutes, breaking it apart with a wooden spoon until cooked through with no pink. Drain excess fat, leaving a thin layer.
- Push meat to the side and add diced onion to the empty space. Cook for 2 minutes, then stir into the meat. Add minced garlic and cook for 30 seconds to 1 minute until fragrant.
- Sprinkle in chili powder, cumin, smoked paprika, salt, and black pepper. Stir constantly for 1 to 2 minutes to toast the spices and coat the meat evenly.
- Pour in ½ cup beef broth and stir in 2 tablespoons tomato paste until fully combined. Simmer for 5 to 7 minutes, stirring occasionally, until the mixture thickens slightly.
- Turn off heat and stir in 1 tablespoon lime juice to brighten the flavors. Let the meat cool to room temperature.
- While meat cools, prepare toppings by dicing tomatoes, red onion, and lettuce. Place each topping in its own small bowl.
- Arrange bags of chips, cooled meat, cheese, and all toppings in an easy-to-reach lineup. Provide small spoons or tongs for self-service assembly.