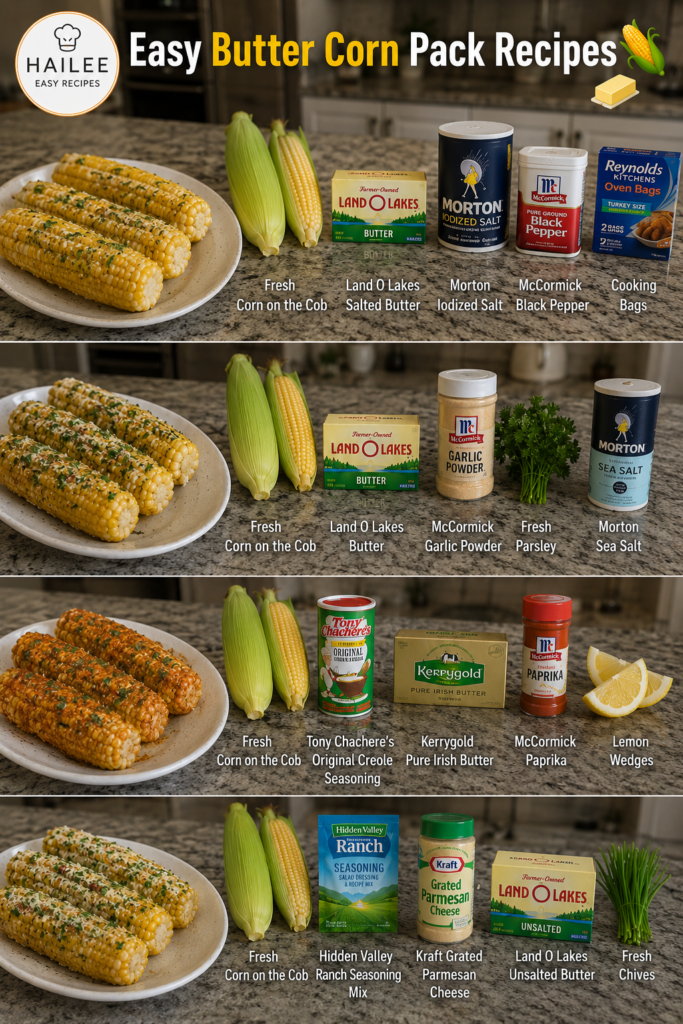
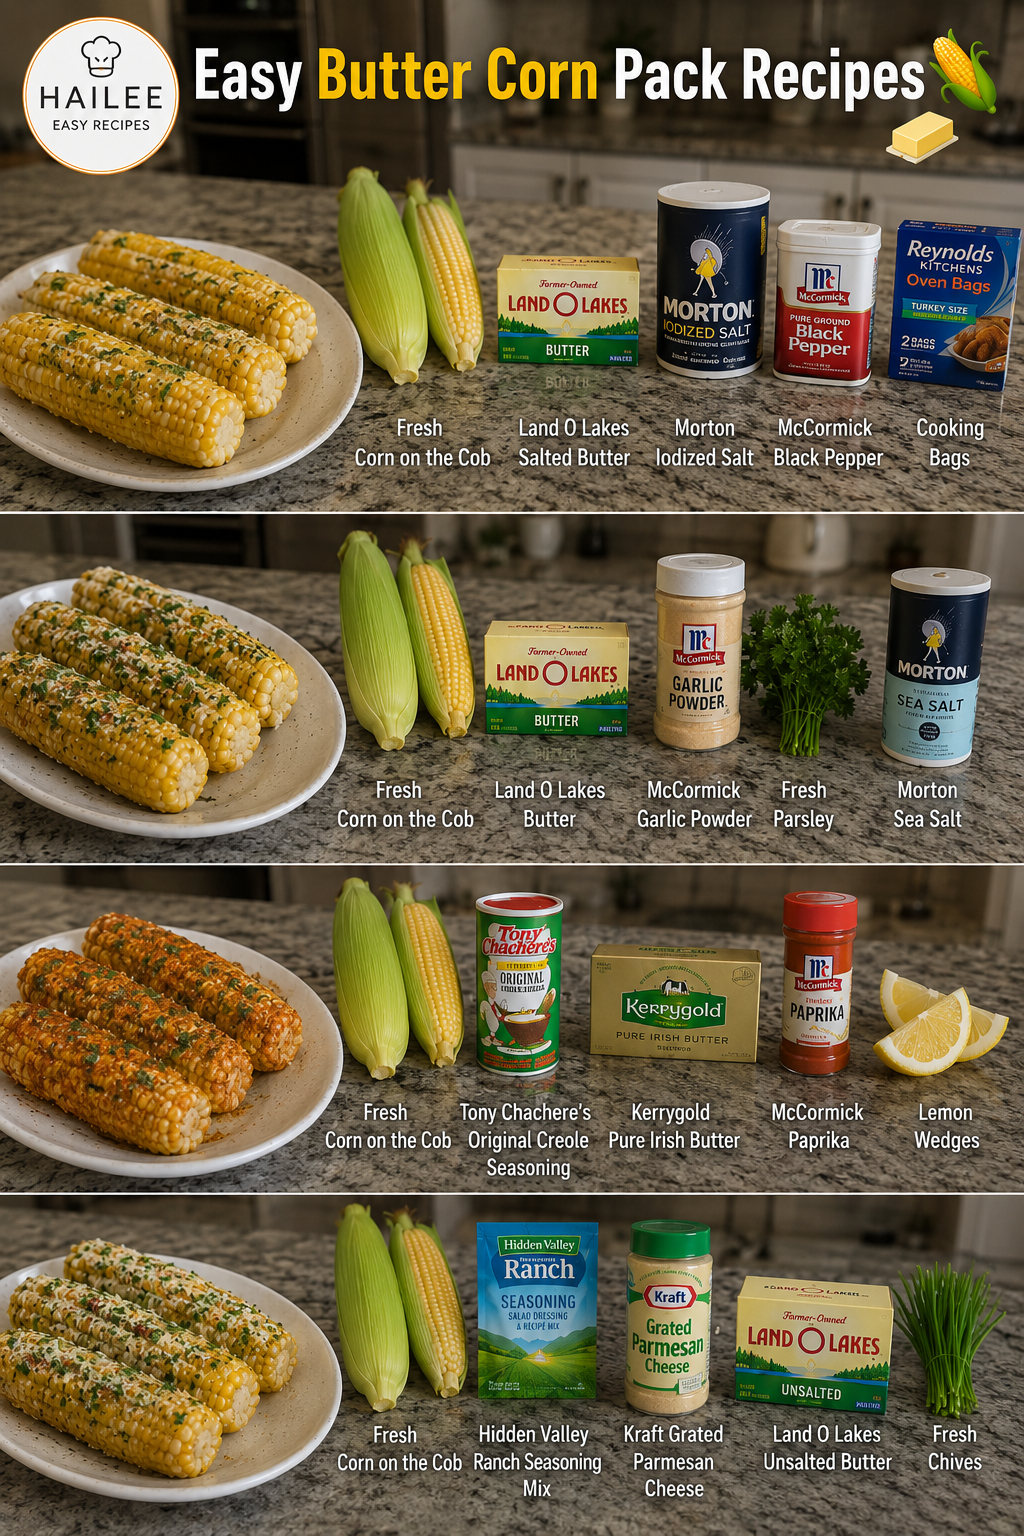
Easy Butter Corn on the Cob Recipes
I grew up in a house where summer meant corn on the cob at almost every dinner table. My mom would boil a big pot of water, drop in the ears, and five minutes later we’d be slathering them with butter while steam rose off the kitchen counter. It was simple, it was delicious, and honestly, I didn’t think much about it back then. Now that I cook for my own family, I’ve realized that easy butter corn on the cob recipes are still one of my favorite ways to turn a weeknight into something that feels a little bit special—without any fuss.
The thing about corn is that it doesn’t need much. A good ear of corn, some real butter, and a pinch of salt can make you genuinely happy. But I’ve also learned over the years that there are so many small ways to make it even better. Maybe it’s a sprinkle of fresh herbs, a squeeze of lime, or a quick char in a hot skillet. Maybe you’re grilling it, boiling it, or even microwaving it when you’re short on time. Whatever method you choose, easy butter corn on the cob recipes are flexible, forgiving, and honestly some of the most satisfying meals you can put on the table.
If you’re looking for a side dish that works with everything from a casual weeknight taco night to a backyard barbecue, or if you just want corn that tastes like it should—sweet, tender, and buttery—this guide is for you. I’m going to walk you through the methods I’ve tested, the mistakes I’ve made, and the little tricks that have made all the difference in my kitchen. Follow me on DianaCookingE on Pinterest for more seasonal recipe ideas and kitchen tips.
Why You’ll Love This Recipe
First, it’s genuinely quick. Whether you’re boiling, grilling, or roasting, you’re looking at 5 to 15 minutes of actual cooking time. That means you can decide to make corn and have it on the table before anyone gets too hungry.
Second, it’s a crowd-pleaser. I’ve never met a person who didn’t light up when corn on the cob showed up on their plate. There’s something about holding it in your hands and eating it straight off the cob that makes people happy in a way that corn off the cob just doesn’t.
Third, it works with almost everything. Taco night? Yes. Grilled chicken and green beans? Absolutely. A simple pasta dinner? I’ve done it. Corn is that ingredient that makes other foods taste better without demanding attention.
And finally, butter corn on the cob is affordable and available year-round now. Fresh corn in summer is peak, but frozen corn works beautifully too, and I’ve had good results even in winter when I’m craving that sweet, buttery flavor.
Ingredients
- 4 to 6 ears of fresh corn (or frozen if fresh isn’t available—thaw first)
- 4 tablespoons unsalted butter, softened or melted
- 1 teaspoon sea salt, plus more to taste
- ½ teaspoon freshly ground black pepper
- Optional: fresh herbs (cilantro, parsley, or chives work beautifully)
- Optional: lime or lemon juice for brightness
Diana’s Tip: I always buy a little extra corn because people tend to eat more than they think they will. Also, if you’re buying corn at the store, peel back a small section of the husk to check that the kernels are plump and bright yellow. Dull or shriveled kernels mean the corn has been sitting around too long.
Optional Add-Ins and Variations
This is where you can make corn your own. Here are my favorite ways to dress it up:
- Garlic butter: Mix minced garlic into your softened butter before spreading it on the corn
- Spicy corn: Add a pinch of cayenne pepper or a sprinkle of tajín seasoning for heat and tang
- Herb-forward: Finely chop fresh basil, cilantro, or parsley and press it into the butter while it’s still warm
- Parmesan and herbs: After buttering, sprinkle with grated Parmesan and fresh thyme
- Honey butter: Drizzle a tiny bit of honey over the butter for a subtle sweetness
- Cotija cheese and lime: This is my summer go-to—crumbly Mexican cheese and a squeeze of fresh lime juice
Step-by-Step Method
Method 1: Boiling (My Go-To for Weeknights)
1. Prep the corn. Peel back the husks and remove the silk under cool running water. I use a soft vegetable brush or just my hands to get the fine strands off. It’s a little tedious, but worth it.
2. Bring a big pot of salted water to a rolling boil. I use about 1 tablespoon of salt per gallon of water. The water should taste like the sea—that’s how you know it’s right.
3. Add the corn and cover. Once the water comes back to a boil, set a timer for 5 to 7 minutes. Fresh corn needs less time than frozen; frozen usually takes 8 to 10 minutes.
Diana’s Tip: I learned this the hard way: don’t leave boiling corn in the pot for more than 10 minutes. It gets mealy and loses that crisp, tender texture. Set a timer and stick to it.
4. Drain and butter immediately. Use tongs to pull the corn out and place it on a serving platter. While it’s still steaming hot, brush or rub the softened butter all over. The heat will melt it and help it stick.
5. Season and serve. Sprinkle with salt, pepper, and any herbs or add-ins you’re using. Eat it while it’s still warm.
Method 2: Grilling (For When You Want Char)
1. Soak the corn (optional but helpful). If you’re keeping the husks on, soak the whole ears in water for at least 30 minutes. This keeps the husks from burning. If you’ve shucked them, skip this step.
2. Preheat your grill to medium-high. You want it hot enough to get some color but not so hot that it burns the kernels.
3. Oil the grates lightly. Use a paper towel dipped in neutral oil to wipe the grates. This prevents sticking.
4. Grill for 10 to 15 minutes, turning every few minutes. You’re looking for light char marks on the kernels. If the husks are still on, they’ll blacken, but that’s fine—the corn inside stays tender.
5. Let it cool just enough to handle, then brush with butter. The warm corn will soak up the butter beautifully. Season and eat immediately.
What I Messed Up At First: I used to leave corn on the grill too long because I was worried it wasn’t cooked. The kernels turned tough and chewy. Now I check one by biting into it. It should still have a slight snap but be tender inside.
Method 3: Oven Roasting (For Hands-Off Cooking)
1. Preheat your oven to 400°F. Line a baking sheet with foil for easy cleanup.
2. Brush corn with melted butter. Lay the shucked ears on the baking sheet and brush them generously with melted butter on all sides.
3. Season and roast for 15 to 20 minutes. Sprinkle with salt and pepper. The kernels should be tender and starting to brown slightly at the edges.
4. Remove and add any final touches. Squeeze lime juice over the top, sprinkle herbs, or add cheese while it’s still warm.
Method 4: Microwave (When You’re Really Short on Time)
1. Wrap a single ear in a damp paper towel. The moisture helps it steam.
2. Microwave on high for 2 to 3 minutes. One ear takes about 2 minutes; two ears take about 3 to 4 minutes.
3. Carefully unwrap and butter. It’ll be hot, so use tongs or a kitchen towel.
Diana’s Tip: This method is genuinely good for a quick lunch or when you’re cooking for one. The corn stays tender and sweet, and you’re done in five minutes flat.
Common Mistakes to Avoid
Overcooking. This is the biggest one. Corn goes from perfect to tough and mealy quickly. Set a timer and stick to it. If you’re not sure, it’s better to undercook slightly—you can always pop it back on heat for 30 seconds.
Not salting the cooking water. If you’re boiling, the water needs to be seasoned. This is where most of the flavor comes from. Taste it before you add the corn.
Buying corn that’s been sitting around. Corn loses sweetness the longer it sits after being picked. Buy it the day you plan to cook it if possible. If you can’t, frozen corn is genuinely better than old fresh corn.
Forgetting to remove the silk. It’s annoying, but eating corn silk is worse. Take the time to rinse it out properly.
Using cold butter. It won’t melt evenly and will just sit on top of the corn. Use softened or melted butter so it coats everything smoothly.
My Tested Substitutions
Butter alternatives: I’ve used olive oil, ghee, and coconut oil. They all work, but they change the flavor. Olive oil is great if you’re going savory with herbs. Ghee gives a richer, almost nutty taste. Coconut oil is interesting with lime and cilantro.
Frozen corn: Honestly, it’s great. Thaw it first and pat it dry so it doesn’t get watery. The texture is slightly softer than fresh, but the flavor is still good, especially if you buy a quality brand.
Fresh herbs: If you don’t have cilantro, try parsley, basil, or chives. They all bring something different. In winter, a tiny pinch of dried oregano or thyme works too.
Cheese options: Cotija is my favorite, but feta, goat cheese, or even a sharp cheddar work beautifully. Grate it fine so it sticks to the butter.
Salt: I prefer sea salt or kosher salt for the bigger crystals, but regular table salt works. Just use a little less because it’s finer and saltier by volume.
How to Customize
The beauty of easy butter corn on the cob recipes is that they’re endlessly adaptable. Think about what flavors you’re already cooking with and lean into that.
If you’re making Mexican food, go with cotija cheese, lime, and cilantro. If you’re doing an Italian night, try fresh basil, garlic, and a tiny grating of Parmesan. For an Asian-inspired meal, brush the corn with a little sesame oil mixed with butter, sprinkle with sesame seeds, and finish with a touch of soy sauce.
You can also play with spice levels. A pinch of smoked paprika gives it a barbecue vibe. Cayenne or chili powder brings heat. Everything bagel seasoning is surprisingly good if you want something savory and a little funky.
Diana’s Tip: Taste as you go. Add salt, herbs, and other flavors gradually. You can always add more, but you can’t take it back.
Serving Ideas
Corn on the cob goes with almost everything, but here are my favorite pairings:
- Grilled chicken and a simple green salad
- Pulled pork sandwiches and coleslaw
- Steak and roasted potatoes
- Fish tacos with lime crema
- Grilled burgers and all the toppings
- Barbecued ribs and baked beans
- Vegetarian grain bowls with roasted vegetables
- Simple pasta with fresh tomatoes and basil
It’s also great as a standalone snack or light lunch. I’ve been known to eat a whole ear with nothing else and be completely happy.
Meal Prep and Storage
Make-ahead: You can cook corn a few hours ahead and eat it at room temperature, or reheat it gently. I don’t recommend buttering it until just before serving because the butter will get a little congealed and weird-looking as it cools.
Leftovers: Cooked corn keeps in an airtight container in the refrigerator for up to 4 days. You can eat it cold, or reheat it wrapped in a damp paper towel in the microwave for about a minute.
Freezing: Cooked corn freezes okay for up to 3 months, but the texture gets a bit softer. I prefer to freeze raw corn on the cob if I’m planning ahead. Wrap ears individually in plastic wrap, then place them in a freezer bag. Thaw before cooking.
Corn off the cob: If you want to cut the kernels off for storage or for adding to other dishes, let the corn cool completely first. Hold it upright on a cutting board and run a sharp knife down the sides to remove the kernels. They’ll keep in the fridge for 3 days or freeze for up to 3 months.
Nutritional Breakdown
One medium ear of corn on the cob with 1 tablespoon of butter contains approximately:
- Calories: 180
- Protein: 3g
- Carbohydrates: 17g
- Fat: 12g
- Fiber: 2g
- Vitamin C: 5mg
- Potassium: 200mg
Corn is a good source of fiber and contains B vitamins, especially thiamine and folate. The butter adds richness and fat-soluble vitamins like vitamin A. It’s a nutritious, satisfying side dish that feels indulgent but isn’t overly heavy.
Frequently Asked Questions
Can I make easy butter corn on the cob recipes with frozen corn?
Absolutely. Thaw frozen corn first and pat it dry so it doesn’t release excess water during cooking. The texture will be slightly softer than fresh, but the flavor is still delicious, especially if you buy a quality brand. Follow any of the cooking methods above—boiling takes about 8 to 10 minutes, grilling about 12 to 15, and roasting about 15 to 20.
How do I know when corn is done?
The kernels should be tender but still have a slight firmness when you bite into them. They shouldn’t be mushy or mealy. If you’re boiling, start checking at the 5-minute mark by piercing a kernel with a fork. For grilling or roasting, look for light browning on the kernels and a tender texture when you test one.
What’s the best way to remove corn silk?
Peel back the husks and hold the corn under cool running water. Use a soft vegetable brush or your hands to gently rub away the silk strands. You can also use a damp paper towel to wipe them off. It takes a minute or two, but it’s worth it to avoid eating silk.
Can I prepare corn ahead of time?
Yes, you can shuck and silk corn several hours ahead and keep it in the refrigerator wrapped in a damp paper towel. You can also cook it a few hours ahead and reheat it gently before serving. I recommend buttering it just before eating for the best texture.
What’s the difference between using fresh and frozen corn?
Fresh corn has a slightly crisper texture and often more intense sweetness, especially if it’s in season. Frozen corn is picked at peak ripeness and frozen immediately, so it retains good flavor and nutrition. The texture is a bit softer after thawing. Either works well for easy butter corn on the cob recipes—it just depends on what’s available and what you prefer.
Final Thoughts
There’s something really satisfying about cooking food that’s simple, delicious, and makes people genuinely happy. Easy butter corn on the cob recipes are exactly that. They don’t require fancy techniques or obscure ingredients. They just require good corn, real butter, and a little attention so you don’t overcook them.
I hope you try one of these methods and find your favorite. Maybe it’s the quick boil on a Tuesday night, or maybe it’s the charred version you make on the grill when friends come over. Either way, I’d love to hear what you think. Come back and let me know which method worked best for you, or if you came up with a variation that’s now your go-to.
Until next time, happy cooking.
— Diana
Recipe Card
Easy Butter Corn on the Cob Recipes
Ingredients
Method
- Peel back the husks and remove the silk under cool running water using a soft vegetable brush or your hands to remove all fine strands.
- Bring a large pot of salted water to a rolling boil, using about 1 tablespoon of salt per gallon of water until it tastes like the sea.
- Add the corn to boiling water and cover, setting a timer for 5 to 7 minutes for fresh corn or 8 to 10 minutes for frozen corn.
- Drain the corn using tongs and place on a serving platter while still steaming hot.
- Brush or rub softened butter all over the hot corn so it melts evenly and coats completely.
- Sprinkle with salt, pepper, fresh herbs, cheese, or lime juice according to your preference.
- Serve immediately while still warm.