
Loaded Cheeseburger Fries
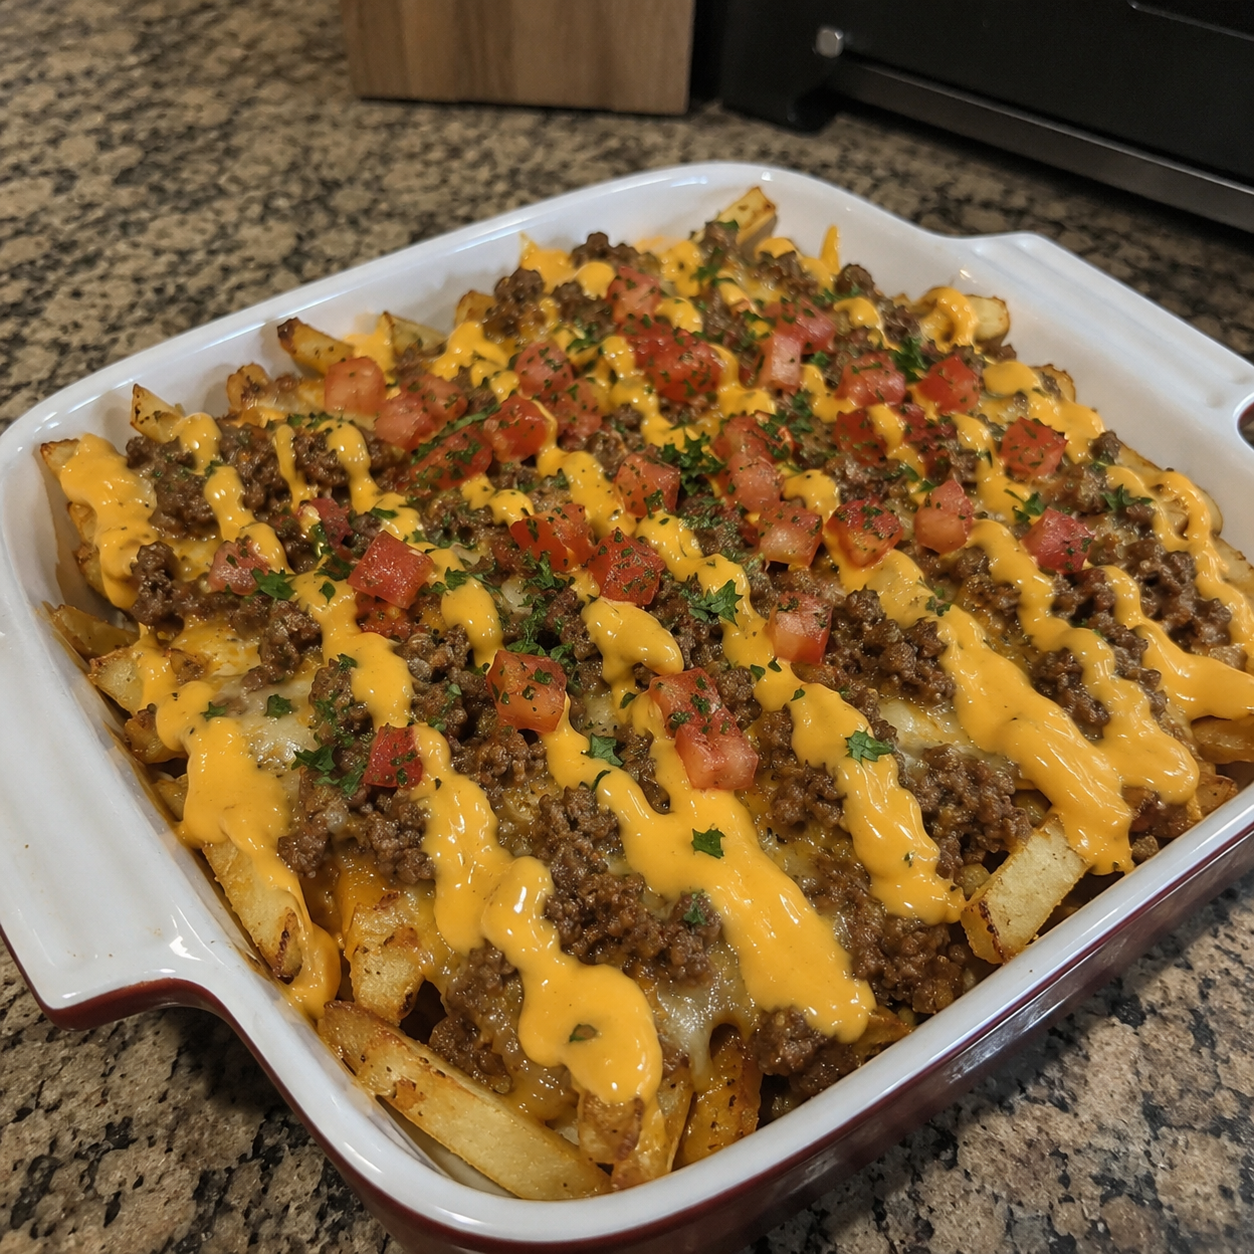
My husband came home from work one Friday night craving something indulgent, and I was tired of the same old dinner routine. We’d just had burgers the weekend before, but the idea stuck with me—what if I took everything we loved about a cheeseburger and piled it onto crispy fries instead? That night, loaded cheeseburger fries were born in my kitchen, and honestly, they’ve become a Friday night tradition ever since.
These aren’t your average fries. I’m talking about a golden, crispy base loaded with seasoned ground beef, melted cheese, crispy bacon, pickles, onions, and a drizzle of special sauce that tastes just like the real thing. It’s comfort food at its finest—messy, satisfying, and way easier than you’d think to pull together on a weeknight.
Loaded cheeseburger fries are perfect for game nights, casual family dinners, or when you want something fun that doesn’t require a lot of fussy plating. My kids devour them, my friends ask for the recipe, and I love that I can have them on the table in under 30 minutes. If you’re a burger lover looking for a fun twist, or if you just want to impress people with something a little different, this is your recipe.
Follow me on DianaCookingE on Pinterest for more recipes like this one—I’m always sharing quick weeknight dinners and creative comfort food ideas.
Why You’ll Love This Recipe
First, it’s incredibly forgiving. You don’t need fancy ingredients or special skills. If you can brown ground beef and melt cheese, you’re already halfway there.
Second, it’s customizable to your taste. Like extra pickles? Go for it. Prefer crispy onions over fresh? That works too. I love that everyone at my table can build their own version while the base stays the same.
Third, it tastes indulgent without feeling like you’re spending hours in the kitchen. The whole thing comes together faster than ordering takeout, and it tastes way better than anything delivered to your door.
Ingredients for Loaded Cheeseburger Fries
- 2 pounds frozen french fries (or fresh-cut, if you’re feeling ambitious)
- 1 pound ground beef (80/20 blend works best)
- 1 teaspoon salt
- ½ teaspoon black pepper
- ½ teaspoon garlic powder
- ¼ teaspoon onion powder
- 2 cups shredded cheddar cheese (or American cheese if you want that classic burger flavor)
- 6 slices bacon, cooked and crumbled
- ¼ cup diced pickles (dill pickles, drained well)
- ¼ cup diced red onion (optional, but I really recommend it)
- 2 tablespoons ketchup
- 2 tablespoons mayonnaise
- 1 tablespoon yellow mustard
- 1 teaspoon relish (sweet or dill, your choice)
- Fresh lettuce or green onions for garnish (optional)
Diana’s Tip: Don’t skip draining your pickles. I learned this the hard way—soggy fries are nobody’s friend. Pat them dry with a paper towel before adding them to the pile.
Optional Add-Ins and Variations
This recipe is your canvas. I sometimes add crispy fried onions on top for extra crunch, or a drizzle of sriracha mayo if I’m feeling a little heat. Some people love adding a fried egg on top, which honestly? Game changer. A soft yolk running over warm fries and melted cheese is pure comfort.
You could also swap in pepper jack cheese for a spicy kick, or go full gourmet with caramelized onions and truffle oil if you’re feeling fancy. The beauty of this dish is that it adapts to whatever you’re craving.
Step-by-Step Method
Step 1: Cook Your Fries
Preheat your oven to 425°F. Spread your frozen fries on a large baking sheet in a single layer. I use parchment paper to make cleanup easier. Bake according to package directions—usually about 20 to 25 minutes—until they’re golden and crispy. You want them cooked all the way through because they won’t get much more time in the oven once you add the toppings.
Diana’s Tip: If you’re using fresh-cut fries, blanch them first in hot oil for a couple of minutes, then finish them in the oven. This gives you that crispy exterior and fluffy inside.
Step 2: Brown the Ground Beef
While the fries are cooking, heat a large skillet over medium-high heat. Add your ground beef and break it up with a wooden spoon as it cooks. This usually takes about 5 to 7 minutes. You want it browned and crumbly, not clumpy. Once it’s cooked through, drain off any excess fat—I use a fine-mesh strainer for this.
What I Messed Up At First: I used to skip the draining step, and the fries would get greasy and sad. Don’t be me. Drain that fat.
Step 3: Season the Meat
Return the drained beef to the skillet (no need to wash it) and add your salt, pepper, garlic powder, and onion powder. Stir well and let it cook for another minute so the seasonings bloom. Taste it—it should taste like a really good burger patty. If it needs more salt, add it now.
Step 4: Make Your Special Sauce
In a small bowl, whisk together the ketchup, mayo, mustard, and relish. This is your burger sauce, and it’s what ties everything together. I sometimes add a pinch of paprika or a splash of Worcestershire sauce, but the basic ratio is solid as is.
Step 5: Assemble the Fries
This is where it gets fun. Take your crispy fries straight from the oven and pile them onto a large serving platter or baking sheet. Scatter the seasoned ground beef over the top. Sprinkle the shredded cheese all over—don’t be shy. Then top with the crumbled bacon, drained pickles, and diced red onion if you’re using it.
Step 6: Melt the Cheese
Pop the loaded fries back into the oven for about 3 to 4 minutes, just until the cheese is melted and gooey. You don’t want to cook the fries any longer or they’ll start to soften. You’re just giving the cheese time to do its thing.
Step 7: Finish and Serve
Pull it out of the oven—watch out for the steam—and immediately drizzle with your special sauce. A light garnish of fresh lettuce or sliced green onions adds a nice fresh touch and color contrast. Serve immediately while everything is hot and the cheese is still melty.
Common Mistakes to Avoid
Overcooking the fries the second time around. Once cheese is melted, you’re done. The fries will continue to soften as they sit, so better to pull them out a touch early than to end up with limp fries.
Not seasoning the beef properly. This is your main protein, so don’t skimp on seasoning. Taste as you go and adjust. Bland beef makes bland fries.
Using wet pickles. I can’t stress this enough. Pat them dry. Moisture is the enemy of crispy fries.
Skipping the special sauce. It seems like a small thing, but that sauce is what makes these taste like an actual cheeseburger. Don’t leave it out.
My Tested Substitutions
For the cheese: American cheese slices work beautifully and melt faster than shredded cheddar. Swiss cheese is nice if you want something a little different. Pepper jack if you want heat.
For the bacon: Crispy bacon bits from a jar work in a pinch, though fresh bacon is always better. Turkey bacon works too, though it’s less crispy.
For the fries: Waffle fries, steak fries, or curly fries all work great. Sweet potato fries are surprisingly good if you want to add a different flavor profile.
For the sauce: If you don’t have relish, use a tiny bit of pickle juice mixed with ketchup and mayo. It gives you that tangy burger flavor without the chunks.
Diana’s Tip: I’ve also made this with ground lamb and a garlic aioli instead of the special sauce. It’s different, but it’s delicious. Don’t be afraid to experiment.
How to Customize
Want to make it your own? Start with the base of fries and beef, then go wild. Add sautéed mushrooms and Swiss cheese for a mushroom burger vibe. Try caramelized onions with gruyere for something more upscale. A fried egg on top makes it a breakfast-for-dinner situation.
You could also go spicy with jalapeños, pepper jack, and sriracha mayo. Or keep it simple with just cheese and bacon if you’re feeding picky eaters. The point is, this is flexible enough to work with whatever you’re craving.
[INTERNAL LINK: Easy Weeknight Dinner Ideas]
Serving Ideas
These are obviously great as a main course, but I also serve them as a fun appetizer for game day or a casual get-together. Cut them into smaller portions and put them in a big bowl in the center of the table—people love the interactive, shareable vibe.
Pair them with a simple green salad to balance out the richness, or serve alongside coleslaw for a fun burger-stand experience. A cold beer or a classic milkshake on the side feels very on-theme.
For a lighter meal, I sometimes make a smaller batch and serve it with roasted vegetables on the side. The loaded fries are rich enough that you don’t need a huge portion.
Meal Prep and Storage
Loaded cheeseburger fries are best eaten fresh and hot, so I don’t recommend making them ahead and reheating. However, you can prep components in advance. Cook your fries and bacon the day before, store them separately in airtight containers, and assemble everything fresh when you’re ready to eat.
The special sauce keeps in the fridge for up to a week, which is handy. The seasoned ground beef also keeps for 3 to 4 days, so you could technically brown it ahead and just reheat it gently before assembling.
Leftovers don’t keep well because the fries get soggy, but honestly, with this crowd-pleasing recipe, there usually aren’t leftovers to worry about.
Nutritional Breakdown
This is comfort food, so it’s not exactly light. One serving (roughly one-quarter of the recipe) contains about 650 calories, 35 grams of protein, 55 grams of carbs, and 32 grams of fat. The exact numbers depend on your specific ingredients and portion size, but this gives you a ballpark idea.
The protein comes from the beef and bacon, the carbs from the fries, and the fat from the cheese and mayo-based sauce. It’s a balanced indulgence, really—a little bit of everything.
Frequently Asked Questions
Can I make loaded cheeseburger fries in an air fryer?
Absolutely. Cook your fries in the air fryer according to the machine’s instructions, then add toppings and finish in a regular oven to melt the cheese. Air fryers can get a little smoky with all the toppings, so I prefer the oven method, but it’s doable.
What’s the best way to reheat leftovers?
Honestly, they don’t reheat well because the fries get soft. But if you must, spread them on a baking sheet and warm in a 350°F oven for about 10 minutes. You’ll lose some of the crispness, but it’s better than the microwave.
Can I use fresh-cut potatoes instead of frozen fries?
Yes, but it takes more time. Cut your potatoes into fries, blanch them in hot oil for a couple of minutes, then bake them until crispy. The frozen ones are honestly more convenient and they turn out just as good.
Is there a vegetarian version?
You could skip the beef and bacon and load the fries with sautéed mushrooms, caramelized onions, and extra cheese. It won’t be the same, but it would still be delicious. Add a fried egg on top for protein.
How do I keep the fries from getting soggy?
Make sure your fries are fully cooked before adding toppings, drain your pickles completely, and don’t let the finished fries sit around too long before eating. Serve immediately after removing from the oven.
Final Thoughts
Loaded cheeseburger fries might seem like a simple idea, but there’s something really special about taking the flavors you love from a classic burger and serving them in a fun, shareable way. My family requests these regularly, and I’ve made them for friends who’ve asked for the recipe multiple times.
The best part? You don’t need any special skills or fancy equipment. If you can bake fries and brown ground beef, you can make loaded cheeseburger fries. And if you mess something up—say, you forget to drain the pickles or you slightly overcook the fries—it’s still going to taste really good.
I hope you give this recipe a try and make it your own. Whether you stick to my version or add your own creative twist, I’d love to hear how it turns out. Happy cooking!
—
Loaded Cheeseburger Fries
Ingredients
Method
- Preheat oven to 425°F. Spread frozen fries on a baking sheet in a single layer and bake according to package directions, about 20 to 25 minutes, until golden and crispy.
- While fries cook, heat a large skillet over medium-high heat. Add ground beef and break it up with a wooden spoon as it cooks for 5 to 7 minutes until browned. Drain excess fat using a fine-mesh strainer.
- Return drained beef to skillet and add salt, pepper, garlic powder, and onion powder. Stir well and cook for 1 minute to bloom the seasonings. Taste and adjust seasoning as needed.
- In a small bowl, whisk together ketchup, mayonnaise, mustard, and relish to make the special sauce. Set aside.
- Pile crispy fries onto a large serving platter or baking sheet. Scatter seasoned ground beef over the fries, then sprinkle shredded cheese generously over the top. Add crumbled bacon, drained pickles, and diced red onion.
- Return loaded fries to the oven for 3 to 4 minutes, just until cheese is melted and gooey.
- Remove from oven and immediately drizzle with special sauce. Serve hot while cheese is still melty.