
Loaded Beef Nachos
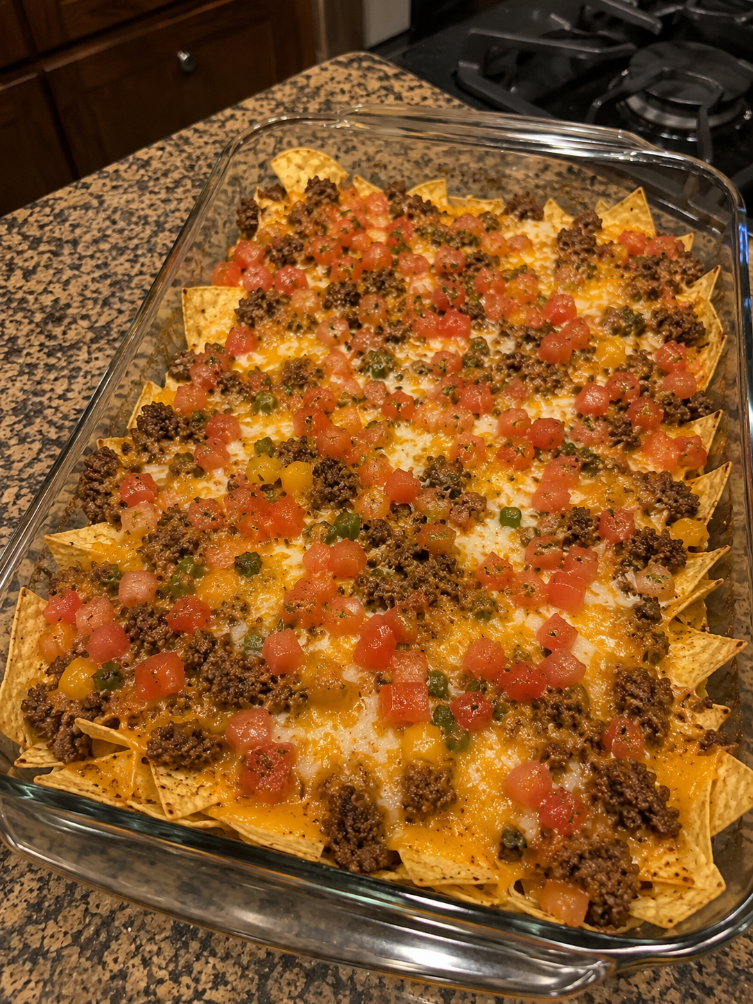
I still remember the first time my husband asked me to make nachos for a game night. I threw some chips on a plate, scattered cheese on top, and called it done. He took one polite bite and went back to the kitchen to make a sandwich. That’s when I realized: nachos aren’t just about throwing things together. They’re about layers, heat, timing, and actually caring about every bite.
That night changed everything. I started experimenting with loaded beef nachos—real nachos with seasoned ground beef, multiple cheeses, fresh toppings, and a careful hand at assembly. Now, whenever I make them, people actually linger at the table instead of disappearing to find something else to eat. My loaded beef nachos have become the recipe I’m asked for most, and honestly, I love making them because they’re so forgiving and fun.
This recipe is for anyone who wants nachos that feel special without requiring fancy skills or hard-to-find ingredients. Whether you’re hosting game day, feeding your family on a casual Friday, or just craving something warm, cheesy, and satisfying, this is your recipe. I’ve tested it dozens of times, made mistakes you don’t have to make, and figured out exactly what makes nachos actually good.
Follow me on DianaCookingE on Pinterest for more crowd-pleasing recipes like this one.
Why You’ll Love This Recipe
These loaded beef nachos come together in about 20 minutes, which means you can go from craving to eating without a huge time commitment. The beef is seasoned just right—not too salty, with a warm spice that builds slowly. The cheese melts into every crack and crevice of the chips, and the fresh toppings add brightness and crunch that keeps each bite interesting.
I love that this recipe scales easily. Making nachos for two? Cut everything in half. Feeding eight people? Double it. The technique stays exactly the same, and the results are always reliable. Plus, you probably have most of these ingredients in your kitchen right now, which means you can make this tonight if you want to.
Ingredients for Loaded Beef Nachos
- 1 pound ground beef (80/20 blend works best)
- 1 tablespoon olive oil
- 1 medium yellow onion, finely diced
- 3 cloves garlic, minced
- 2 tablespoons chili powder
- 1 tablespoon cumin
- 1 teaspoon smoked paprika
- ½ teaspoon cayenne pepper (adjust to your heat preference)
- 1 teaspoon salt
- ½ teaspoon black pepper
- ½ cup beef broth
- 6 ounces tortilla chips (about half a standard bag)
- 2 cups shredded cheddar cheese
- 1 cup shredded Monterey Jack cheese
- ½ cup diced jalapeños (fresh or pickled, depending on your preference)
- ½ cup sour cream
- ¼ cup fresh cilantro, roughly chopped
- 1 lime, cut into wedges
- ½ cup diced red onion (for freshness)
- ½ cup diced tomato (optional but recommended)
Diana’s Tip: Don’t skip the beef broth. It keeps the meat moist and flavorful without making it greasy. I learned this the hard way after making dried-out, crumbly beef the first few times.
Optional Add-Ins and Variations
This is where loaded beef nachos become your nachos. I like to keep a few extras on hand depending on who’s eating and what I have in the fridge.
- Black beans or refried beans: Spread a thin layer on the chips before adding cheese for extra substance and fiber.
- Corn: Fresh, frozen, or canned corn adds sweetness and texture. About ½ cup works well.
- Avocado or guacamole: Adds creaminess. Layer it on top after baking so it doesn’t get warm.
- Crispy bacon: Because bacon on everything is never wrong. About 4 strips, crumbled.
- Pico de gallo: A fresh mix of tomato, onion, cilantro, and lime juice instead of plain diced tomato.
- Pickled red onions: They add tang and look beautiful.
- Green onions: Scatter them on top at the very end for a fresh bite.
Step-by-Step Method
Step 1: Brown the beef. Heat olive oil in a large skillet over medium-high heat. Once it’s shimmering, add the ground beef. Break it into small pieces as it cooks—don’t stir it constantly, because you want some browning, not just gray crumbles. This takes about 5 to 6 minutes. You’ll know it’s done when there’s no pink left and the edges are slightly crispy.
Diana’s Tip: If your beef looks really greasy at this point, drain some of it off. You want a little fat for flavor, but not a puddle.
Step 2: Add aromatics and spices. Push the beef to the side of the skillet and add the diced onion to the empty space. Let it cook for about 2 minutes until it starts to soften. Add the garlic and cook for another 30 seconds—you’ll smell it immediately, and that’s your signal to keep moving so it doesn’t burn.
Step 3: Season the meat. Sprinkle the chili powder, cumin, smoked paprika, cayenne, salt, and black pepper directly over the beef and onions. Stir everything together so the spices coat the meat evenly. The smell at this moment is honestly why I love cooking. Let it cook for about 1 minute so the spices toast slightly and release their flavors.
Step 4: Add the broth. Pour in the beef broth and stir well. Reduce the heat to medium-low and let it simmer for about 5 minutes. The liquid will reduce, and the beef will absorb all those flavors. You want the mixture to be moist but not soupy. If there’s still a lot of liquid, give it another minute or two.
What I Messed Up At First: I used to skip the simmering step and go straight to assembly. The beef tasted flat and one-dimensional. That broth makes all the difference.
Step 5: Prepare your baking sheet. While the beef is simmering, preheat your oven to 400°F. Line a large baking sheet with parchment paper or foil—trust me, cleanup is worth it. Spread the tortilla chips in a single layer, leaving some space between them so the heat circulates.
Step 6: Layer the cheese. Spoon about half of the seasoned beef over the chips, distributing it as evenly as you can. Then sprinkle half of the cheddar and half of the Monterey Jack over the chips and beef. Add the remaining beef, then top with the rest of the cheese. This double-layering technique means you get cheese in every bite, not just on top.
Diana’s Tip: Mix your cheeses together before sprinkling if you want them distributed more evenly. I usually just alternate between the two, which works just fine.
Step 7: Bake until melted. Put the baking sheet in the oven for about 8 to 10 minutes. You’re looking for the cheese to be completely melted and starting to bubble around the edges. The chips should still have some crunch—you’re not trying to soften them into submission.
Step 8: Add fresh toppings. Remove the nachos from the oven and let them cool for about 2 minutes so you don’t burn your mouth immediately. Scatter the jalapeños, diced red onion, tomato, and cilantro over the top. Drizzle with sour cream (or dollop it on in small amounts). Squeeze fresh lime juice over everything.
Step 9: Serve immediately. Nachos are best eaten right away while the cheese is still melty and the chips still have their texture. Grab them with your hands, use a fork, or eat them however feels right. Have lime wedges nearby for anyone who wants extra brightness.
Common Mistakes to Avoid
Using too many chips: I know it’s tempting to load up a huge plate, but thick layers of chips don’t cook evenly. Some stay crunchy, some get soggy, and some barely get warm. Stick to a single layer and you’ll have much better results. If you need more, make a second batch.
Not seasoning the beef enough: Bland beef makes bland nachos. Taste the meat mixture before you assemble everything. It should taste a little bold on its own because it’s going to be mixed with mild cheese and chips. Add more salt or spice if needed.
Overbaking: Cheese can go from melted to broken and greasy if you leave it in too long. Start checking at 8 minutes. Every oven is different, so know yours.
Forgetting the fresh toppings: I used to think loaded beef nachos were just about the hot stuff. But the fresh cilantro, lime juice, and crisp red onion are what make them special. Don’t skip them.
Piling toppings on before baking: If you put the jalapeños and sour cream on before the nachos go in the oven, they’ll get weird and separated. Add all fresh and cold toppings after baking.
My Tested Substitutions
Ground turkey instead of beef: This works, but you’ll need to add a little more fat (an extra half tablespoon of oil) because turkey is leaner. The flavor will be slightly milder, so consider bumping up the spices a bit.
Spice blend instead of individual spices: If you have a taco seasoning blend you love, use about 2 tablespoons instead of measuring out all the individual spices. Just check the sodium content first—some blends are quite salty.
Different cheeses: I’ve used sharp cheddar (more flavor), pepper jack (more heat), and even a mix with some cotija for tanginess. The 3-to-1 ratio of cheddar to Monterey Jack is just a guide. Use what you have.
Greek yogurt instead of sour cream: It’s tangier and slightly thinner, so drizzle it carefully. I prefer sour cream for nachos, but Greek yogurt works in a pinch.
Homemade tortilla chips: If you want to make your own, cut corn tortillas into triangles, brush them lightly with oil, sprinkle with salt, and bake at 375°F for about 10 minutes until crispy. They’re fresher and you can control the salt.
How to Customize
One of my favorite things about loaded beef nachos is that they’re endlessly customizable. Make them your way.
For a lighter version, use lean ground beef, skip some of the cheese, and load up on fresh toppings. For a spicier version, increase the cayenne and jalapeños, and add a drizzle of hot sauce. For a loaded-loaded version, add beans, corn, bacon, and extra toppings.
If you’re making nachos for a group with different preferences, you can assemble individual portions on smaller plates and customize each one before baking. It takes a little longer, but everyone gets exactly what they want.
[INTERNAL LINK: easy appetizers for parties]
Serving Ideas
I serve loaded beef nachos with cold drinks—beer, soda, or a margarita if we’re being fancy. They’re perfect for game day, casual dinner with friends, or even a fun weeknight meal when you want something different.
Pair them with simple sides like a green salad to cut through the richness, or just serve them as the main event. I like to set out small bowls of extra toppings—more sour cream, hot sauce, guacamole—so people can customize their own bites.
For a more formal gathering, you could make individual nacho portions on small plates or in shallow bowls. It looks nicer and feels a little more intentional than a big shared plate.
Meal Prep and Storage
Here’s the honest truth: nachos are best eaten fresh and warm. They don’t really store well because the chips get soggy and the cheese hardens.
That said, you can prep components ahead. Brown the beef and store it in the refrigerator for up to 3 days. Shred your cheeses and store them together in a container. Chop your fresh toppings and keep them in separate containers. Then when you’re ready to eat, assemble and bake.
If you have leftover nachos, store them in an airtight container in the refrigerator for up to 2 days. Reheat them in a 350°F oven for about 5 minutes until the cheese is melted again. They won’t be quite as crispy as fresh, but they’re still edible.
The beef mixture freezes well for up to 2 months. Thaw it in the refrigerator overnight and reheat gently on the stovetop before assembling your nachos.
Nutritional Breakdown
Keep in mind that nachos are naturally a bit indulgent—they’re cheese and fried chips, after all. But they’re also satisfying, which means you might eat less than you think.
Per serving (based on 4 servings): approximately 620 calories, 32g protein, 42g carbs, 38g fat, and 5g fiber. The numbers will shift depending on your cheese ratio and toppings, so use this as a general guide.
The protein from the beef and cheese keeps you satisfied, and the fresh toppings add fiber and nutrients. It’s not health food, but it’s not nutritionally empty either.
Frequently Asked Questions
Can I make loaded beef nachos ahead of time?
You can prep all the components ahead, but assemble and bake them right before eating. If you bake them ahead, they’ll get soggy within an hour or two. Prep the beef, chop your toppings, and shred your cheese earlier in the day, then assemble when you’re ready to eat.
What’s the best way to reheat nachos?
Use the oven at 350°F for about 5 minutes. The microwave will make them rubbery and unevenly heated. If you’re just reheating the beef, a skillet on the stovetop works fine.
Can I use a different type of chip?
Absolutely. Tortilla chips are traditional, but I’ve made nachos with thick-cut potato chips, pita chips, and even wonton crisps. Just remember that thinner chips will soften faster, so adjust your baking time accordingly.
How do I keep the chips from getting soggy?
Use a single layer of chips, don’t overload with wet toppings before baking, and bake just until the cheese melts. Add fresh toppings after baking. If you’re worried about sogginess, assemble the nachos on parchment paper so air can circulate underneath.
Can I make this vegetarian?
Yes! Skip the beef and use seasoned black beans, pinto beans, or lentils instead. Season them with the same spice blend. You’ll lose the protein from the beef, so consider adding extra cheese or topping with a fried egg if you want more substance.
Final Thoughts
Making loaded beef nachos has taught me that the best recipes aren’t always complicated—they’re just thoughtful. It’s about choosing good ingredients, building layers of flavor, and not rushing the process. It’s about knowing when to add heat and when to add freshness.
I hope this recipe becomes one you make again and again, the way it has for me. Whether you’re feeding a crowd or just yourself, whether you follow it exactly or make it your own, I hope your loaded beef nachos turn out delicious. And if you make them, I’d love to hear how they went. Come find me and tell me what you changed or what you loved.
Happy cooking, and enjoy every cheesy, crispy, flavorful bite.
—
Loaded Beef Nachos
Ingredients
Method
- Heat olive oil in a large skillet over medium-high heat. Add ground beef, breaking it into small pieces as it cooks for 5 to 6 minutes until browned with no pink remaining.
- Push beef to the side and add diced onion to the empty space. Cook for 2 minutes until softened. Add garlic and cook for 30 seconds.
- Sprinkle chili powder, cumin, smoked paprika, cayenne, salt, and black pepper over the beef and onions. Stir well and cook for 1 minute to toast the spices.
- Pour in beef broth and stir. Reduce heat to medium-low and simmer for 5 minutes until the liquid reduces and the beef absorbs the flavors.
- Preheat oven to 400°F. Line a large baking sheet with parchment paper. Spread tortilla chips in a single layer.
- Spoon half the seasoned beef over the chips. Sprinkle half the cheddar and half the Monterey Jack cheese. Add remaining beef and top with remaining cheese.
- Bake for 8 to 10 minutes until cheese is completely melted and bubbling around the edges.
- Remove from oven and let cool for 2 minutes. Top with jalapeños, red onion, tomato, and cilantro. Drizzle with sour cream and squeeze lime juice over everything.
- Serve immediately while cheese is melty and chips are crispy.