Christmas Envelope Cookies
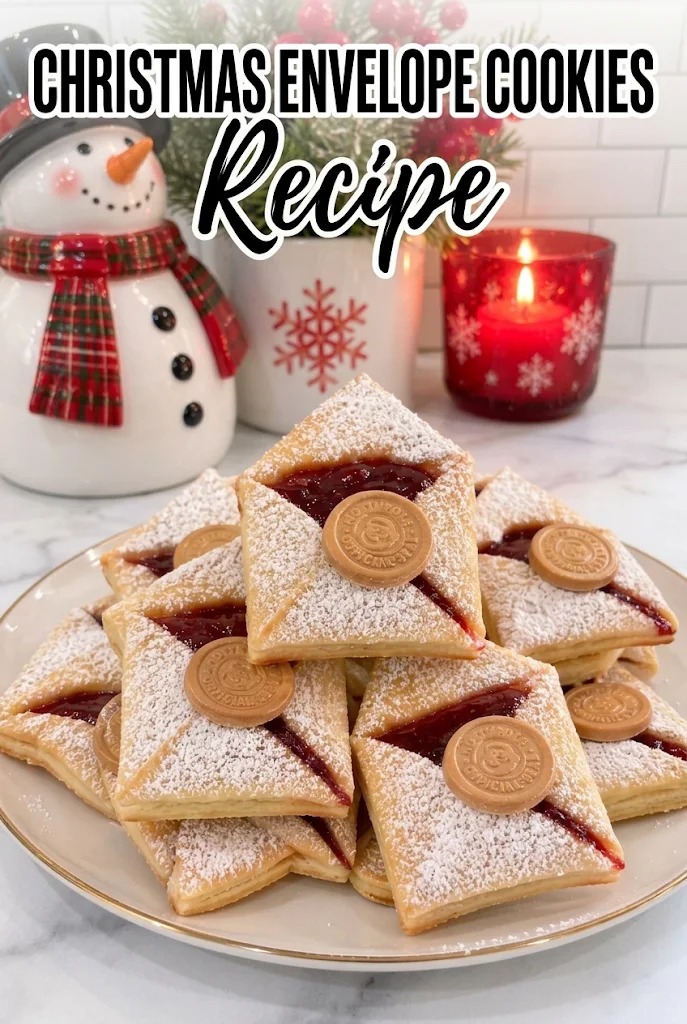
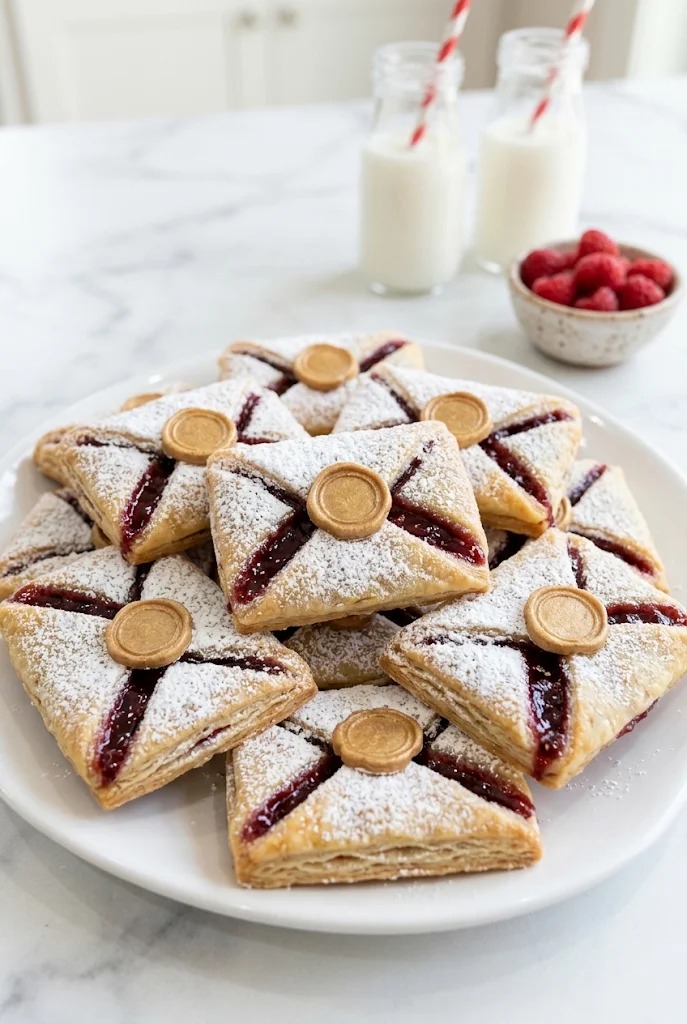
These butter cookies fold into little envelopes around a center of raspberry jam, then get sealed and baked until the edges turn golden. They’re elegant enough for a holiday platter but straightforward enough to make with a basic kitchen setup. The dough comes together quickly, the folding is simple once you get the rhythm, and the final dusting of powdered sugar gives them that finished, bakery-quality look.
The appeal here is partly the visual—those neat little folded corners and the jam peeking through—but mostly the flavor. You’re working with a tender butter cookie base that’s not too sweet on its own, so the raspberry jam becomes the real star. The powdered sugar coating adds a gentle sweetness and a soft texture that contrasts nicely with the crisp edges of the baked cookie.
About the Ingredients
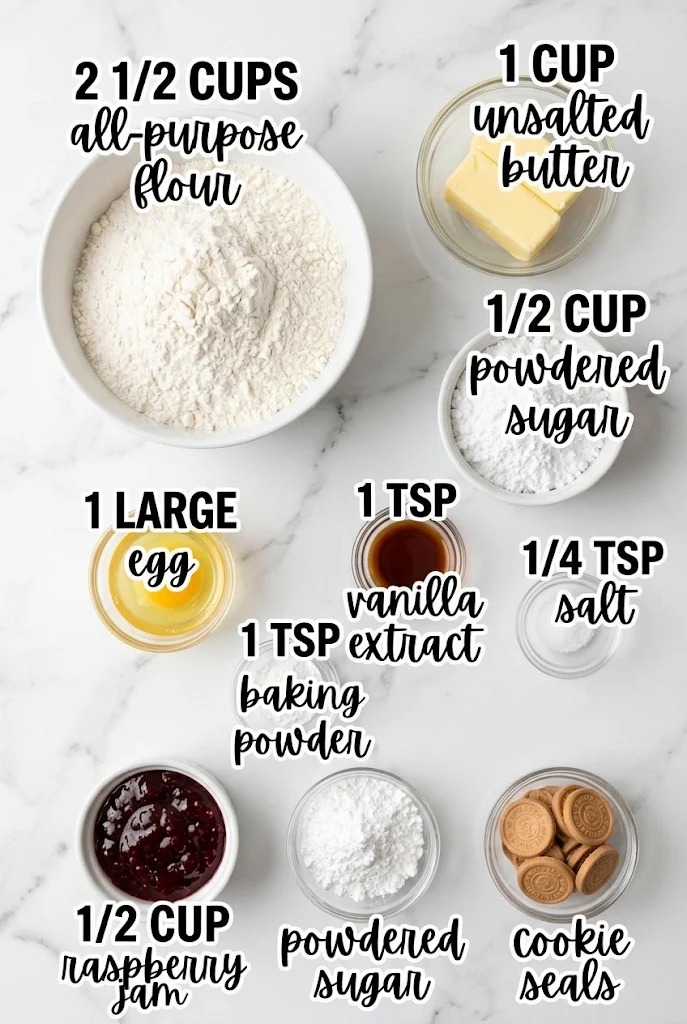
Butter and powdered sugar form the foundation of the dough. You’re creaming a full cup of unsalted butter with half a cup of powdered sugar, which gives you a pale, fluffy base. Unsalted butter lets you control the salt level in the final cookie, and powdered sugar dissolves more easily than granulated sugar, helping create a tender crumb. Make sure your butter is soft enough to beat easily but not melting or greasy.
The egg and vanilla add moisture and flavor. One large egg binds the dough and helps it hold together during rolling and folding. Vanilla extract brings warmth without being obvious—it’s there to support the butter flavor, not announce itself.
All-purpose flour, baking powder, and salt are your dry ingredients. Two and a half cups of flour gives you enough structure to roll the dough flat and cut clean shapes. The teaspoon of baking powder provides a gentle lift so the cookies stay tender rather than dense. A quarter teaspoon of salt balances the sweetness and brightens the butter flavor.
Raspberry jam is the filling. The recipe calls for half a cup, which is enough to fill 24 cookies with a modest spoonful in each one. Jam consistency matters here—you want something thick enough that it doesn’t run all over the baking sheet when you fold the corners up. If your jam is very loose, it may leak out during baking, so spoon it carefully into the center of each square before folding.
Powdered sugar for dusting is separate from the powdered sugar in the dough. You’ll use extra to coat the cooled cookies. This creates that soft, snowy finish and adds a touch of sweetness to each bite.
Cookie seals are small decorative stamps or shapes that you press onto the folded envelope to hold it closed and add a finished touch. They’re optional in the sense that the cookies will still bake and hold their shape without them, but they do help keep the corners sealed and give the cookies that polished, intentional look.
Ingredients
- 2 1/2 CUPS all-purpose flour
- 1 CUP unsalted butter
- 1/2 CUP powdered sugar
- 1 LARGE egg
- 1 TSP vanilla extract
- 1 TSP baking powder
- 1/4 TSP salt
- 1/2 CUP raspberry jam
- powdered sugar
- cookie seals
Making the Dough
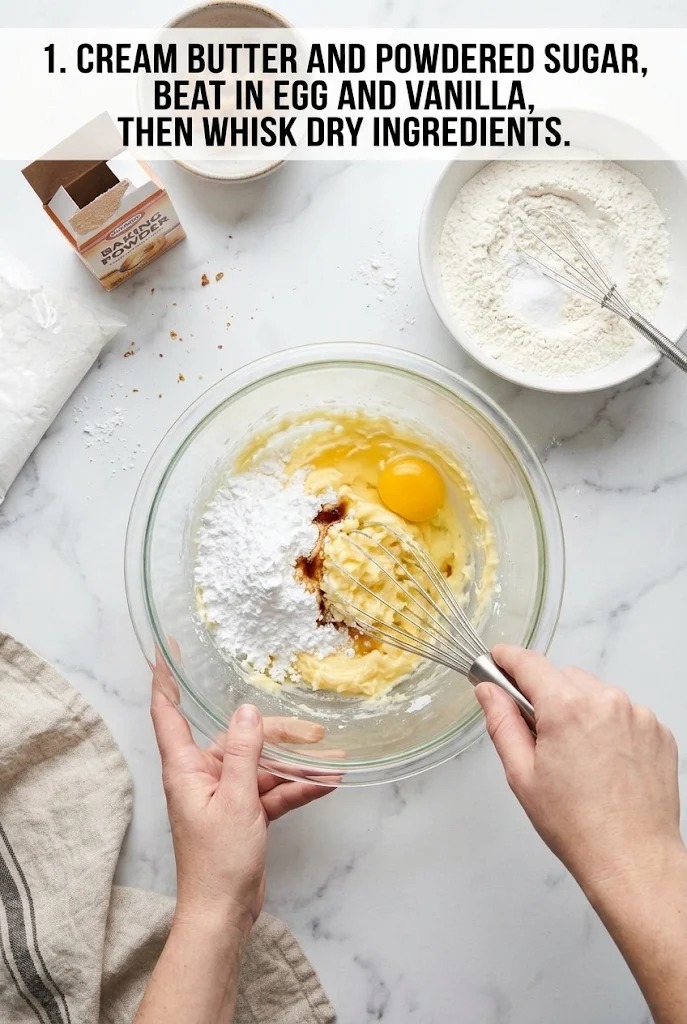
Start by creaming the softened butter and powdered sugar together in a mixing bowl. Use an electric mixer on medium speed or whisk by hand if you prefer. The goal is to beat them until the mixture is pale and fluffy, which usually takes a few minutes. This step incorporates air into the butter, which helps the cookies stay tender.
Once the butter and sugar are light and fluffy, beat in the egg and vanilla extract. Mix until everything is well combined and the mixture looks smooth. You might notice it looks a bit curdled at first—that’s normal. Keep mixing and it will come together.
In a separate bowl, whisk together the flour, baking powder, and salt. This distributes the baking powder evenly so your cookies rise uniformly. Add the dry ingredients to the wet ingredients and mix until a smooth dough forms. Don’t overmix once the flour is incorporated; you just want everything combined.
Rolling and Cutting
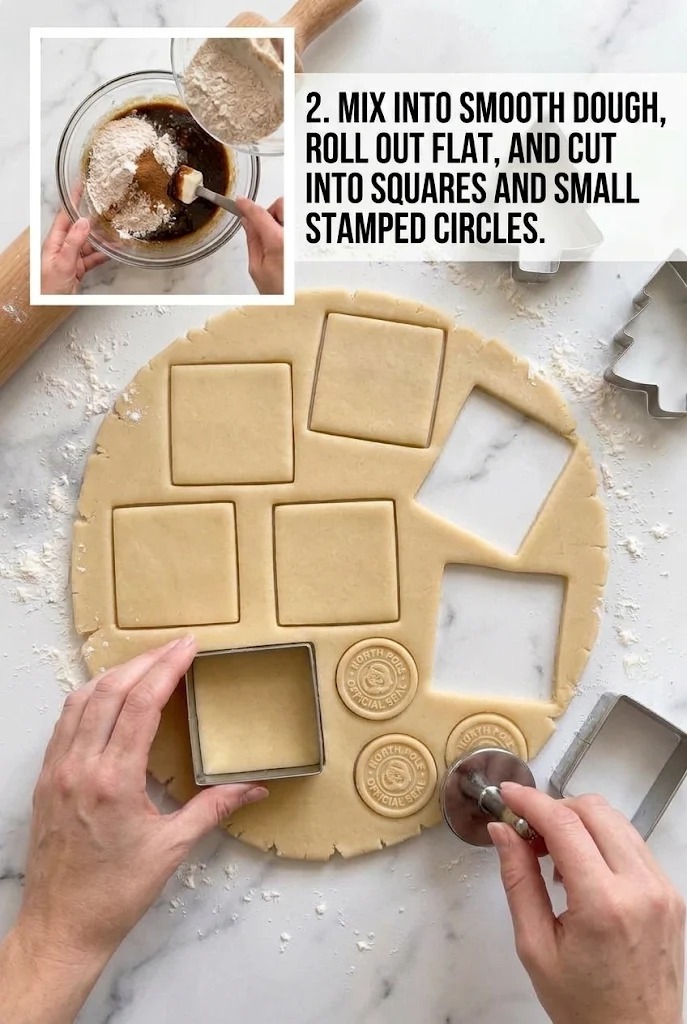
Turn the dough out onto a lightly floured work surface and roll it out flat. The thickness matters for how the cookies bake—aim for about an eighth of an inch thick, which gives you cookies that are tender but sturdy enough to fold without tearing. If the dough is sticky, dust your rolling pin and work surface with a little extra flour.
Cut the dough into squares using a square cookie cutter. The size is flexible, but something around two inches square works well for a cookie you can hold and eat comfortably. You’ll also need to cut or stamp small circles from the dough—these become the seals that hold the folded envelope closed. If you don’t have a round cutter, a small glass or the rim of a bottle works fine.
Filling and Folding
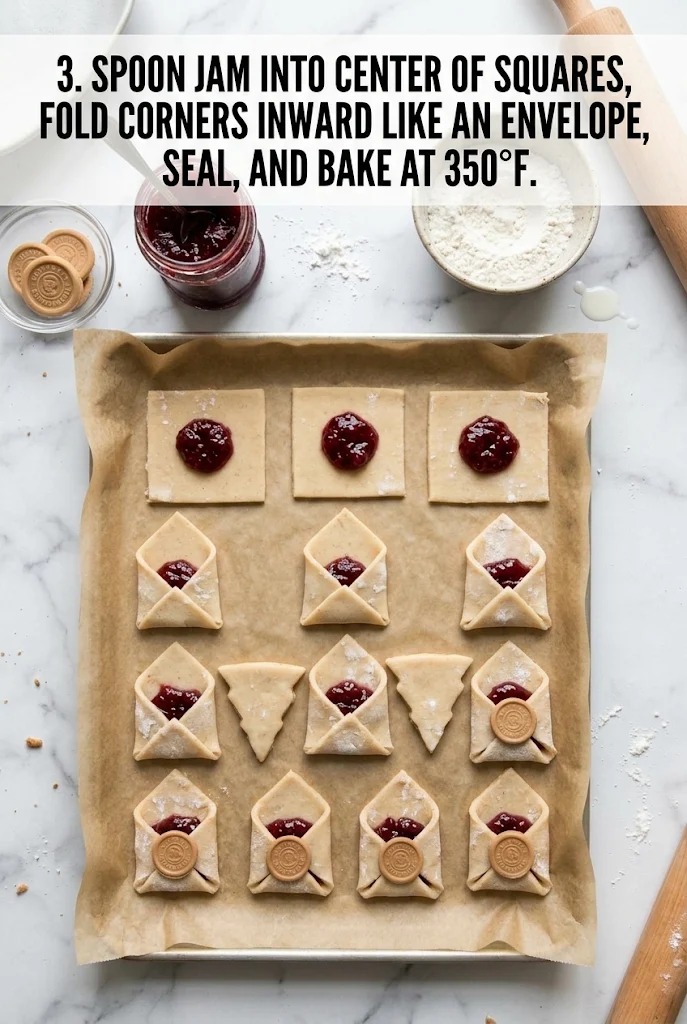
Place a square of dough on a parchment-lined baking sheet. Spoon a small amount of raspberry jam into the center of the square—roughly a teaspoon or so, depending on the size of your square. Don’t overfill; too much jam will leak out when you fold the corners up.
Fold all four corners of the square inward toward the center, overlapping them slightly so they meet in the middle. The corners should overlap enough to create a sealed envelope shape. If the dough cracks or tears slightly at the folds, that’s fine; it will seal as it bakes.
Press one of your small stamped circles onto the center where the corners meet. This acts as both a seal and a decorative element. Press firmly so it adheres to the dough. If you’re not using seals, you can simply press the center gently with your finger to help hold the folds in place.
Repeat with the remaining dough squares and jam until all your envelope cookies are assembled on the baking sheet. Leave a little space between them—about an inch—so they have room to bake without touching.
How to Make It
- Cream butter and powdered sugar, beat in egg and vanilla, then whisk dry ingredients.

- Mix into smooth dough, roll out flat, and cut into squares and small stamped circles.
- Spoon jam into center of squares, fold corners inward like an envelope, seal, and bake at 350°F.
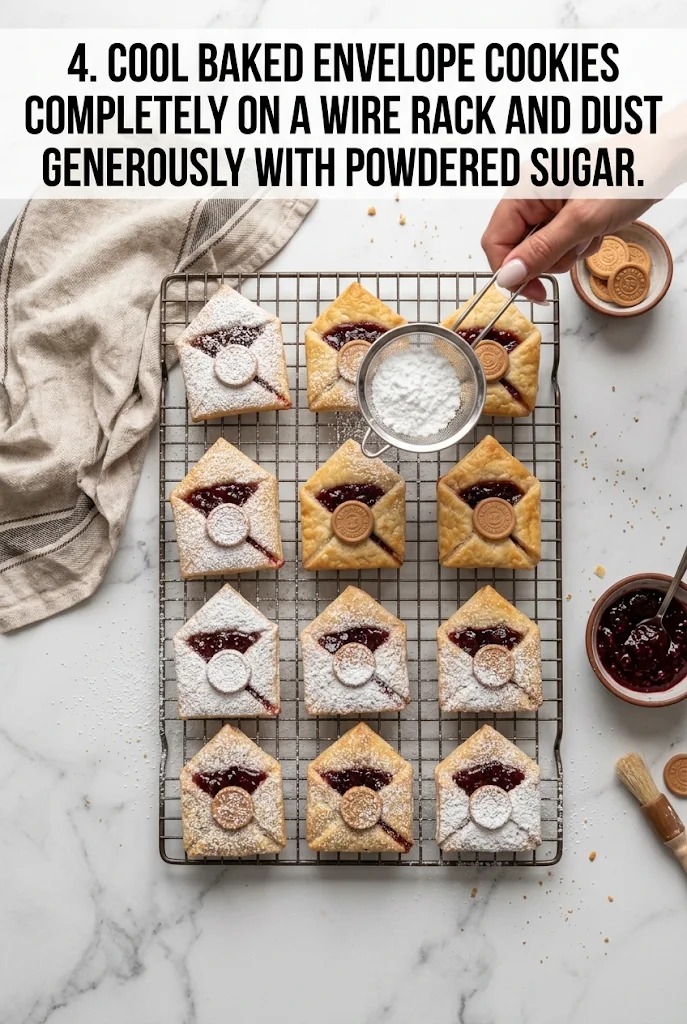
- Cool baked envelope cookies completely on a wire rack and dust generously with powdered sugar.
Baking
Bake the cookies at 350°F for approximately 10 to 12 minutes. Watch for the edges to turn light golden; that’s your visual cue for doneness. Oven temperatures vary, so the exact timing depends on your oven’s calibration and how thick you rolled the dough. Thinner cookies will bake faster than thicker ones. Start checking around the 10-minute mark so you don’t overbake them.
The cookies should look set but still tender when you pull them out. The jam might bubble slightly at the edges or peek through the folds—that’s normal and part of their charm.
Cooling and Finishing
Let the baked envelope cookies cool completely on a wire cooling rack. This prevents them from steaming and getting soggy on the bottom. Once they’re cool to the touch, dust them generously with powdered sugar. Use a fine-mesh sieve or a small strainer to apply an even coat, or simply sprinkle it on with a spoon. The powdered sugar coating should be applied after the cookies have cooled completely; if you dust them while they’re still warm, the sugar will melt into the warm cookie rather than staying on the surface.
Recipe Notes
- Baking time at 350°F is approximately 10–12 minutes until edges are light golden; watch for visual doneness cues as exact timing depends on oven calibration and cookie thickness.
- Jam should be spooned carefully into the center of each square before folding to prevent overflow during baking.
- Cookie seals help hold the folded envelope shape during baking; press firmly after folding corners inward.
- Dust with powdered sugar after cookies have cooled completely to prevent melting.
Practical Tips
Jam consistency is important. If your jam is very thin or runny, it may spread across the baking sheet instead of staying in the center of each cookie. Thicker jams hold their shape better. Spoon the jam carefully into the center of each square before folding to minimize mess and prevent overflow during baking.
The cookie seals help hold the folded envelope shape during baking and add a decorative finish. Press them firmly onto the center of each folded cookie so they stick. If you don’t have seals, the cookies will still hold their envelope shape as they bake, but the visual impact won’t be quite the same.
These cookies are best served fresh or within a day or two of baking. The powdered sugar coating is part of their appeal, so store them in a way that keeps that snowy finish intact. A shallow container lined with parchment paper works well.
The total time from start to finish is about 37 minutes: 25 minutes of hands-on prep (creaming, mixing, rolling, cutting, and assembling) plus 12 minutes of baking. There’s no chilling time required, so you can go from mixing bowl to oven relatively quickly.
CHRISTMAS ENVELOPE COOKIES Recipe
Ingredients
Equipment
Method
- Cream butter and powdered sugar, beat in egg and vanilla, then whisk dry ingredients.
- Mix into smooth dough, roll out flat, and cut into squares and small stamped circles.
- Spoon jam into center of squares, fold corners inward like an envelope, seal, and bake at 350°F.
- Cool baked envelope cookies completely on a wire rack and dust generously with powdered sugar.
Notes
Recipe tips
- Baking time at 350°F is approximately 10–12 minutes until edges are light golden; watch for visual doneness cues as exact timing depends on oven calibration and cookie thickness.
- Jam should be spooned carefully into the center of each square before folding to prevent overflow during baking.
- Cookie seals help hold the folded envelope shape during baking; press firmly after folding corners inward.
- Dust with powdered sugar after cookies have cooled completely to prevent melting.