
Christmas Monster Chocolate Chip Cookies
These chocolate chip cookies get a festive twist with candy eyeballs pressed into the warm dough, turning a classic treat into something playful and seasonal. The combination of semi-sweet and mini chocolate chips gives you texture variety in every bite, while the orange and yellow candies add a pop of holiday color. They’re straightforward to make—just cream butter and sugar, mix in eggs and vanilla, fold in the dry ingredients and mix-ins, then bake until the edges turn golden.
The real magic happens right after they come out of the oven. While the cookies are still warm and soft, you press the candy eyeballs gently into the tops. This timing matters because the dough needs to be warm enough to hold the decorations securely, but the cookies need to stay intact. It’s a simple technique that transforms an ordinary batch into something that looks intentional and fun.
About the Ingredients
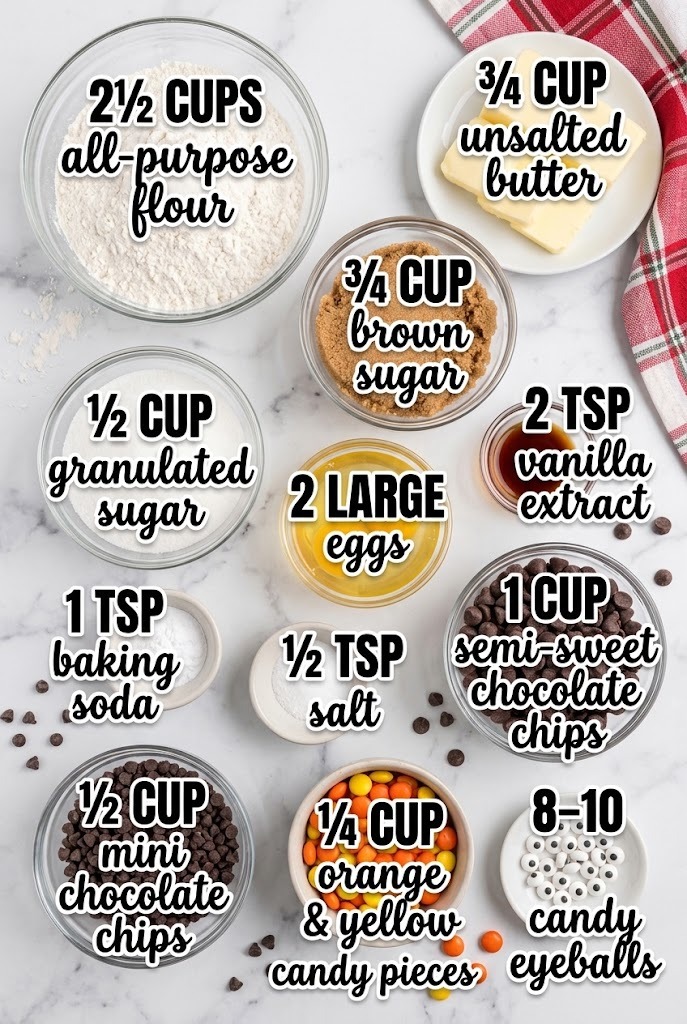
Butter and sugars: You’ll start by creaming together softened unsalted butter, brown sugar, and granulated sugar until the mixture is light, fluffy, and fully combined. This creaming step incorporates air into the dough, which helps the cookies rise slightly and develop a tender crumb. Brown sugar adds moisture and a subtle molasses flavor, while granulated sugar helps with structure and spread. Make sure your butter is at room temperature before you start—cold butter won’t cream properly and you’ll end up with a dense dough.
Eggs and vanilla: Two large eggs and two teaspoons of vanilla extract get beaten into the creamed mixture. The eggs add moisture and help bind the ingredients together, while vanilla rounds out the flavor profile. Beat these in thoroughly so they’re fully incorporated before you move on to the dry ingredients.
Flour, baking soda, and salt: All-purpose flour provides structure, while baking soda acts as the leavening agent to help the cookies rise in the oven. Salt balances the sweetness and enhances all the flavors. Stir these dry ingredients into the wet mixture until just combined—overmixing at this stage can lead to tough cookies.
Chocolate chips: The recipe calls for both semi-sweet and mini chocolate chips. The semi-sweet chips deliver classic chocolate flavor in larger pieces, while the mini chips fill in gaps and create more chocolate distribution throughout each cookie. Together, they give you a satisfying chocolate presence without overwhelming the dough. If you prefer a different chocolate flavor, you can adjust, but semi-sweet is the standard here.
Candy decorations: Orange and yellow candy pieces add festive color and a touch of sweetness. The amount is flexible—adjust the quantity based on how much color and candy flavor you want in each cookie. The candy eyeballs are the star of the show; they’re pressed into the warm dough immediately after baking to create the monster effect. Eight to ten eyeballs means you’ll have enough for a batch of 24 cookies, with some cookies getting one eyeball and others getting two, depending on how you arrange them.
Ingredients
Dry ingredients
- 2 1/2 CUPS all-purpose flour
- 3/4 CUP unsalted butter
- 3/4 CUP brown sugar
Butter and sugars
- 1/2 CUP granulated sugar
- 2 LARGE eggs
- 2 TSP vanilla extract
Wet ingredients
- 1 TSP baking soda
- 1/2 TSP salt
Mix-ins and toppings
- 1 CUP semi-sweet chocolate chips
- 1/2 CUP mini chocolate chips
- 1/4 CUP orange & yellow candy pieces
- 8-10 candy eyeballs
Preparing Your Workspace
Line your baking sheets with parchment paper before you start mixing. This prevents sticking and makes cleanup easier. Have all your ingredients measured and ready—this is especially important for the mix-ins, since you’ll be folding them in quickly once the dough is ready. A cookie scoop or spoon helps you portion the dough evenly, which means more consistent baking and a more uniform batch.
The Creaming Process
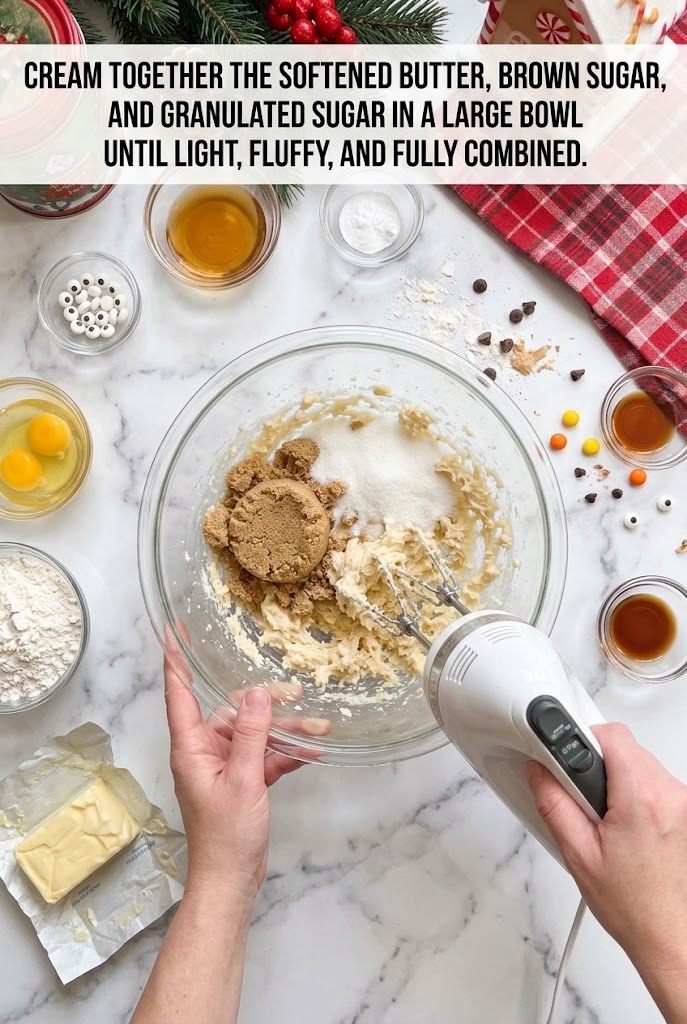
Start by creaming the softened butter with both sugars. Use an electric mixer or whisk and beat until the mixture is light in color and fluffy in texture—this usually takes a few minutes. You’re looking for a noticeable change in volume and a pale, almost mousse-like consistency. This step is crucial because it creates the foundation for tender cookies with good rise.
Once the butter and sugars are creamed, beat in the eggs and vanilla extract. Mix until everything is fully incorporated and the mixture looks smooth and well-combined. This is when the dough starts to come together as a cohesive mixture.
Combining Dry and Wet Ingredients
Stir the flour, baking soda, and salt into the wet mixture. Mix just until the dry ingredients are no longer visible—you don’t want to overmix at this point. Overmixing develops gluten, which can make cookies tough and chewy rather than tender and slightly crispy at the edges.
Fold in the semi-sweet chocolate chips, mini chocolate chips, and orange and yellow candy pieces. Folding is gentler than stirring and helps keep the dough tender. Make sure the mix-ins are evenly distributed so each cookie has a good balance of chocolate and candy.
How to Make It
- Cream together the softened butter, brown sugar, and granulated sugar in a large bowl until light, fluffy, and fully combined.

- Cream butter and sugars, beat in eggs and vanilla, then stir in the dry ingredients. Fold in both sizes of chocolate chips and the orange and yellow candies.
- Scoop the dough into rounds and place 2 inches apart on a parchment-lined baking sheet. Press the edible candy eyeballs into the top of each dough round.
- Bake at 350°F for 10-12 minutes until golden around the edges. Immediately press the candy eyeballs gently into the warm cookies, then let cool on the pan.


Scooping and Decorating
Scoop the dough into rounds and place them about 2 inches apart on your parchment-lined baking sheet. The spacing is important because cookies spread as they bake, and you don’t want them to merge together. Use a cookie scoop for consistent sizing, or drop rounded spoonfuls of dough if you prefer a more rustic look.
Before baking, press the candy eyeballs gently into the top of each dough round. You can place one or two eyeballs per cookie depending on the size and your preference. The eyeballs should be nestled into the dough but not pressed so hard that they sink completely or crack.
Baking and Setting the Decorations
Bake at 350°F for 10 to 12 minutes, until the edges are golden brown. The centers may still look slightly underdone, and that’s fine—they’ll continue to cook as the cookies cool. Watch for the moment when the edges start to turn golden; that’s your signal to pull them out.
This is the critical step: immediately after removing the cookies from the oven, gently press the candy eyeballs into the warm cookies again. The warmth of the dough makes it soft enough to accept the decorations and hold them securely as everything cools. If the eyeballs have shifted during baking, this is your chance to reposition them.
Cooling
Let the cookies cool completely on the baking sheet before transferring them. This prevents breakage and allows the dough to set around the candy decorations. Once they’re cool and firm, you can move them to a serving plate or storage container.
Recipe Notes
- Soften butter to room temperature before creaming for best results.
- Press eyeballs gently into warm cookies immediately after removing from oven while dough is still soft enough to hold them.
- Allow cookies to cool completely on the baking sheet before transferring to avoid breakage.
- Orange and yellow candies add festive color; adjust quantities to preference.
Common Questions
Can I use a different type of chocolate chip? Yes. Dark chocolate chips will give you a deeper, less sweet flavor, while milk chocolate chips will be sweeter and milder. The semi-sweet chips in this recipe are a middle ground.
What if I don’t have mini chocolate chips? You can use all semi-sweet chips, though you’ll lose some of the texture variety. You could also chop larger chocolate pieces into smaller bits.
Do the candy eyeballs need to be a specific brand? Any edible candy eyeballs designed for decorating will work. They’re available at most grocery stores during the Halloween and holiday seasons.
Can I make the dough ahead of time? The recipe as written doesn’t include a chill time, so you can bake right after mixing. If you prefer to prepare dough in advance, you can refrigerate it, though the recipe doesn’t specify storage duration or how it affects baking.
Why is the timing of the eyeball pressing important? The dough needs to be warm enough to grip the decorations but cool enough that it doesn’t melt or distort them. Pressing them in immediately after baking ensures they stay in place as the cookies cool and firm up.
CHRISTMAS MONSTER CHOCOLATE CHIP COOKIES
Ingredients
Equipment
Method
- Cream together the softened butter, brown sugar, and granulated sugar in a large bowl until light, fluffy, and fully combined.
- Cream butter and sugars, beat in eggs and vanilla, then stir in the dry ingredients. Fold in both sizes of chocolate chips and the orange and yellow candies.
- Scoop the dough into rounds and place 2 inches apart on a parchment-lined baking sheet. Press the edible candy eyeballs into the top of each dough round.
- Bake at 350°F for 10-12 minutes until golden around the edges. Immediately press the candy eyeballs gently into the warm cookies, then let cool on the pan.
Notes
Recipe tips
- Soften butter to room temperature before creaming for best results.
- Press eyeballs gently into warm cookies immediately after removing from oven while dough is still soft enough to hold them.
- Allow cookies to cool completely on the baking sheet before transferring to avoid breakage.
- Orange and yellow candies add festive color; adjust quantities to preference.