
Classic Baked Macaroni and Cheese
A Comfort Food That Never Lets You Down
I still remember the first time I made my own baked macaroni and cheese from scratch. I was in my twenties, standing in my tiny apartment kitchen on a rainy Tuesday, craving the kind of creamy, cheesy pasta that felt like a warm hug. I’d grown up eating the boxed version—and don’t get me wrong, I still love it—but I wanted something more. Something that tasted like it came from real butter, real cheese, and real effort.
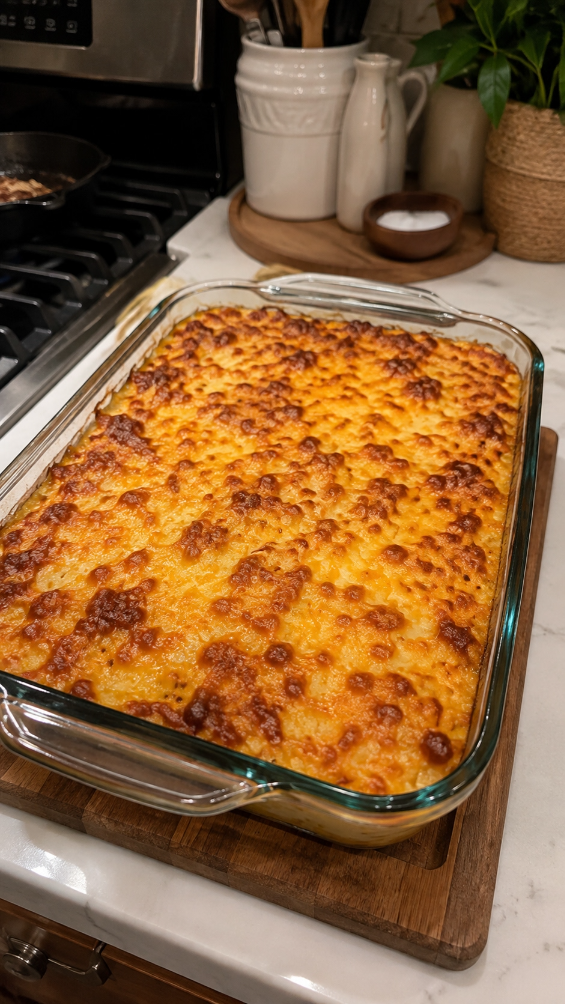
That first attempt wasn’t perfect. I oversalted the sauce, and my pasta came out a little mushy. But even with those mistakes, it was so much better than anything I’d made before. Now, after years of testing and tweaking, I’ve landed on a version of classic baked macaroni and cheese that’s creamy on the inside, has those irresistible golden-brown breadcrumb edges, and tastes like the comfort food we all deserve.
This recipe is for anyone who wants to feel like they’re doing something special in the kitchen without actually spending hours there. It’s for weeknight dinners, potlucks, holiday sides, and those moments when you need something warm and familiar. Whether you’re cooking for your family, impressing a date, or just treating yourself, this classic baked macaroni and cheese delivers every single time.
If you love recipes like this, follow me on DianaCookingE on Pinterest for more comfort food that actually works.
Why You’ll Love This Recipe
The best part about this dish? It tastes like restaurant-quality mac and cheese, but you made it at home. You control every ingredient, every flavor, and every texture.
- Creamy, not gluey: I use a proper cheese sauce made with a roux, not just melted cheese dumped over pasta. This means your sauce stays silky and coats every noodle beautifully.
- Real cheese flavor: A combination of sharp cheddar and Gruyère gives you depth and complexity. You can taste the difference.
- Crispy-edged, tender center: The breadcrumb topping bakes into something golden and crunchy while the inside stays creamy and soft. It’s textural perfection.
- Flexible and forgiving: This recipe works with almost any cheese you have on hand, and you can make it ahead and bake it later.
- Feeds a crowd: One dish serves 6 to 8 people comfortably, making it ideal for family dinners or bringing to a potluck.
Ingredients for Classic Baked Macaroni and Cheese
- 1 pound elbow macaroni
- 4 tablespoons unsalted butter
- 3 tablespoons all-purpose flour
- 3 cups whole milk, warmed
- 2 cups sharp cheddar cheese, shredded
- 1 cup Gruyère cheese, shredded
- 1 teaspoon Dijon mustard
- ½ teaspoon garlic powder
- ¼ teaspoon cayenne pepper (optional, but I recommend it)
- Salt and black pepper to taste
- ½ cup panko breadcrumbs
- 2 tablespoons melted butter (for the topping)
- 2 tablespoons fresh parmesan, finely grated
- 1 tablespoon fresh parsley, chopped (optional)
Diana’s Tip: Don’t skip warming the milk. Cold milk added to a hot roux will create lumps, and nobody wants lumpy cheese sauce. I microwave mine for about 2 minutes while I’m making the roux.
Optional Add-Ins and Variations
One of my favorite things about this recipe is how flexible it is. You can keep it simple and classic, or you can customize it to match what you’re craving or what you have in your fridge.
- Crispy bacon: Crumble 4 to 6 slices of cooked bacon and fold it into the sauce before baking. Trust me on this.
- Caramelized onions: Sweet, deep, and luxurious. Spread a thin layer on the bottom of your baking dish before adding the pasta.
- Roasted jalapeños or red peppers: Add heat or sweetness. About ½ cup works perfectly.
- Fresh herbs: Thyme, chives, or a pinch of smoked paprika can all find a home here.
- Breadcrumb mix-ins: Stir some crispy sage or fresh thyme into your breadcrumb topping for extra flavor.
Diana’s Tip: If you’re adding something wet (like roasted peppers), drain it well first. Extra moisture can make your mac and cheese watery.
Step-by-Step Method
Step 1: Cook the pasta
Bring a large pot of salted water to a rolling boil. Add your elbow macaroni and cook it until it’s just shy of al dente—about 1 minute less than the package directions suggest. You want it slightly firm because it’ll continue cooking in the oven. Drain it in a colander and set it aside. Don’t rinse it; the starch helps the sauce cling to the noodles.
Step 2: Make your roux
In a large saucepan over medium heat, melt the butter. Once it’s foaming and smells nutty (that’s the sign you’re doing it right), sprinkle in the flour and stir constantly for about 2 minutes. You’re cooking out the raw flour taste and creating a paste. This is your roux, and it’s the foundation of a silky sauce.
Diana’s Tip: If your roux looks lumpy or breaks, don’t panic. Just keep stirring and let it cook a bit longer. It’ll smooth out.
Step 3: Add the warm milk
Slowly pour in your warmed milk while whisking constantly. This is the key to avoiding lumps. Don’t dump it all in at once; take your time and whisk as you go. Keep the heat at medium and stir often until the sauce thickens enough to coat the back of a spoon, about 5 to 7 minutes.
Step 4: Add the cheese and seasonings
Remove the pan from heat. Add your shredded cheddar and Gruyère, stirring until they’re completely melted and smooth. The residual heat will do the work for you. Now stir in the Dijon mustard, garlic powder, cayenne pepper, and a generous pinch of salt and black pepper. Taste it. Does it need more salt? Add a little more. This is your moment to make it taste exactly how you want it.
What I Messed Up At First: I used to add the cheese over high heat and it would break, becoming grainy and separated. Medium heat and patience are your friends here.
Step 5: Combine pasta and sauce
Pour your cooked pasta into the cheese sauce and fold it together gently until every noodle is coated. If you have any add-ins (like bacon or roasted peppers), fold those in now too. Transfer everything to a buttered 9-by-13-inch baking dish, spreading it in an even layer.
Step 6: Make the topping
In a small bowl, toss the panko breadcrumbs with the melted butter, grated parmesan, and fresh parsley if you’re using it. Sprinkle this mixture evenly over the top of your mac and cheese. This is where the magic happens—this topping will turn golden, crispy, and absolutely irresistible.
Step 7: Bake
Preheat your oven to 350°F if you haven’t already. Bake the mac and cheese for 25 to 30 minutes, until the top is golden brown and the edges are bubbling slightly. You’ll smell it before you see it—that warm, cheesy, buttery aroma filling your kitchen. That’s how you know it’s done.
Let it rest for 5 minutes before serving. I know it’s hard to wait, but this helps it set so it doesn’t fall apart on your plate.
Common Mistakes to Avoid
Overcooking the pasta: Mushy pasta makes mushy mac and cheese. Cook it one minute under the package time. It’ll finish cooking in the oven.
Using cold milk in the roux: This creates lumps. Warm your milk first, even if it’s just in the microwave for 2 minutes.
Adding cheese over high heat: High heat breaks the cheese sauce. Keep it low and gentle.
Skipping the roux: Some recipes just mix melted cheese with pasta water. That works, but it’s not as silky or stable. A roux is worth the extra 5 minutes.
Not seasoning enough: Taste as you go. Cheese is salty, but you still need to season properly. If it tastes flat, it probably needs salt.
My Tested Substitutions
I’ve made this recipe dozens of times, and I’ve learned what swaps work and which ones don’t.
Different cheeses: You can use any combination of sharp cheddar, Gruyère, fontina, or even a little smoked gouda. Just avoid pre-shredded cheese with anti-caking agents if you can; freshly shredded melts smoother. I’ve used 2 cups cheddar and 1 cup fontina, and it was incredible.
Half-and-half instead of whole milk: This makes it richer and creamier. Use 2.5 cups half-and-half and 0.5 cups milk to avoid it being too heavy.
Evaporated milk: This works in a pinch and actually makes the sauce extra creamy. Use 1.5 cups evaporated milk plus 1.5 cups regular milk.
Gluten-free flour: Use a 1-to-1 gluten-free all-purpose flour blend for the roux. It works just as well.
Butter alternatives: I’ve tested this with ghee and it’s delicious. Olive oil works too, but you’ll lose some of that buttery richness.
How to Customize
Make this recipe your own. Here are some of my favorite combinations:
- Smoky and spicy: Add smoked paprika, cayenne, and crispy bacon.
- Fancy and herb-forward: Mix fresh thyme and sage into the breadcrumb topping, and add a touch of white wine to the sauce.
- Loaded veggie version: Fold in steamed broccoli, roasted butternut squash, or sautéed mushrooms.
- Lobster or crab mac: Add lump crab meat or lobster chunks for a special occasion version. Use about 1 cup.
[INTERNAL LINK: relevant topic]
Serving Ideas
This classic baked macaroni and cheese is a side dish that can steal the show. Serve it alongside a simple green salad and roasted chicken for a complete meal. I also love it with a crusty bread for soaking up any extra sauce.
For a casual dinner, pair it with a burger or pulled pork sandwich. For something more formal, it’s the perfect side for roasted salmon or beef tenderloin. And honestly? Sometimes I just serve it with a big salad and call it dinner.
The leftovers are fantastic cold or reheated, making this a great dish for lunch boxes the next day.
Meal Prep and Storage
Make-ahead option: You can assemble this dish up to 24 hours ahead. Prepare everything through Step 5, cover it tightly with plastic wrap, and refrigerate. When you’re ready to bake, add the breadcrumb topping and bake as directed. You might need an extra 5 to 10 minutes since it’s cold.
Freezing: This freezes beautifully. Prepare the full dish, cover it tightly with plastic wrap and then foil, and freeze for up to 3 months. Thaw overnight in the fridge, then bake as directed, adding a few extra minutes if needed.
Storing leftovers: Cover any leftover mac and cheese and refrigerate for up to 4 days. Reheat it gently in a 325°F oven, covered with foil, for about 15 to 20 minutes. You can also microwave individual portions, but the oven keeps the texture better.
Nutritional Breakdown
Per serving (based on 8 servings):
- Calories: 520
- Protein: 22g
- Carbohydrates: 48g
- Fat: 24g
- Fiber: 1g
Diana’s Note: These are approximate values and can vary based on the specific brands and types of cheese you use. If you’re tracking macros carefully, use a nutrition calculator with your exact ingredients.
Frequently Asked Questions
Can I make this without a roux?
You can, but I wouldn’t recommend it. A roux creates a stable, silky sauce that holds up beautifully during baking. Without it, you’ll get something more like melted cheese, which can separate or become grainy. The roux is only 5 minutes of work and makes a huge difference.
Why is my mac and cheese watery?
This usually happens because the pasta was cooked too long or because you added too much liquid. Make sure your pasta is slightly undercooked, and measure your milk carefully. If it happens, you can bake it uncovered for an extra 5 to 10 minutes to evaporate some liquid.
Can I use pre-shredded cheese?
You can, but freshly shredded melts smoother and creamier. Pre-shredded cheese has anti-caking agents that can make the sauce slightly grainy. If you only have pre-shredded, it’ll still work—just know the texture might be slightly different.
What’s the best way to reheat leftovers?
The oven is your friend. Preheat it to 325°F, cover your mac and cheese with foil, and bake for 15 to 20 minutes until it’s heated through. This keeps the texture creamy and the topping crispy. Microwaving works in a pinch, but it can make things a bit rubbery.
Can I make this in a slow cooker?
Yes, but you’ll miss the crispy breadcrumb topping. Make the mac and cheese as directed through Step 5, transfer it to a slow cooker, and keep it warm on low for up to 2 hours. If you want a topping, you can broil it briefly just before serving, though it won’t be quite as crispy as the oven version.
Final Thoughts
This classic baked macaroni and cheese has been a staple in my kitchen for years, and I hope it becomes one in yours too. It’s the kind of recipe that works for any occasion—casual weeknight dinners, holiday potlucks, or those nights when you just need something warm and comforting.
The beauty of this dish is that it’s simple enough to make on a Tuesday night, but impressive enough to serve to guests. Every time you make it, you’ll get better at knowing exactly how much salt you like, which cheese combination speaks to you, and how you want that topping to look when it comes out of the oven.
I’d love to hear how your version turns out. Did you add bacon? Try a different cheese? Make it ahead? Drop me a comment below—I read every single one, and I’m always excited to hear what people are cooking in their kitchens.
Until next time, happy cooking.
—
Classic Baked Macaroni and Cheese
Ingredients
Method
- Bring a large pot of salted water to a rolling boil. Add elbow macaroni and cook until just shy of al dente, about 1 minute less than package directions. Drain in a colander and set aside without rinsing.
- In a large saucepan over medium heat, melt butter until foaming and nutty-smelling. Sprinkle in flour and stir constantly for about 2 minutes to create a roux.
- Slowly pour in warmed milk while whisking constantly to avoid lumps. Keep heat at medium and stir often until sauce thickens enough to coat the back of a spoon, about 5 to 7 minutes.
- Remove pan from heat. Add shredded cheddar and Gruyère, stirring until completely melted and smooth. Stir in Dijon mustard, garlic powder, cayenne pepper, salt, and black pepper to taste.
- Pour cooked pasta into cheese sauce and fold together gently until every noodle is coated. Transfer to a buttered 9-by-13-inch baking dish in an even layer.
- In a small bowl, toss panko breadcrumbs with melted butter, grated parmesan, and optional fresh parsley. Sprinkle evenly over mac and cheese.
- Preheat oven to 350°F. Bake for 25 to 30 minutes until top is golden brown and edges are bubbling slightly. Let rest 5 minutes before serving.