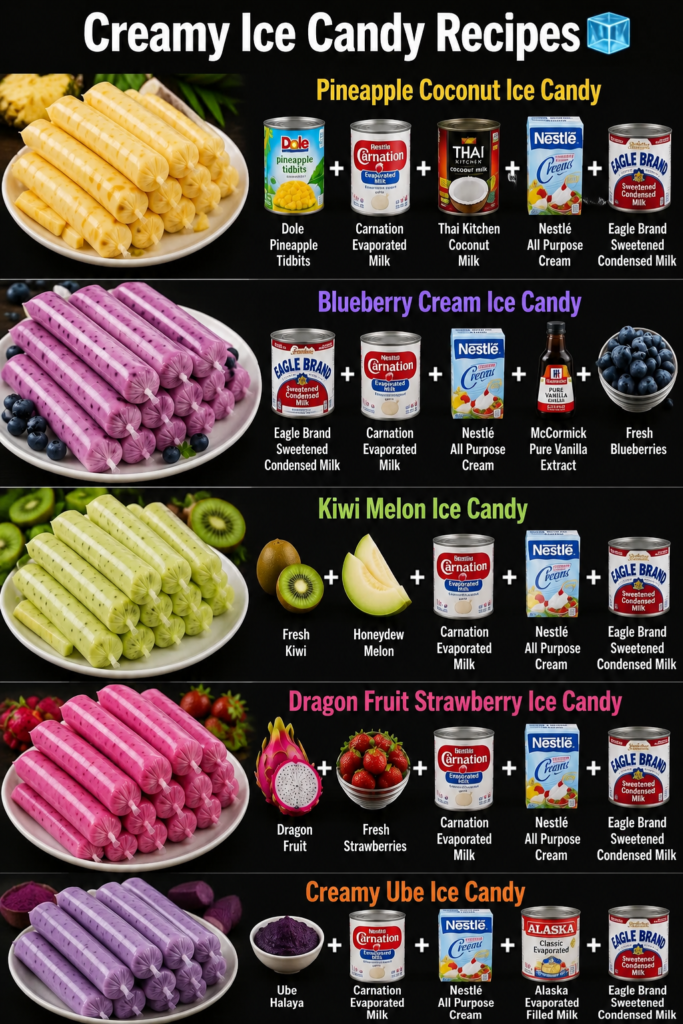
Creamy Ice Candy
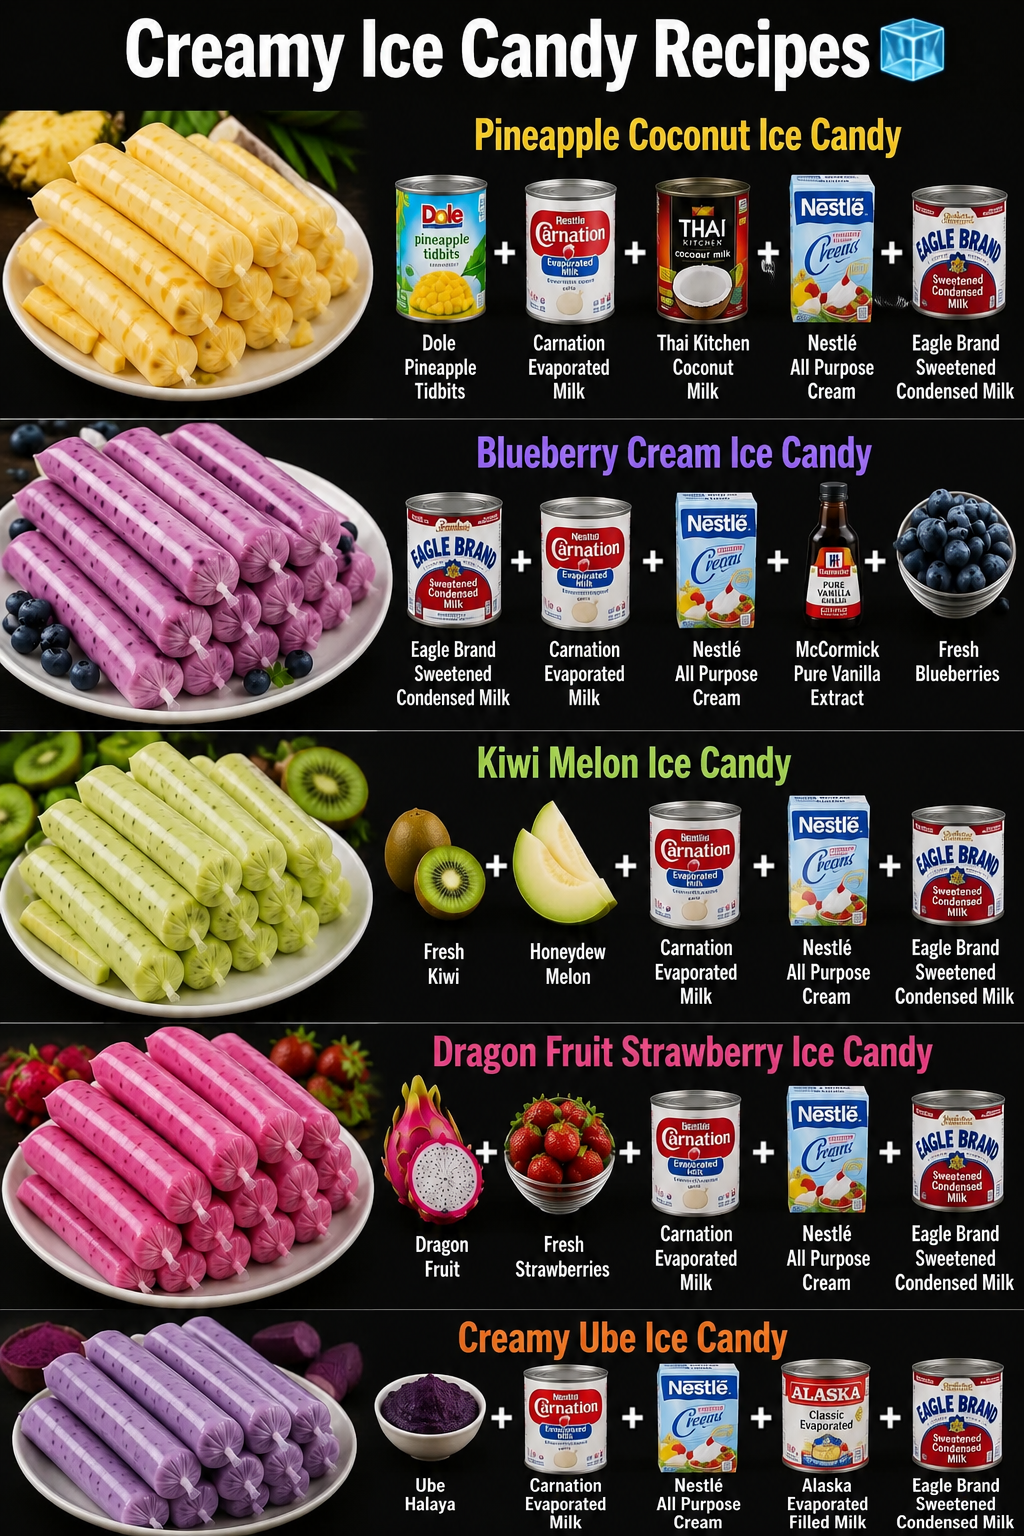
A Sweet Memory That Tastes Like Summer
I still remember the first time my daughter asked me to make creamy ice candy from scratch. She’d been eyeing those store-bought frozen pops in the grocery store, but I knew I could do better at home. That afternoon, we stood in the kitchen together, mixing cream and sugar, pouring the mixture into molds, and waiting by the freezer like it was Christmas morning. When she pulled out those first homemade creamy ice candies the next day, her face lit up. They were smoother, creamier, and honestly more delicious than anything we’d bought before.
That’s when I realized something: creamy ice candy doesn’t have to be complicated or store-bought. It’s one of those recipes that looks fancy but is genuinely simple once you understand the basics. The magic happens when you combine heavy cream, sweetened condensed milk, and a flavor you love, then freeze it into something that melts on your tongue like pure summer.
This recipe is for anyone who wants to skip the artificial ingredients and make something real. Whether you’re a parent looking to impress your kids, someone who loves homemade frozen treats, or just tired of paying premium prices for popsicles, you’re in the right place. I’ve made these dozens of times now, tested different variations, and learned exactly what works.
Follow me on DianaCookingE on Pinterest for more easy recipes like this one that taste homemade and feel special.
Why You’ll Love This Recipe
First, there’s the texture. Real cream creates this silky, smooth mouthfeel that you just don’t get from store-bought versions. When you bite into one of these, it’s not icy or grainy—it’s genuinely creamy.
Second, you control what goes into them. No mystery ingredients, no additives, no weird aftertaste. Just cream, milk, sugar, and flavor. That matters to me, especially when I’m making these for my family.
Third, they’re budget-friendly. A batch of homemade creamy ice candy costs a fraction of what you’d spend on premium frozen treats. I usually make a big batch and keep them in the freezer for weeks.
And honestly? They taste like a treat you made with your own hands. There’s something special about that.
Ingredients for Creamy Ice Candy
- 1 cup heavy cream (cold, straight from the fridge)
- 1 can (14 oz) sweetened condensed milk
- 1/2 cup whole milk
- 1 teaspoon vanilla extract (or your chosen flavor)
- Pinch of salt (this matters—it balances sweetness)
Diana’s Tip: Don’t skip the cold cream. If your cream is warm, you’ll end up with a grainy texture instead of that smooth, creamy finish. Keep it in the fridge until the moment you need it.
Diana’s Tip: Sweetened condensed milk is the secret ingredient here. It adds richness and helps prevent ice crystals from forming. Don’t substitute it with regular milk—it won’t work the same way.
Optional Add-Ins and Variations
Once you master the basic creamy ice candy, the fun begins. Here are my favorite additions:
- Strawberry: Blend 1 cup fresh strawberries with 2 tablespoons sugar, then fold into the cream mixture
- Chocolate: Whisk 3 tablespoons unsweetened cocoa powder with 2 tablespoons sugar before mixing in
- Mango: Use 3/4 cup mango puree instead of some of the whole milk
- Cookies and cream: Crush 4 to 5 cookies and stir them in just before freezing
- Salted caramel: Drizzle caramel sauce into the mixture and swirl gently with a toothpick
The key with any add-in is keeping the liquid balance roughly the same. If you’re adding fruit puree, reduce the whole milk slightly so the mixture doesn’t become too thin.
Step-by-Step Method
Step 1: Gather Your Supplies
You’ll need popsicle molds (silicone or plastic—either works), a mixing bowl, a whisk, and a measuring cup. I like silicone molds because they’re flexible and the pops slide out easily. If you don’t have molds, you can use small paper cups and insert wooden sticks halfway through freezing.
Step 2: Combine the Base
Pour your cold heavy cream into a bowl. Add the sweetened condensed milk, whole milk, vanilla extract, and salt. Whisk everything together until smooth and well combined. This should take about a minute. You’re not whipping the cream—just mixing everything evenly.
Diana’s Tip: Don’t overmix. If you whip the cream too much, you’ll end up with a fluffy texture instead of smooth and creamy. A gentle whisk is all you need.
Step 3: Add Your Flavor
If you’re using fresh fruit, puree it first and strain out any large pulp. Fold it gently into the cream mixture. If you’re using extract or other liquid flavorings, add them now and stir well. Taste a tiny spoonful—this is your chance to adjust sweetness or flavor before freezing.
What I Messed Up At First: I once forgot to taste the mixture before freezing, and I ended up with pops that were too sweet. Now I always do a quick taste test. It takes five seconds and saves disappointment later.
Step 4: Pour Into Molds
Carefully pour the mixture into your popsicle molds, leaving about 1/4 inch at the top (they’ll expand slightly as they freeze). If you’re using paper cups, fill them most of the way.
Step 5: Insert Sticks (If Using Cups)
If you’re using molds with built-in sticks, you’re done. If you’re using paper cups, place them on a baking sheet and freeze for about 2 hours until the mixture is slushy. Then insert wooden sticks into the center of each cup.
Step 6: Freeze Completely
Return everything to the freezer for at least 6 hours, or overnight. I usually freeze mine for 8 hours to be safe. They’re ready when they’re completely solid and don’t jiggle when you gently shake the mold.
Step 7: Release and Enjoy
Run warm water over the outside of each mold for 10 to 15 seconds. This loosens the pop just enough to slide out easily. If you’re using silicone molds, just flex them gently and the pops will pop right out.
Common Mistakes to Avoid
Grainy texture: This usually means your cream wasn’t cold enough or you overmixed. Always start with chilled cream and mix gently.
Too icy: If your pops taste icy instead of creamy, you might not have used enough sweetened condensed milk. It acts as a natural anti-freeze agent. Don’t skimp on it.
Pops won’t come out of the mold: Run warm water over the outside for a full 15 seconds. Some molds need a bit more time than others. Patience is your friend here.
Flavor is muted: Freezing dulls flavors slightly, so your mixture should taste a bit more flavorful than you want the final pop to be. Don’t be shy with vanilla or fruit puree.
My Tested Substitutions
Can’t find sweetened condensed milk? Mix 1/2 cup regular milk with 1/2 cup powdered sugar and blend until smooth. It’s not identical, but it works in a pinch.
Want to use half-and-half instead of heavy cream? You can, but the texture will be slightly less rich. Use a full cup of half-and-half and reduce the whole milk to 1/4 cup to compensate.
Using evaporated milk? It’s thinner than sweetened condensed milk, so use 1 and 1/4 cups and add 2 tablespoons of sugar to the base.
Allergic to dairy? I’ve had good results with full-fat coconut cream and coconut milk, though the flavor will shift slightly. Use the same proportions as the dairy version.
How to Customize
The beauty of homemade creamy ice candy is that it’s endlessly adaptable. Love coffee? Add 1 tablespoon of instant espresso powder dissolved in a little warm water. Want something tropical? Swap the vanilla for coconut extract and add 1/2 cup pineapple juice. Craving something decadent? Swirl in 2 tablespoons of peanut butter mixed with a little honey.
You can also play with the sweetness level. If you prefer less sugar, reduce the sweetened condensed milk by a few tablespoons, but know that this will make the texture slightly icier. If you want richer pops, use all heavy cream instead of mixing it with whole milk.
[INTERNAL LINK: homemade frozen desserts]
Serving Ideas
These are perfect for hot summer days straight from the freezer. I love serving them at backyard barbecues or afternoon snack time. They’re also great for kids’ birthday parties—make a batch in different flavors and let everyone pick their favorite.
For adults, I sometimes make a boozy version by adding 2 tablespoons of liqueur (like Kahlúa for coffee pops or rum for tropical ones). Just know that alcohol freezes at a lower temperature, so these might take a bit longer to set.
You can also crush one of these pops and layer it into a glass with whipped cream for a fancy dessert. It looks impressive but takes almost no extra effort.
Meal Prep and Storage
These freeze beautifully for up to 2 weeks. I usually make a double batch and keep them in the freezer for grab-and-go snacks. Store them in an airtight container or freezer bag once they’re completely frozen.
If your pops start to get freezer burn (that white, icy coating), they’re still safe to eat, but the texture might be a bit off. To prevent this, wrap them individually in plastic wrap or parchment paper after they’re frozen solid.
You can also prep the mixture up to 24 hours ahead. Just keep it covered in the fridge and pour into molds when you’re ready to freeze.
Nutritional Breakdown
Each creamy ice candy (based on 8 pops per batch) contains approximately:
- Calories: 185
- Protein: 2g
- Carbohydrates: 18g
- Fat: 11g
- Fiber: 0g
Keep in mind that these numbers shift if you add fruit, cookies, or other mix-ins. Fruit generally adds a few carbs but keeps calories about the same. Cookies and candy will increase both calories and sugar.
Frequently Asked Questions
How long does it take to freeze creamy ice candy?
At least 6 hours, but I recommend 8 hours or overnight for the best results. The longer they freeze, the firmer they’ll be.
Can I make these without popsicle molds?
Absolutely. Pour the mixture into small paper cups, freeze for 2 hours until slushy, then insert wooden sticks. They work just as well and honestly look kind of charming.
Why is my mixture separating?
This usually means the ingredients weren’t mixed well enough or one of them was too warm. Give everything another good whisk. If it’s still separating, blend it with an immersion blender for 30 seconds.
Can I double this recipe?
Yes, and I do it all the time. Just double every ingredient and follow the same steps. You might need to freeze for an extra 30 minutes since there’s more volume.
What’s the best way to remove pops that are stuck?
Warm water is your best friend. Run it over the outside of the mold for 15 to 20 seconds, then gently flex or twist the mold. If they’re still stuck, run the water a bit longer. Don’t force it or you’ll break the pop.
Final Thoughts
Making creamy ice candy at home changed how I think about frozen treats. It’s not just about saving money or avoiding additives—though those are nice perks. It’s about having something delicious and homemade ready whenever you want it. It’s about knowing exactly what’s in the food you’re eating. And honestly, it’s about the joy of pulling a perfectly frozen pop out of the mold and hearing someone say, “You made this?”
Start with the basic vanilla version, master that, and then branch out into flavors you love. You’ll be amazed at how easy it is and how much better homemade tastes. I hope you enjoy making these creamy ice candies as much as I do.
—
Creamy Ice Candy
Ingredients
Method
- Pour cold heavy cream into a mixing bowl. Add sweetened condensed milk, whole milk, vanilla extract, and salt. Whisk together until smooth and well combined, about one minute. Do not overmix.
- If using fresh fruit, puree and strain it first. Fold fruit puree or other flavorings gently into the cream mixture. Taste a small spoonful to adjust sweetness or flavor as needed.
- Carefully pour the mixture into popsicle molds, leaving about 1/4 inch at the top. If using paper cups, fill most of the way and place on a baking sheet.
- If using paper cups, freeze for 2 hours until slushy, then insert wooden sticks into the center of each cup.
- Return molds to freezer for at least 6 hours, or overnight until completely solid and firm.
- Run warm water over the outside of each mold for 10 to 15 seconds to loosen the pops. Gently flex silicone molds or twist plastic molds until pops slide out easily.
- Serve immediately or store in an airtight container in the freezer.
- Enjoy your homemade creamy ice candy straight from the freezer.