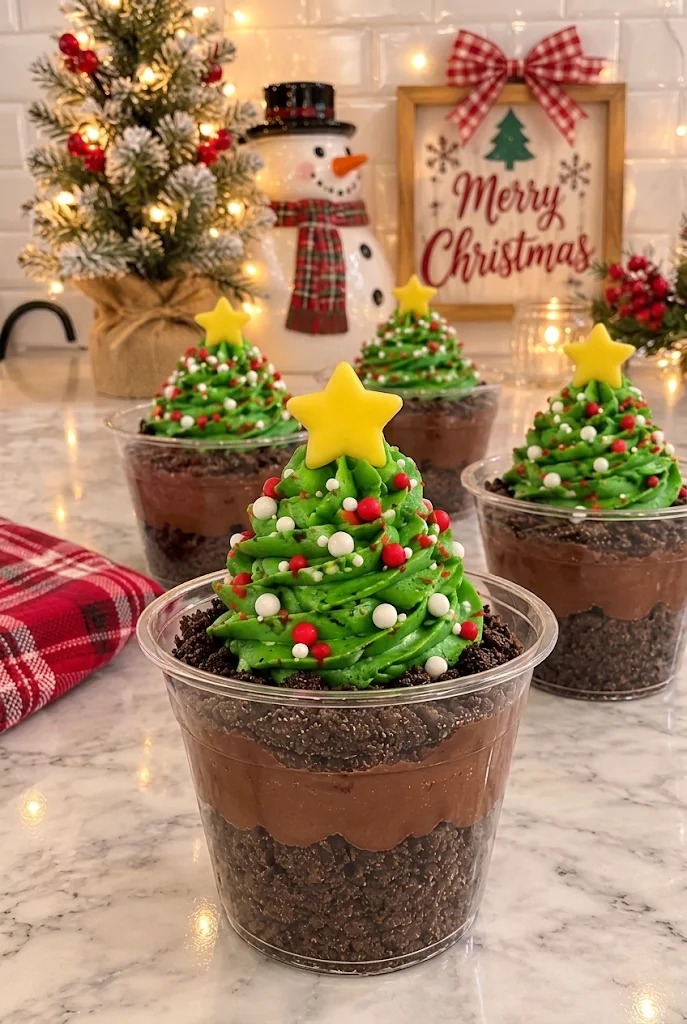
These layered Christmas tree dessert cups bring together chocolate, butter, and festive decoration in a no-bake treat that feels special without requiring baking skills. Clear cups let you see each layer—a crunchy chocolate cookie base, creamy pudding middle, and piped green buttercream trees topped with sprinkles and a yellow star. They’re designed for individual servings, which makes them practical for holiday gatherings or as a make-ahead dessert.
Building the Layers
The structure of these cups depends on three distinct layers, each with its own role. The foundation is a chocolate cookie crumb base mixed with melted butter. This layer needs to be sturdy enough to hold the pudding without crumbling into it, so the butter acts as a binder. You’ll crush chocolate cookies into coarse crumbs—not fine powder, but pieces you can still see and feel. Measure out 2 cups total, then use 1 cup of those crumbs mixed with melted butter to create a wet-sand texture. Press this mixture firmly into the bottom of each clear dessert cup. The pressure matters here; a loose base will shift when you add the pudding layer above it.
The middle layer is chocolate pudding prepared according to package directions. Let it cool completely before assembly so it doesn’t melt the buttercream you’ll add later. Spoon the pudding directly over the cookie base, then top the pudding with the remaining 1 cup of crushed cookie crumbs. These crumbs add texture contrast and visual interest when you look through the clear cup.
Ingredients
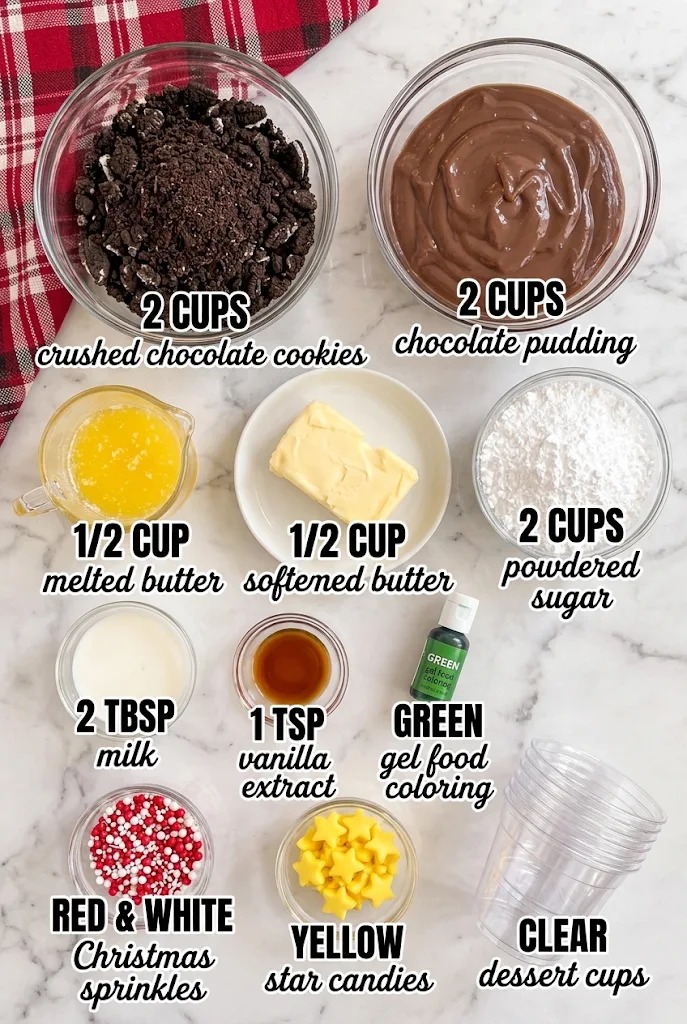
cookie crumb base
- 2 CUPS crushed chocolate cookies
- 2 CUPS chocolate pudding
pudding layer
- 1/2 CUP melted butter
green buttercream
- 1/2 CUP softened butter
- 2 CUPS powdered sugar
- 2 TBSP milk
- 1 TSP vanilla extract
- GREEN gel food coloring
toppings and serving
- RED & WHITE Christmas sprinkles
- YELLOW star candies
- CLEAR dessert cups
The Green Buttercream
The top layer is where the Christmas trees come in. You’ll beat softened butter with powdered sugar, milk, vanilla extract, and green gel food coloring until the mixture is smooth and fluffy. The softened butter is essential—it needs to be at room temperature so it incorporates air and becomes light enough to pipe. If your butter is too cold, it won’t whip properly and the frosting will be dense. If it’s too warm, it’ll be greasy and won’t hold a shape.
Gel food coloring gives you a vibrant green without adding extra liquid the way liquid coloring would. Start with a small amount and add more until you reach the shade you want. The color deepens slightly as you beat the frosting, so don’t overdo it at first.
Choosing Your Cups and Equipment
Clear dessert cups in the 8–10 ounce range work best for this recipe. The transparency is part of the appeal—it shows off the layers. If your cups are much larger, you’ll need more filling; if they’re smaller, you’ll have leftover mixture. A piping bag with a medium round or star tip lets you pipe the buttercream into tree shapes. If you don’t have a piping bag, you can spoon the buttercream on top and smooth it into a mound, though piping gives you more control and a more intentional look.
An electric mixer makes quick work of the buttercream, but a bowl and whisk will work if you’re willing to put in some arm effort. The goal is to incorporate air into the butter and sugar, which takes a few minutes of beating.
How to Make It
- Prepare chocolate pudding according to package directions and refrigerate until cool.
- Crush chocolate cookies into coarse crumbs; measure out 2 cups total.
- In a small bowl, combine 1 cup crushed cookie crumbs with melted butter and mix until resembles wet sand.
- Press cookie-butter mixture firmly into the bottom of each clear dessert cup to form an even base layer.
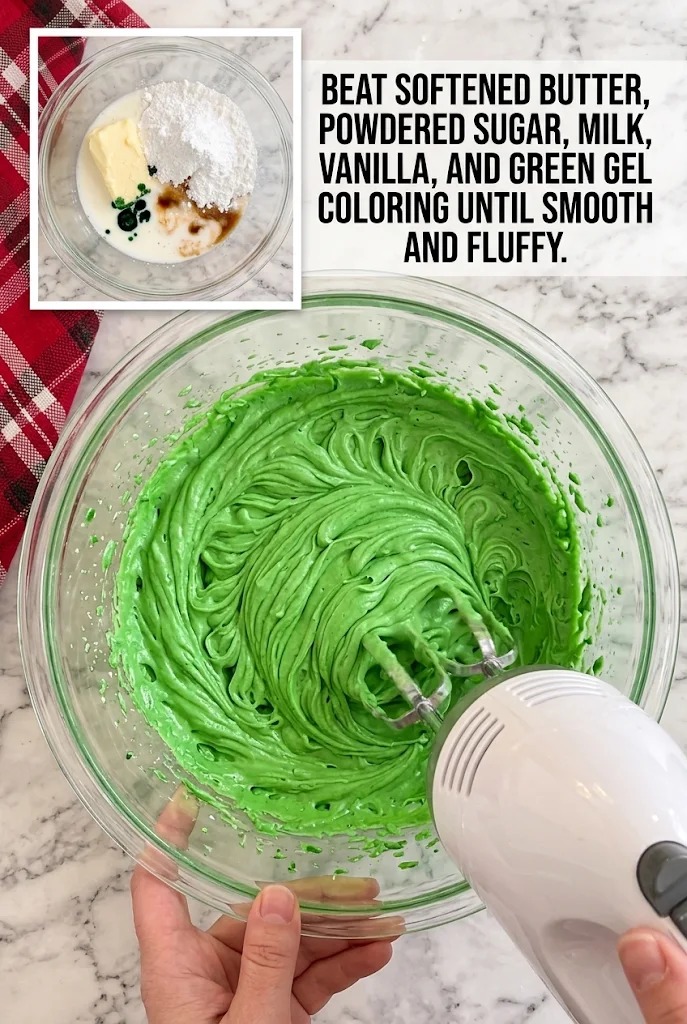
- Beat softened butter, powdered sugar, milk, vanilla, and green gel coloring until smooth and fluffy.

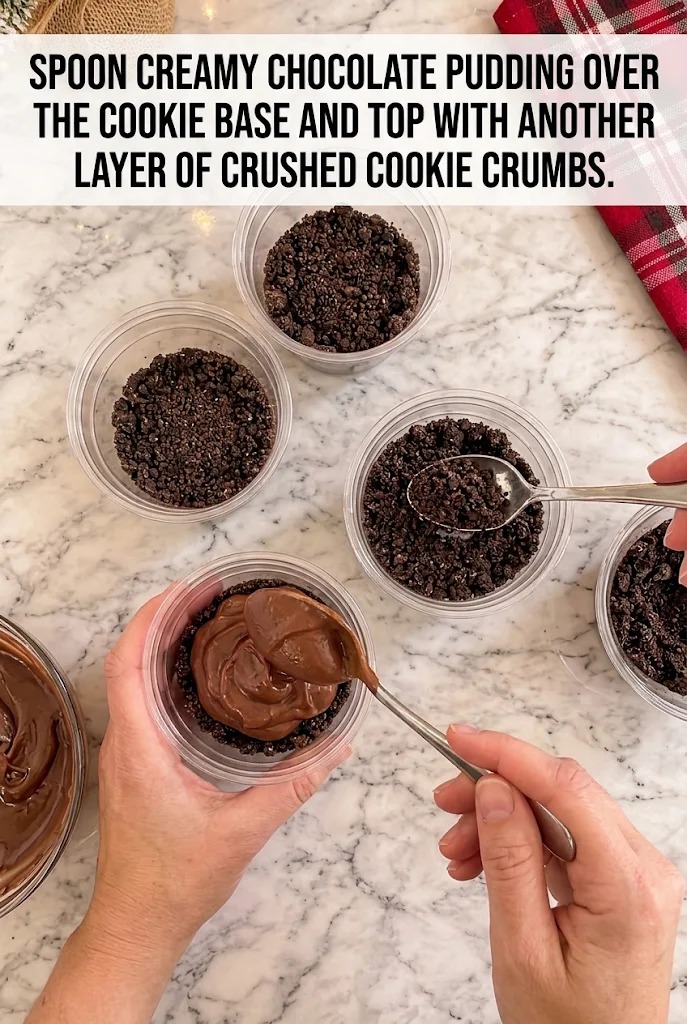
- Spoon creamy chocolate pudding over the cookie base and top with another layer of crushed cookie crumbs.
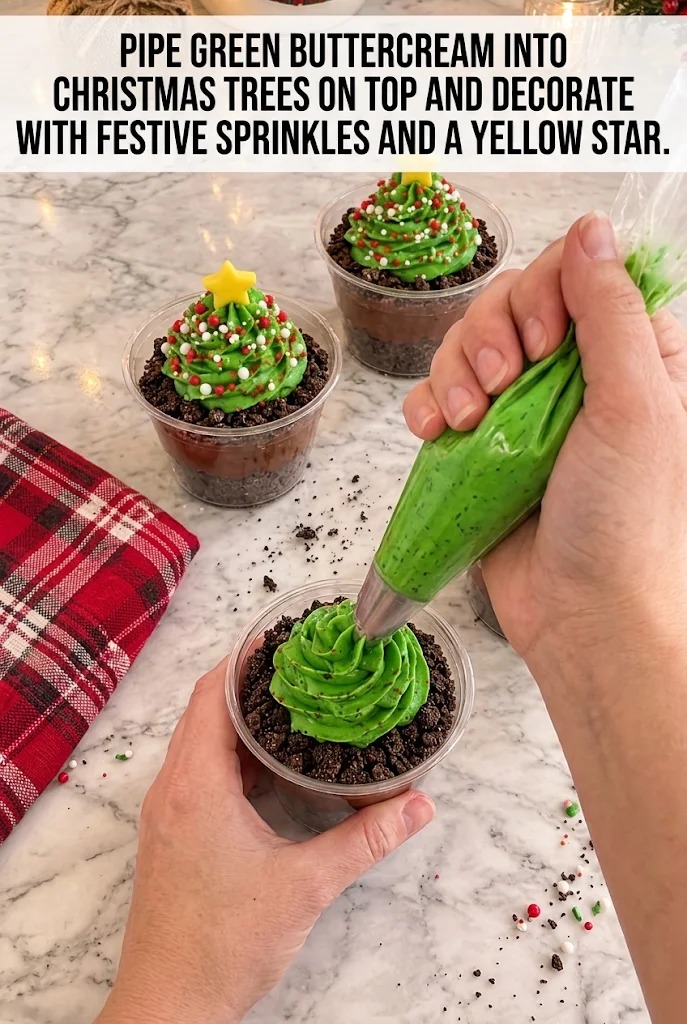
- Pipe green buttercream into christmas trees on top and decorate with festive sprinkles and a yellow star.
- Refrigerate assembled cups for at least 30 minutes until pudding layer is set and buttercream is firm.
Recipe Notes
- Use prepared chocolate pudding and keep the dessert refrigerated.
- The yield and preparation time are estimates; cup size affects the number of servings.
- The photos do not specify a chilling time.
Assembling the Cups
Start by preparing the chocolate pudding according to the package directions. Different brands set at different rates, so follow what the box tells you. Once it’s made, let it cool completely—this step prevents the warm pudding from melting your buttercream later.
While the pudding cools, crush your chocolate cookies. You want coarse crumbs, not a fine powder. Measure out 2 cups total. In a small bowl, combine 1 cup of those crumbs with the melted butter and stir until the mixture looks like wet sand. This is your base layer.
Press the cookie-butter mixture firmly into the bottom of each clear dessert cup. Use the back of a spoon or your fingers to pack it down evenly. This creates a stable platform for the pudding layer. Don’t rush this step; a loose base will shift and crack when you add the pudding.
Spoon the cooled chocolate pudding over the cookie base, filling each cup about halfway. Top the pudding with the remaining 1 cup of crushed cookie crumbs. These crumbs stay visible through the clear cup and add a textural layer.
Now make the green buttercream. Beat the softened butter, powdered sugar, milk, vanilla extract, and green gel coloring together until smooth and fluffy. This takes about 2–3 minutes with an electric mixer. The mixture should be light in color and texture, not dense or greasy.
Spoon the buttercream into a piping bag fitted with a medium round or star tip. Pipe the frosting into small tree shapes on top of each cup. If you’re piping trees, start with a wide base and spiral upward, making each layer narrower than the one below it to create a tree silhouette.
Decorate each tree with red and white Christmas sprinkles, then top with a yellow star candy. The sprinkles add color and festive detail, while the star serves as the tree topper.
Timing and Storage Before Serving
Refrigerate the assembled cups for at least 30 minutes before serving. This allows the pudding layer to set and the buttercream to firm up. The chilling time also helps the flavors meld together. If you’re making these ahead, you can prepare the cups up to the point of piping the buttercream and refrigerate them. Pipe the trees and add the sprinkles and star just before serving to keep the buttercream from softening in the cold pudding layer.
Practical Notes for Success
The clear cups are the star of this dessert, so make sure they’re clean and dry before you start layering. Any residue or moisture will show through and affect the presentation.
If your chocolate pudding is too thick to spoon easily, thin it slightly with a splash of milk. If it’s too thin, let it set a bit longer in the refrigerator before assembling the cups.
The buttercream should be piped immediately before serving or just a few minutes before. If you pipe it too far in advance, it will soften from the cold pudding layer beneath it and lose its shape.
The estimated yield is six cups, depending on cup size. If you need more servings, double the recipe. If you have fewer guests, the components keep well separately—leftover pudding can be eaten on its own, and extra buttercream can be refrigerated for a few days.
Christmas Tree Dessert Cups
Ingredients
Equipment
Method
- Prepare chocolate pudding according to package directions and refrigerate until cool.
- Crush chocolate cookies into coarse crumbs; measure out 2 cups total.
- In a small bowl, combine 1 cup crushed cookie crumbs with melted butter and mix until resembles wet sand.
- Press cookie-butter mixture firmly into the bottom of each clear dessert cup to form an even base layer.
- Beat softened butter, powdered sugar, milk, vanilla, and green gel coloring until smooth and fluffy.
- Spoon creamy chocolate pudding over the cookie base and top with another layer of crushed cookie crumbs.
- Pipe green buttercream into christmas trees on top and decorate with festive sprinkles and a yellow star.
- Refrigerate assembled cups for at least 30 minutes until pudding layer is set and buttercream is firm.
Notes
Recipe tips
- Use prepared chocolate pudding and keep the dessert refrigerated.
- The yield and preparation time are estimates; cup size affects the number of servings.
- The photos do not specify a chilling time.