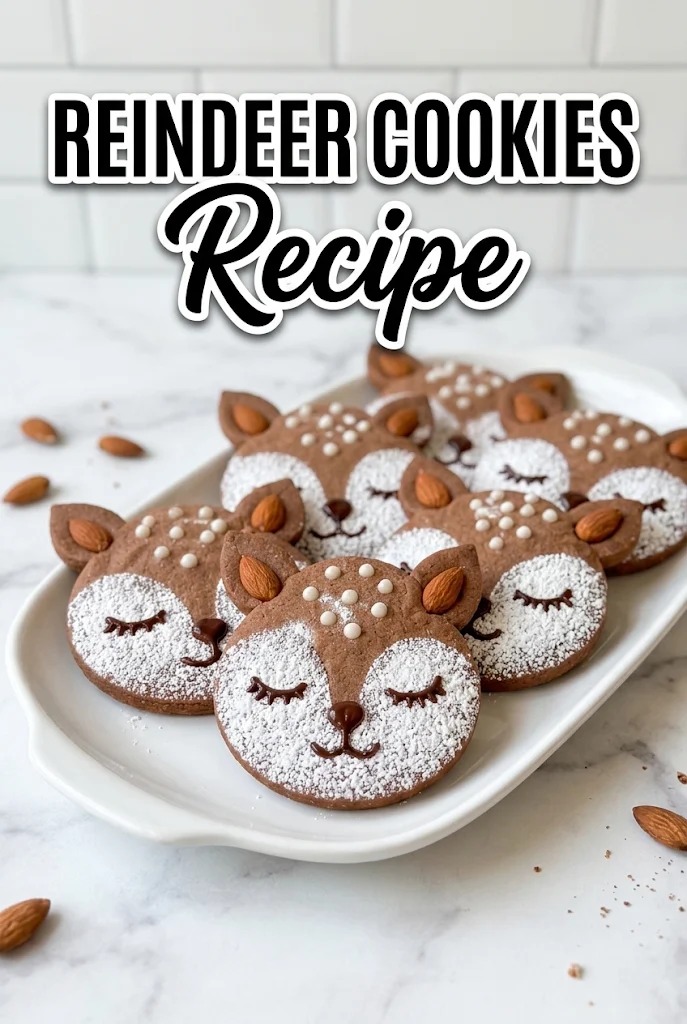
Red velvet crinkle cookies deliver that signature cocoa-and-vanilla flavor with a subtle tang, finished with a dramatic white-sugar crackle across the top. The dough relies on cocoa powder, red food coloring, and a touch of vinegar to build the classic red velvet taste without requiring buttermilk or cream cheese. The result is a tender, cake-like cookie with crispy edges and a soft center—the kind that looks impressive on a plate but comes together with straightforward mixing and a two-hour chill.
What Makes These Cookies Work
The base starts with butter and two types of sugar. Unsalted butter gives you control over the salt level, while granulated and brown sugar together create balanced sweetness and help achieve that tender crumb. Brown sugar adds a slight molasses note that complements the cocoa without overpowering the red velvet profile.
Two large eggs bind the dough and contribute to the cake-like texture. They’re beaten into the creamed butter and sugar along with vanilla extract, which rounds out the flavor. Red food coloring mixed directly into the wet ingredients distributes evenly throughout the dough, giving these cookies their distinctive hue.
The dry ingredients—all-purpose flour, cocoa powder, baking powder, baking soda, and salt—structure the cookie and control how it spreads. Cocoa powder brings earthiness and depth; it’s the foundation of the red velvet flavor. Baking powder provides lift, while baking soda reacts with the vinegar to add extra rise and help develop that characteristic crinkled surface.
Vinegar is the secret ingredient that ties red velvet together. Just one teaspoon creates the subtle tang that defines the flavor, and it reacts with the baking soda to create additional lift and texture. This is what gives the cookies their signature crackle. Powdered sugar is reserved for rolling the dough balls before baking. Applied generously, it creates the dramatic white crackle effect as the cookies bake and expand.
Ingredients
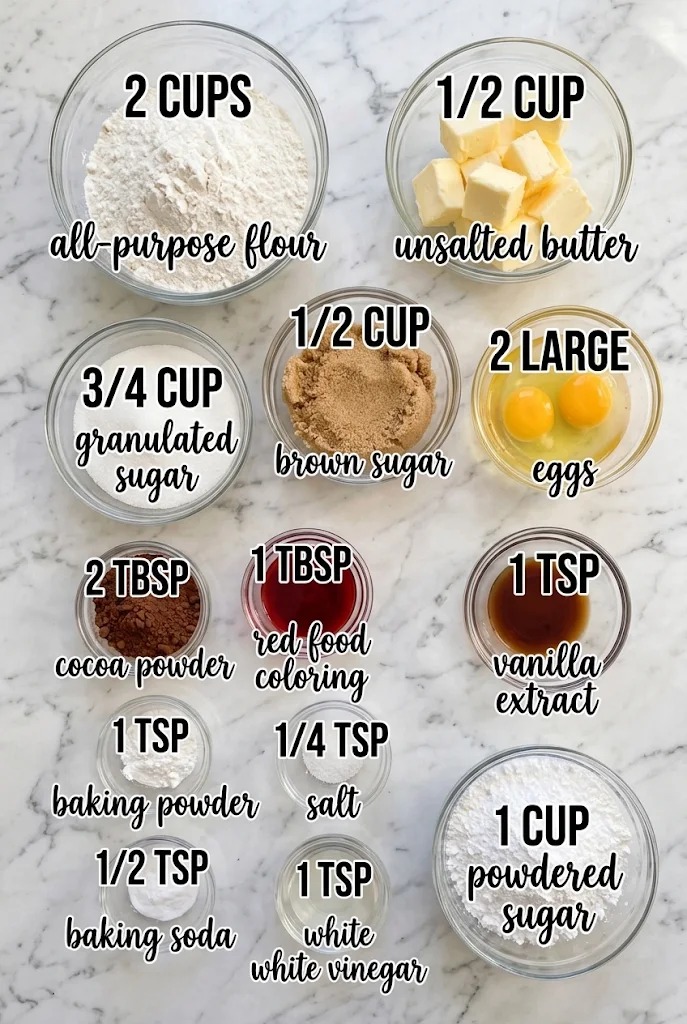
- 2 CUPS all-purpose flour
- 1/2 CUP unsalted butter
- 3/4 CUP granulated sugar
- 1/2 CUP brown sugar
- 2 LARGE eggs
- 2 TBSP cocoa powder
- 1 TBSP red food coloring
- 1 TSP vanilla extract
- 1 TSP baking powder
- 1/4 TSP salt
- 1/2 TSP baking soda
- 1 TSP white white vinegar
- 1 CUP powdered sugar
Making the Dough
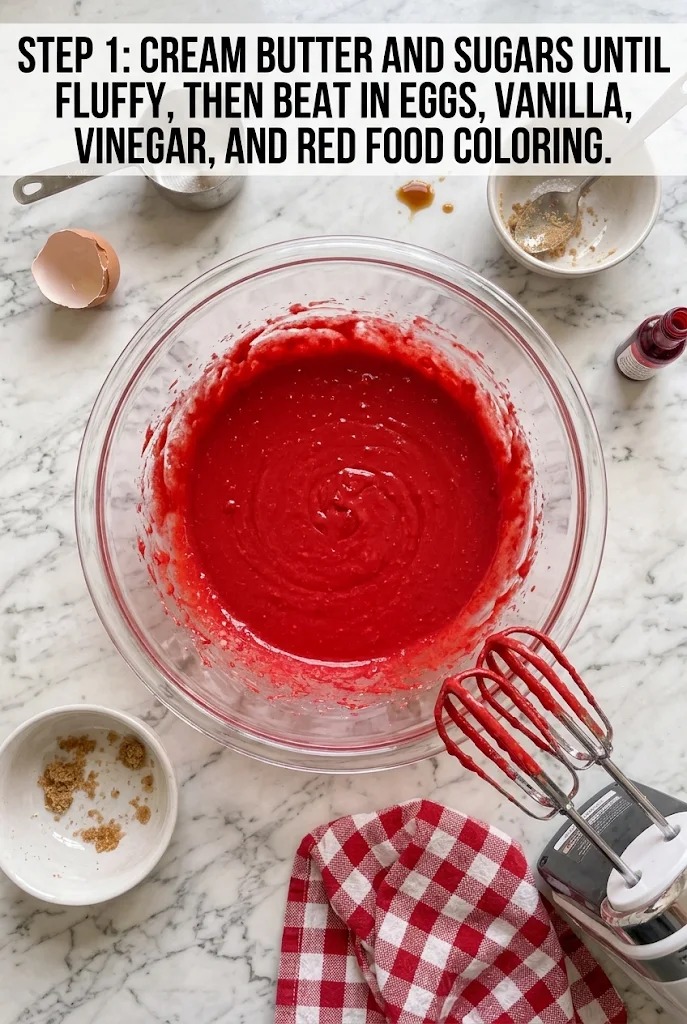
Start by creaming butter and both sugars together until the mixture is light and fluffy. This step incorporates air into the dough, which helps the cookies rise and develop their tender crumb. Beat for a couple of minutes until it’s noticeably lighter in color and texture.
Add the eggs one at a time, beating well after each addition. Then mix in the vanilla extract, vinegar, and red food coloring. The vinegar reacts with the baking soda to create lift and contributes to that distinctive red velvet tang. The red food coloring should be fully incorporated so the dough has an even, deep red hue.
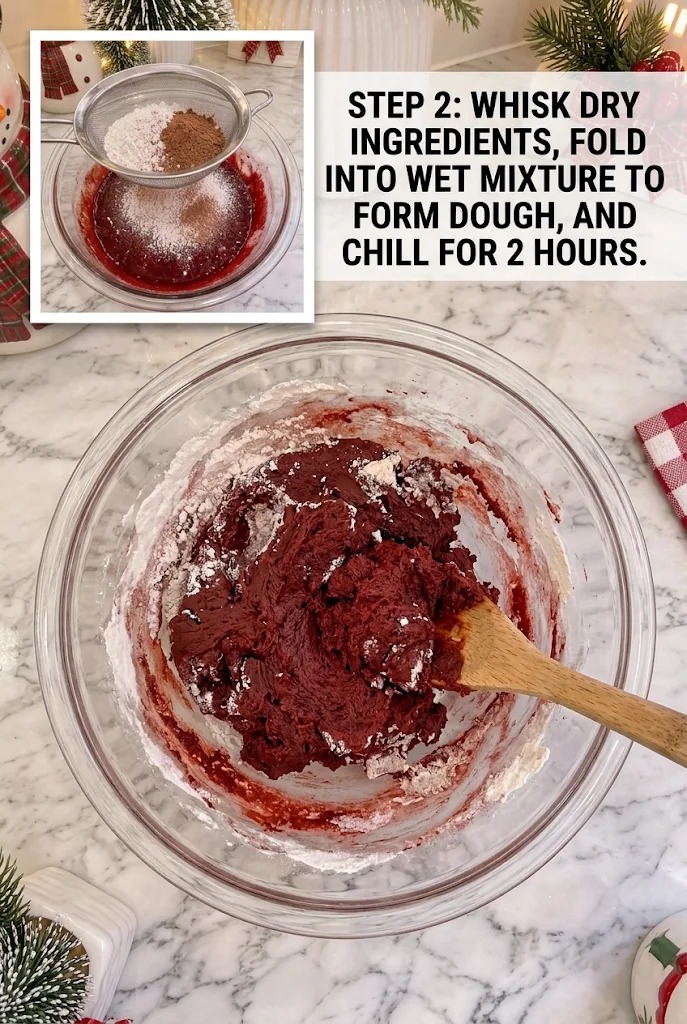
In a separate bowl, whisk together the flour, cocoa powder, baking powder, baking soda, and salt. This ensures the leavening agents and cocoa are evenly distributed. Fold the dry mixture into the wet ingredients gently until just combined. Overmixing can toughen the dough, so stop as soon as you don’t see streaks of flour.
The dough needs to chill for the full two hours before baking. This resting period allows the flavors to meld, prevents the dough from spreading too much in the oven, and helps the cookies develop their characteristic crinkled appearance. Cover the dough or transfer it to a bowl if that’s easier to work with.
How to Make It
- Cream butter and sugars until fluffy, then beat in eggs, vanilla, vinegar, and red food coloring.

- Whisk dry ingredients, fold into wet mixture to form dough, and chill for 2 hours.
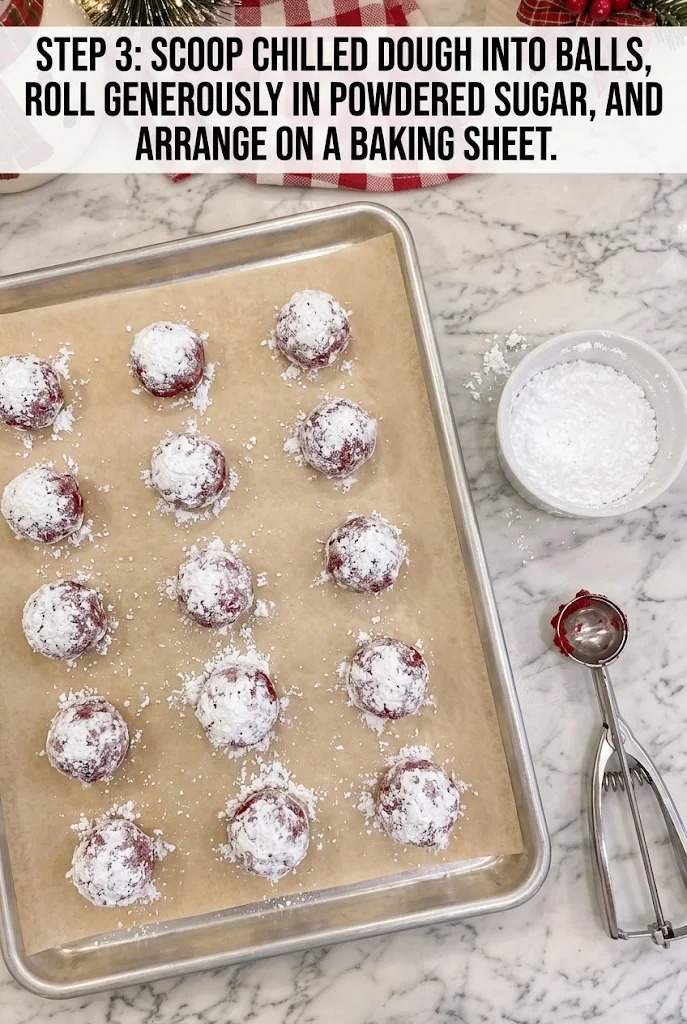
- Scoop chilled dough into balls, roll generously in powdered sugar, and arrange on a baking sheet.
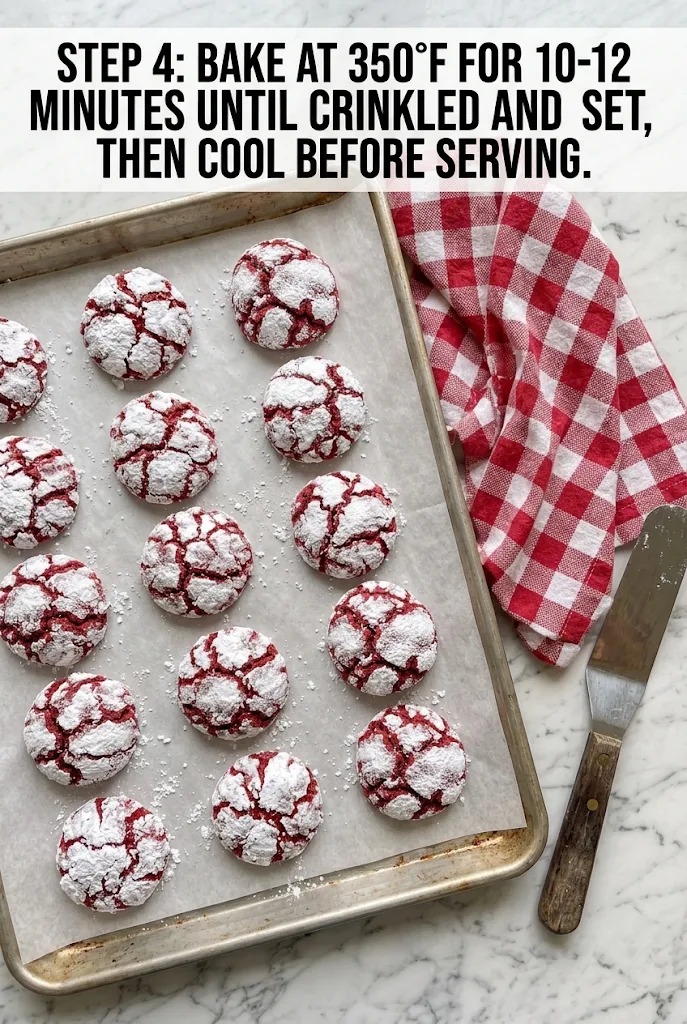
- Bake at 350°F for 10-12 minutes until crinkled and set, then cool before serving.
Recipe Notes
- Chill dough for the full 2 hours to prevent excessive spreading and achieve the characteristic crinkled appearance.
- Roll dough balls generously in powdered sugar for pronounced white crackle effect.
- Cookies continue to set as they cool; remove from oven when edges are firm but centers still appear slightly underbaked.
- Use parchment paper to prevent sticking and ensure even browning.
Shaping and Baking
After chilling, scoop the dough into balls. A cookie scoop makes this easier and ensures uniform sizes, which means even baking. Pour powdered sugar into a shallow dish and roll each dough ball generously in the sugar. The more powdered sugar coating, the more pronounced the white crackle will be as the cookies bake.
Arrange the sugar-coated balls on a baking sheet lined with parchment paper, spacing them about two inches apart. Parchment paper prevents sticking and promotes even browning on the bottom.
Bake at 350°F for 10 to 12 minutes. The key is catching them at the right moment: the edges should be firm and set, but the centers may still look slightly underbaked. This is intentional. The cookies continue to set as they cool on the pan, and this timing ensures a tender center with a slight chew rather than a completely cake-like texture throughout.
Let the cookies cool on the baking sheet for a few minutes before transferring them to a wire rack. They’ll firm up as they cool completely.
Why the Two-Hour Chill Matters
Chilling the dough accomplishes several things. It gives the flour time to fully hydrate, which affects how the dough behaves in the oven. It also slows down the spreading, so the cookies hold their shape better and develop that crinkled surface more dramatically. Without this rest, the dough would spread too quickly and the cookies would flatten rather than crack.
Understanding the Flavor
Red velvet is often misunderstood as purely chocolate, but it’s actually a subtle flavor. The cocoa powder here is just two tablespoons—enough to add depth and a hint of chocolate without making these taste like chocolate cookies. The vinegar and vanilla are what round out the flavor and give red velvet its distinctive character. If you taste the dough, you’ll notice the tang from the vinegar and the warmth of the vanilla more than a strong cocoa flavor.
The Powdered Sugar Coating
The generous coating of powdered sugar isn’t just for looks. As the cookies bake, they expand and crack through the sugar layer, creating that signature crinkle. The sugar also adds a subtle sweetness to the exterior and a slight textural contrast to the tender cookie underneath. Rolling the dough balls thoroughly in the sugar ensures good coverage and a more dramatic effect.
Baking Sheet Setup
Parchment paper is worth using here. It prevents the bottoms from browning too quickly and makes cleanup easier. If you don’t have parchment paper, a silicone baking mat works just as well. Spacing the cookies about two inches apart gives them room to spread slightly without touching.
Recognizing When They’re Done
These cookies are done when the edges look set and firm, but the very center may still jiggle slightly if you gently shake the pan. This slight underbaking is what keeps them tender. If you bake them until they look completely set all the way through, they’ll be too firm. The residual heat from the baking sheet will continue cooking them as they cool.
Flavor and Texture Profile
The combination of cocoa, red food coloring, and vinegar creates a flavor that’s familiar but subtle. These aren’t chocolate cookies—they’re red velvet cookies with a hint of cocoa. The texture is cake-like with a slight chew in the center, and the crinkled sugar coating adds a delicate crispness to the exterior. The vanilla and vinegar give them a warm, slightly tangy finish.
This recipe yields 24 cookies. With 20 minutes of prep time plus the two-hour chill and 10 to 12 minutes of baking, plan accordingly if you’re making them for a specific occasion. Store cooled cookies in an airtight container for several days.
RED VELVET CRINKLE COOKIES Recipe
Ingredients
Equipment
Method
- Cream butter and sugars until fluffy, then beat in eggs, vanilla, vinegar, and red food coloring.
- Whisk dry ingredients, fold into wet mixture to form dough, and chill for 2 hours.
- Scoop chilled dough into balls, roll generously in powdered sugar, and arrange on a baking sheet.
- Bake at 350°F for 10-12 minutes until crinkled and set, then cool before serving.
Notes
Recipe tips
- Chill dough for the full 2 hours to prevent excessive spreading and achieve the characteristic crinkled appearance.
- Roll dough balls generously in powdered sugar for pronounced white crackle effect.
- Cookies continue to set as they cool; remove from oven when edges are firm but centers still appear slightly underbaked.
- Use parchment paper to prevent sticking and ensure even browning.