Quick and Easy Coconut Chocolate Bars: Dreamy Treats in 30 Minutes
Quick and Easy Coconut Chocolate Bars: Dreamy Treats in 30 Minutes
My Quick and Easy Coconut Chocolate Bars Discovery Story
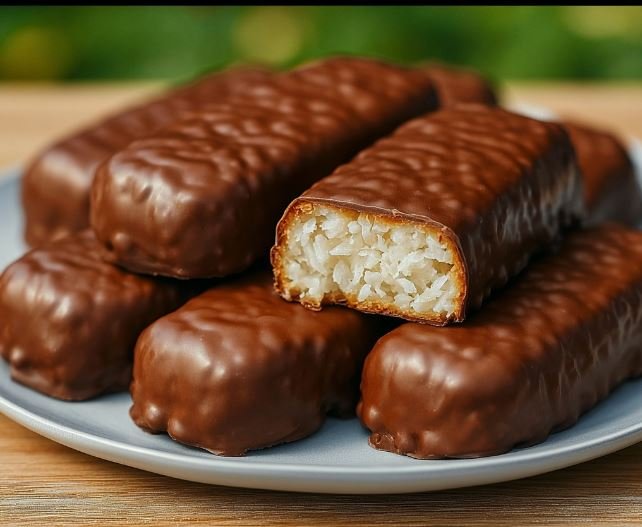
If you’d told me a year ago that quick and easy coconut chocolate bars would become one of my most reliable desserts, I would’ve been skeptical. I mean, I’ve always been a “from scratch, hours in the kitchen” kind of baker. But let me tell you — these little bars are everything: chewy, chocolatey, simple, and ridiculously satisfying.
I first made them on a busy Wednesday when my daughter called out from the living room, “Mom, do we have anything sweet?” The pantry was looking bare, but I spotted coconut flakes and chocolate chips. In less than 30 minutes, something magical happened — dessert was ready, and the kids thought I’d planned it all along.
My grandmother would have laughed at me. She used to say, “You don’t need fancy ingredients, just a good idea and a warm oven.” I remember standing on that old wooden stool in her kitchen, watching her melt chocolate in a double boiler and sprinkle shredded coconut on top of cookies. She never wrote recipes down, but she taught me how to improvise — and this recipe is living proof of her wisdom.
What Makes These Bars So Special
Here’s what you’ll need for these dreamy bars:
The Coconut Base:
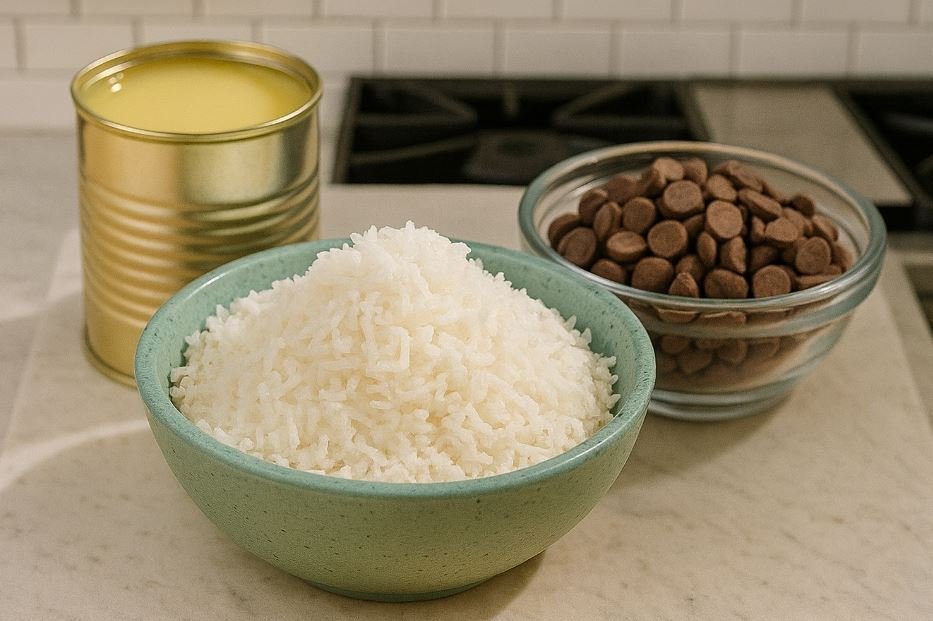
- 2 cups shredded coconut (sweetened or unsweetened) – The chewy heart of the recipe.
- 1/2 cup condensed milk – Makes it creamy and holds everything together.
- 1/2 teaspoon vanilla extract – A subtle flavor boost.
The Chocolate Coating:
- 2 cups semisweet chocolate chips – Rich and perfectly balanced.
- 1 tablespoon coconut oil – Helps the chocolate set with a glossy finish.
Optional Magic Touches:
- Chopped almonds – For an Almond Joy vibe.
- Sea salt flakes – For that sweet-salty perfection.
Substitutions I’ve Actually Tested:
- Instead of condensed milk: I once used coconut cream and powdered sugar — worked beautifully but slightly softer.
- For dairy-free: Dark chocolate plus coconut cream gave amazing results.
- Low sugar: Unsweetened coconut with sugar-free chocolate chips (my husband didn’t notice the swap!).
Time Investment That’s Actually Worth It
Let’s break it down:
- Prep Time: 10 minutes
- Chill Time: 20 minutes
- Total Time: 30 minutes
Here’s the thing — I love desserts that don’t keep me tied to the oven. These bars are no-bake and come together faster than any cookies I’ve ever made.
My Time-Saving Trick: I line my pan with parchment paper, so I can lift the whole batch out and cut into neat squares without fuss.
Step-by-Step Instructions
Step 1: Mix the Coconut Base
Combine shredded coconut, condensed milk, and vanilla in a bowl until sticky and well blended.
Diana’s Tip: If it feels too dry, add a teaspoon more condensed milk.
What to Watch For: Mixture should press together easily without crumbling.
Step 2: Shape and Chill
Press mixture firmly into a parchment-lined 8×8 pan. Chill for 10 minutes.
Diana’s Tip: Wet your fingers slightly to press it down smoothly.
What to Watch For: Base should feel firm before adding chocolate.
Step 3: Melt the Chocolate
Melt chocolate chips with coconut oil until smooth.
Diana’s Tip: I microwave in 20-second bursts, stirring each time. My grandmother would’ve used her double boiler — both work perfectly.
What to Watch For: Don’t overheat, or chocolate may seize.
Step 4: Coat and Set
Pour chocolate over chilled coconut base, smoothing evenly. Sprinkle almonds or sea salt if using. Chill 20 minutes until firm.
Diana’s Tip: For thicker chocolate, use an extra 1/2 cup of chips.
What to Watch For: Chocolate should snap cleanly when cut.
Why I Feel Good About Serving These
Per Bar (makes ~16):
- Calories: ~210
- Carbs: 18g
- Protein: 2g
- Fat: 14g
- Fiber: 3g
These bars feel indulgent, but they’re portion-friendly and made with simple pantry ingredients. When I’m craving candy, these are a better choice than store-bought.
Making These Even Better for You
For Lower Carbs: Use unsweetened coconut and sugar-free chocolate chips — I’ve tested it, and it’s still delicious.
For Dairy-Free Friends: Swap condensed milk for coconut cream, and use dark chocolate.
To Boost Protein: Stir in a scoop of vanilla protein powder — my husband actually preferred this version!
How I Love to Serve These
For Weeknight Treats: I keep a stash in the fridge for quick after-dinner bites.
When Entertaining: I cut them into bite-sized cubes and serve on a platter with strawberries. At one party, they disappeared before the brownies.
Seasonal Twist: In winter, I add crushed peppermint candy on top. In summer, I pair them with fresh pineapple slices for a tropical twist.
My Go-To Combinations:
- With hot coffee in the morning.
- As a sweet bite after dinner.
- Wrapped in parchment as lunchbox surprises for the kids.
Learn from My Kitchen Disasters
Mistake #1: Using too much condensed milk.
- Result: Bars never set.
- Fix: Stick to 1/2 cup and chill longer if needed.
Mistake #2: Cutting before chocolate hardened.
- Result: Messy, gooey squares.
- Fix: Always chill until chocolate is firm.
Mistake #3: Using sweetened coconut with milk chocolate.
- Result: Overly sweet.
- Fix: Balance sweetness with semisweet chocolate.
Meal Prep Magic with These Bars
Short-Term Storage: Keep in airtight container at room temp for 2 days or in the fridge for 1 week.
Freezer-Friendly: Freeze up to 2 months wrapped individually.
My Sunday Prep Routine: I often make a double batch, freeze half, and keep half in the fridge. The frozen ones thaw in 10 minutes for instant treats.
Reheating Like a Pro: These are best chilled or at room temp — no reheating needed.
Why This Recipe Earned a Permanent Spot in My Kitchen
Here’s why these bars are here to stay:
- Ready in 30 minutes.
- Simple, pantry-friendly ingredients.
- No-bake convenience.
- Family-approved every time.
Every time I make these, I think of my grandmother sprinkling coconut over chocolate cookies. She taught me that great desserts don’t need to be complicated — just made with love. I’m telling you, once you try these quick and easy coconut chocolate bars, you’ll make them again and again.
Ready to give them a try? Share your creations on Facebook (Cooking with Diana) or tag me on Pinterest (@DianaRecipes). And if you love these, don’t miss my No-Bake Peanut Butter Oat Bars — another quick and dreamy treat!
Your Questions Answered
Q: Can I make these ahead of time?
A: Yes, they keep beautifully for up to a week in the fridge.
Q: What if I don’t have condensed milk?
A: Coconut cream with powdered sugar works in a pinch.
Q: How do I keep the chocolate from cracking?
A: Let bars sit at room temp for 5 minutes before cutting.
Q: Can these be frozen?
A: Absolutely! I freeze individual squares for easy snacks.
Q: Are these too sweet?
A: Use unsweetened coconut and semisweet or dark chocolate for balance.
Q: Can I make them nutty?
A: Yes — almonds, pecans, or even pistachios are delicious on top.
Q: Can kids help make these?
A: Definitely — my kids love pressing the coconut layer and sprinkling toppings.

