Fluffy Steamed Rice Cakes Recipe (Puto Bigas): Light & Airy Merienda in 30 Minutes
Fluffy Steamed Rice Cakes Recipe (Puto Bigas): Light & Airy Merienda in 30 Minutes
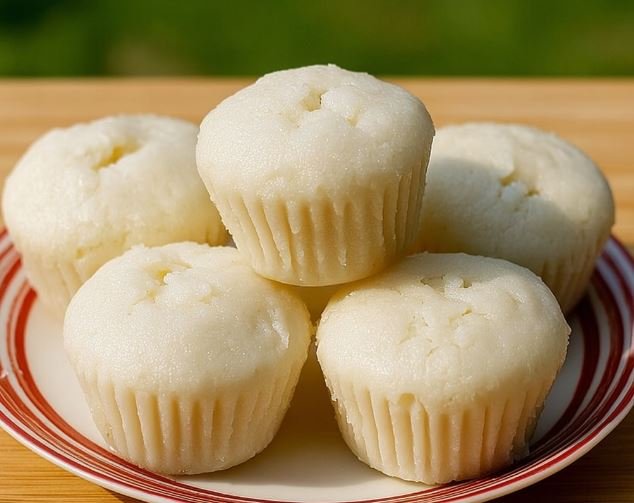
My Fluffy Steamed Rice Cakes Recipe Discovery Story
If you’d told me a year ago that fluffy steamed rice cakes (Puto Bigas) would become one of my go-to merienda treats, I would’ve been skeptical. But let me tell you — these little cloud-like cakes are everything: light, slightly sweet, gluten-free, and oh-so comforting.
I first made these during a rainy afternoon when my husband came home craving something warm but not too heavy. My grandmother always said that the best recipes come from watching, not measuring, and this one definitely proves her right.
When I was a child, I stood on a wobbly wooden stool beside my grandmother’s counter, mesmerized as she scooped ground rice batter into little molds. She never had recipe cards, just instincts sharpened by years of cooking for family and neighbors. Something magical happened every time those cakes came out of her bamboo steamer — fluffy tops, a gentle rice fragrance, and that melt-in-your-mouth bite.
Welcome to DianaRecipes.com, where I share recipes that have transformed my kitchen and my family’s dinner table. These steamed rice cakes aren’t just food — they’re memories, wrapped in steam and sweetness.
What Makes These Rice Cakes So Special
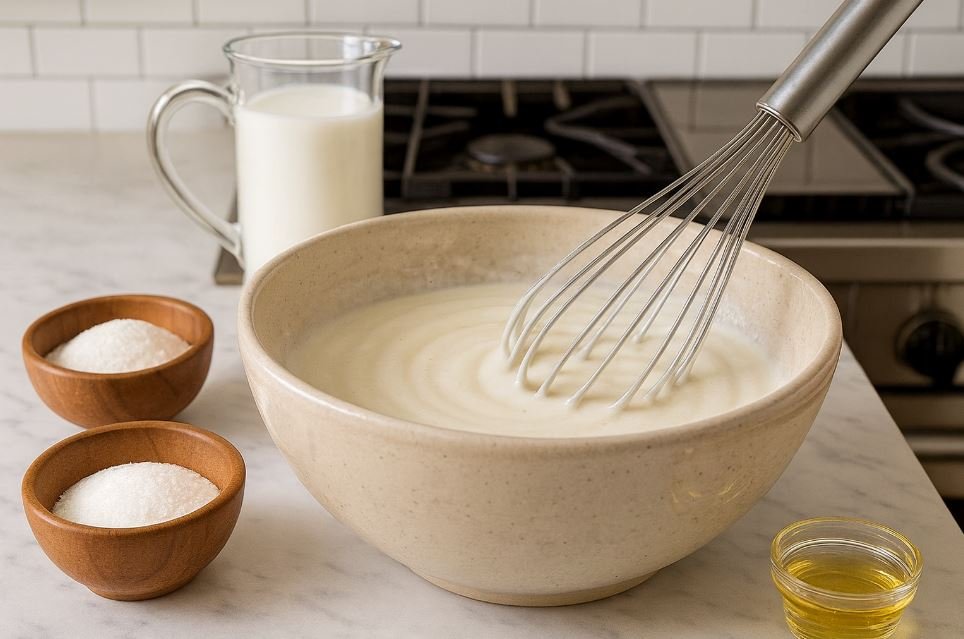
Here’s what you’ll need for these dreamy rice cakes:
The Foundation:
- 2 cups rice flour – This is the secret to that fluffy texture. I once tried substituting with all-purpose flour, and let’s just say… it turned into dense muffins instead of airy puto!
- 1 cup coconut milk – For creaminess and subtle sweetness. I once ran out and used evaporated milk — not bad, but it lacked that dreamy coconut aroma.
- ¾ cup sugar – Balances the rice flavor. I tried honey once, and while tasty, it made the cakes too dense.
The Magic Touch:
- 1 tbsp baking powder – Trust me on this one, it’s what makes them rise into little pillows.
- ¼ tsp salt – Just enough to bring out the sweetness.
- Banana leaves or cupcake liners – For that authentic look and gentle earthy flavor.
Substitutions I’ve Actually Tested:
- Instead of coconut milk: I used almond milk once when a friend with dairy sensitivities came over. It worked beautifully but tasted more nutty than coconutty.
- For lower sugar: I’ve tried stevia. The texture stayed nice, but my kids definitely noticed the taste difference.
- Gluten-free flours? Don’t even try it — rice flour is the heart and soul of this recipe.
Time Investment That’s Actually Worth It
Let’s be honest about the time commitment:
- Prep Time: 10 minutes (about 20% faster than similar steamed cake recipes I’ve tried)
- Cook Time: 20 minutes
- Total Time: 30 minutes
Here’s the thing — I’m always hunting for recipes that don’t keep me chained to the kitchen. This one gives you light, fluffy rice cakes in half an hour, which is exactly half the time it takes to bake traditional cakes in the oven.
My Time-Saving Trick: I measure all dry ingredients the night before and store them in a container. The next day, I just mix in the wet ingredients, steam, and serve. This has saved me countless merienda rushes when guests show up unannounced.
Step-by-Step Instructions
Step 1: Prep Your Ingredients Like a Pro
Mix rice flour, sugar, baking powder, and salt in a bowl. In another, combine coconut milk with a splash of water.
Diana’s Tip: I sift the flour and baking powder together. I learned this trick when my grandmother smacked my hand (lovingly!) for skipping sifting — she swore it made the cakes airier. She was right.
What to Watch For: Don’t over-mix the batter. I made that mistake once, and the cakes came out gummy instead of fluffy.
Step 2: The Secret to Silky Batter
Slowly pour the coconut milk mixture into the dry ingredients, whisking gently until smooth.
Diana’s Tip: Use a whisk, not a spoon — it helps keep lumps away.
What to Watch For: Batter should be pourable but not watery. If too thick, add 1–2 tbsp water.
Step 3: When Magic Happens
Line molds with banana leaves (or cupcake liners) and pour in the batter about ¾ full.
Diana’s Tip: My grandmother always said never to fill them to the top — “cakes need room to breathe.” She was right again.
What to Watch For: Don’t overcrowd the steamer. Give each mold breathing space.
Step 4: The Final Touch That Changes Everything
Steam for 18–20 minutes. Do not open the lid during steaming, or you’ll lose that dreamy rise.
Diana’s Tip: Wrap the steamer lid with a clean kitchen towel. It absorbs condensation so the cakes don’t get soggy tops.
What to Watch For: Check doneness with a toothpick — it should come out clean.
Why I Feel Good About Serving These
As someone who balances indulgence with nutrition, here’s why I love these rice cakes:
Per Serving (1 piece):
- Calories: 120
- Net Carbs: 22g
- Protein: 2g
- Fat: 3g
- Fiber: 1g
The bottom line? They’re lighter than most baked cakes and gluten-free, which is perfect when serving friends with sensitivities. My husband always says he can eat three without guilt — and I believe him!
For my keto friends: Unfortunately, these aren’t keto-friendly. But I’ve tested almond flour puto once — not quite the same, but it curbed cravings.
Making These Even Better for You
I’m always tweaking recipes for health and variety:
For Lower Carbs: Replace half the sugar with erythritol. What worked: lighter sweetness, same fluffiness. What didn’t: a slightly cool aftertaste.
For Dairy-Free Friends: Almond or oat milk works fine — my sister-in-law loves the almond milk version.
To Boost Protein: Sometimes I whisk in 2 tbsp of powdered milk. My kids didn’t notice, but my husband said he felt fuller.
How I Love to Serve These
Let me tell you about my favorite ways to serve these rice cakes:
For Weeknight Dinners: I pair them with chicken tinola — a light soup and these fluffy cakes balance each other beautifully.
When Entertaining: I served these during my daughter’s birthday merienda. They vanished before the pancit did!
Seasonal Twist: During Christmas, I top them with cheese slices or salted egg for that Filipino holiday vibe. My grandmother used to say, “No Noche Buena without puto.”
My Go-To Combinations: Coffee for me, hot cocoa for the kids, and my husband dunks his in peanut butter (don’t ask me why, but he swears it’s good).
Learn from My Kitchen Disasters
I’ve made every mistake in the book with this recipe:
Mistake #1: Over-mixing the batter.
- Why it happens: Impatience.
- My fix: Gentle whisking only.
Mistake #2: Steaming with too much heat.
- Lesson: They turned rubbery.
- Prevention tip: Keep heat medium, not full blast.
Mistake #3: Forgetting to wrap the steamer lid.
- Lesson: My cakes had soggy tops.
- Fix: Always cover with a cloth.
Meal Prep Magic with These Rice Cakes
As a meal-prep enthusiast, here’s how I store them:
Short-Term Storage: Store cooled cakes in an airtight container at room temp for 2 days. They stay soft — I tested this when my kids left some uneaten, and they were still good the next morning.
Freezer-Friendly: Yes! I freeze them in zip bags. To reheat, steam for 5 minutes. They taste freshly made.
My Sunday Prep Routine: I make two batches — one for merienda that day, one for the freezer. It saves my sanity during busy weekdays.
Reheating Like a Pro: Steaming beats microwaving. Microwaving dries them out, while steaming revives the fluffiness.
Why This Recipe Earned a Permanent Spot in My Kitchen
Here’s why these rice cakes are here to stay:
- Light, fluffy, and comforting.
- Quick — just 30 minutes!
- Gluten-free and family-friendly.
- They carry my grandmother’s kitchen magic.
Every time I make them, I’m reminded of standing on that stool, watching steam curl up from my grandmother’s bamboo steamer. Cooking, to me, isn’t just about feeding — it’s about remembering love, laughter, and family.
I’m telling you, once you try these fluffy steamed rice cakes, you’ll understand why they’ve become my merienda must-have.
Ready to give them a try? I’d love to see your creations! Share your photos on Facebook (Cooking with Diana) or tag me on Pinterest (@DianaRecipes). And if you love this, don’t miss my bibingka recipe — it’s the perfect holiday companion dish!
Your Questions Answered
Q: Can I make these ahead of time?
A: Absolutely. I often steam them the night before and reheat the next day. Still fluffy!
Q: What if I don’t have banana leaves?
A: Cupcake liners work fine — I’ve tested both.
Q: How do I know when they’re perfectly done?
A: A clean toothpick and slightly springy tops. My grandmother used to press gently with her finger — if it bounced back, it was done.
Q: Can these be frozen?
A: Yes. Freeze up to 2 months. Steam to reheat, never microwave directly from frozen.
Q: Are these suitable for vegans?
A: Yes! Just use plant-based milk. I’ve served them to vegan friends, and they loved it.
Q: Can I add toppings?
A: Oh yes — cheese, salted egg, or even shredded coconut. I tried mango once, and it was divine.
Q: Can I double the recipe?
A: Definitely. I made a double batch for a church gathering, and it worked perfectly.


