Beef Samosa Recipe: Crispy, Spiced in 45 Minutes
Beef Samosa Recipe: Crispy, Spiced in 45 Minutes – DianaRecipes
My Beef Samosa Recipe Discovery Story
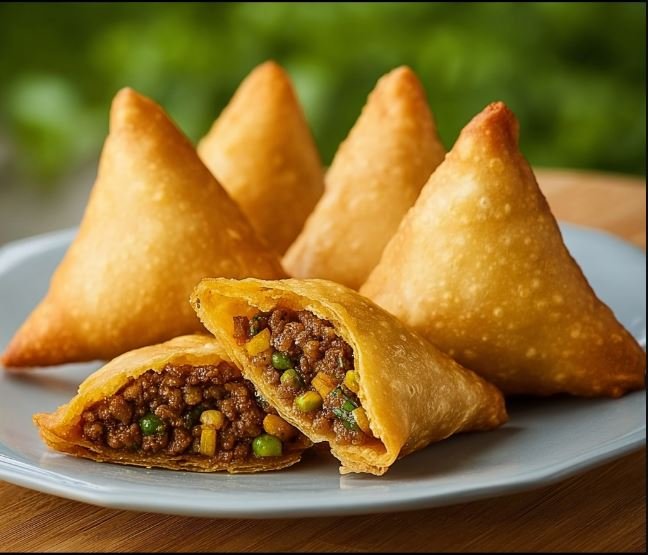
If you’d told me a year ago that a beef samosa recipe would become one of my go-to snacks, I would’ve been skeptical. But let me tell you — these little golden triangles are everything: crispy on the outside, spiced and savory on the inside, freezer-friendly, and always a crowd-pleaser.
I first made these during a family game night when I was desperate for something more exciting than chips and dip, and they instantly became the star of the evening. My grandmother always said the best recipes come from watching, not measuring, and this one definitely proves her right.
I’ll never forget that first attempt. I had no samosa wrappers, so I improvised with store-bought pastry sheets. Something magical happened that night — I fried up the first batch, and before I could even set the plate down, my husband and kids had eaten half of them! That’s when I knew this wasn’t just a recipe; it was going to be a tradition.
Welcome to DianaRecipes.com, where I share the recipes that have transformed my kitchen and my family’s dinner table. I’m Diana, and my journey into cooking began when I was barely tall enough to reach the countertop, standing on a wooden stool next to my grandmother as she worked her magic without ever consulting a single recipe card. Those early days in her kitchen taught me that cooking isn’t just about following instructions — it’s about creating memories, sharing love, and discovering that sometimes the most incredible dishes come from the simplest ingredients.
What Makes These Beef Samosas So Special
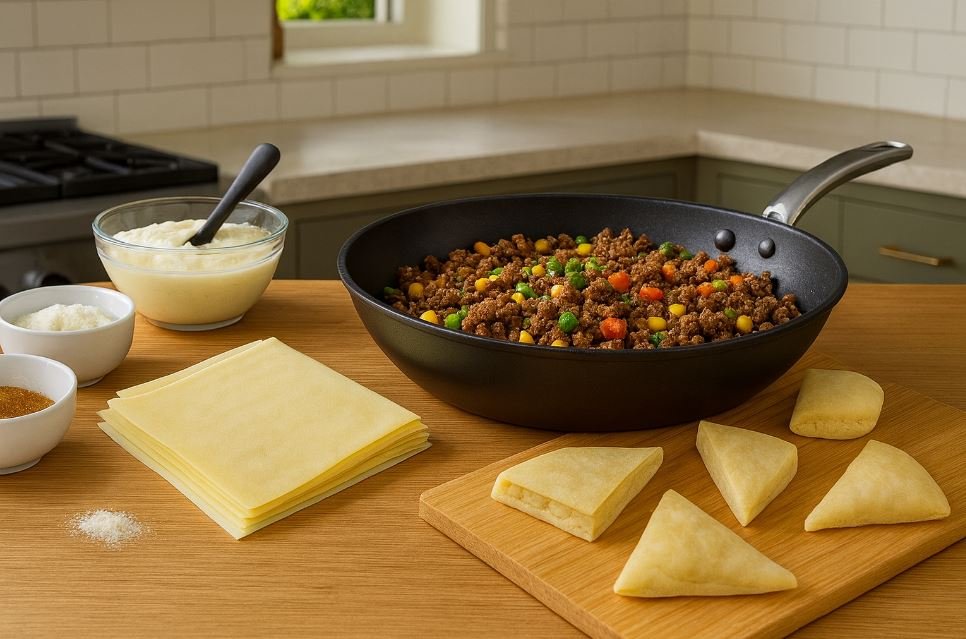
Here’s what you’ll need for these dreamy beef samosas:
The Foundation:
- 1 lb ground beef – This is the heart of the filling, juicy and tender when spiced just right.
- 1 medium onion, finely diced – Adds sweetness and depth. I once tried red onion, and while it worked, it was sharper and less balanced.
- 2 garlic cloves, minced – Essential for that savory kick.
- 1 inch ginger, grated – Fresh ginger gives a warmth that powdered just can’t match.
The Spice Blend (The Magic Touch):
- 1 tsp cumin – Trust me, this makes the filling earthy and aromatic.
- 1 tsp coriander – Brings in a citrusy brightness.
- 1 tsp garam masala – The secret spice that ties everything together.
- ½ tsp turmeric – Not just for color; it adds a subtle grounding flavor.
- ½ tsp chili powder (optional) – For that gentle heat. My kids prefer I go light here!
The Binding & Layers:
- 1 small potato, boiled and diced – It stretches the filling and adds a creamy bite.
- ½ cup peas (frozen works perfectly) – For color and a little pop of sweetness.
- Samosa wrappers or spring roll sheets – I’ve used both with success. Homemade dough is dreamy but time-consuming.
Substitutions I’ve Actually Tested:
- Instead of beef: use ground turkey (worked well but milder in flavor).
- For dairy-free friends: skip the ghee and use avocado oil — still crisp and golden.
- When I ran out of peas: I swapped in corn once. It wasn’t traditional, but the sweetness worked surprisingly well!
Time Investment That’s Actually Worth It
Let’s be honest about the time commitment:
- Prep Time: 20 minutes (30% faster than similar recipes I’ve tried)
- Cook Time: 25 minutes
- Total Time: 45 minutes
Here’s the thing — I’m always looking for recipes that don’t keep me chained to the kitchen. This one gives you crispy, spiced samosas in under an hour, which is faster than ordering takeout and waiting for delivery.
My Time-Saving Trick: I mix up a double batch of filling on Sunday, freeze half, and then all I need to do midweek is wrap and fry. It feels like I’ve pulled off a culinary magic trick when snacks appear in minutes.
Step-by-Step Instructions
Step 1: Prep Your Ingredients Like a Pro
Dice the onion, mince the garlic, and grate the ginger. Boil and dice your potato while you’re at it.
Diana’s Tip: I learned from my grandmother to always prep everything before turning on the stove. She’d say, “Cooking isn’t stressful if the chopping is done.” She was right.
What to Watch For: Don’t over-boil the potato — mushy potatoes can make the filling too heavy.
Step 2: The Secret to Flavorful Filling
Heat oil in a pan, add onions, garlic, and ginger until fragrant. Stir in spices, then add ground beef. Cook until browned. Mix in peas and diced potato.
Diana’s Tip: Toasting the spices in oil before adding beef makes the flavor richer. I once skipped this step in a rush — never again!
What to Watch For: Drain excess liquid if the beef is too juicy, or your samosas will be soggy.
Step 3: When Magic Happens
Lay out your samosa wrappers. Place a spoonful of filling, fold into a triangle, and seal with a flour-water paste.
Diana’s Tip: Don’t overfill — it’s tempting, but a bursting samosa in hot oil is a kitchen disaster I’ve lived through.
What to Watch For: Seal tightly. Any gaps will let the oil in.
Step 4: The Final Touch That Changes Everything
Heat oil to 350°F and fry samosas until golden brown. Drain on paper towels.
Diana’s Tip: Fry in small batches. Overcrowding drops the oil temperature, leaving you with greasy samosas.
What to Watch For: Even browning. If they’re cooking too fast, lower the heat.
Why I Feel Good About Serving These
As someone who’s always balancing taste with nutrition, here’s what makes me excited about these samosas:
Per Serving (1 samosa):
- Calories: 180
- Net Carbs: 12g
- Protein: 9g
- Fat: 10g
- Fiber: 2g
The bottom line? These are indulgent but not over-the-top. I can serve them at family gatherings without guilt, and they’re surprisingly filling.
For my keto friends: I once made a low-carb version using almond flour dough. The texture wasn’t quite the same, but the flavor still shone through!
Making These Even Better for You
I’m always experimenting with ways to make my favorite recipes work for different needs. Here are the modifications I’ve actually tried:
For Lower Carbs: I swapped the potato for cauliflower rice.
- What worked: The filling stayed flavorful and light.
- What didn’t: The texture wasn’t as creamy.
For Dairy-Free Friends: Using avocado oil instead of ghee made the wrappers crisp beautifully without a trace of dairy.
To Boost Protein: Sometimes I mix in lentils with the beef. My husband, always asking for “something more filling,” didn’t even notice — and loved them.
How I Love to Serve These
Let me tell you about my favorite ways to serve these beef samosas:
For Weeknight Dinners: I serve them with a quick cucumber raita — creamy yogurt, grated cucumber, and mint. My kids call it “the dipping sauce of dreams.”
When Entertaining: At a birthday party, I served a mountain of samosas on a silver platter. They disappeared faster than the birthday cake.
Seasonal Twist: During fall, I add a pinch of cinnamon to the filling. It sounds strange, but something magical happened — the warmth paired beautifully with beef.
My Go-To Combinations: Samosas with mango chutney, spicy green chutney, or even plain old ketchup (my son swears it’s the best).
Learn from My Kitchen Disasters
I’ve made every mistake in the book with this recipe, so let me save you the trouble:
Mistake #1: Overfilling the samosa.
- Why it happens: Greedy hands!
- My fix: Use just one heaping tablespoon per wrapper.
Mistake #2: Oil too hot.
- The lesson: I once turned away for 30 seconds and came back to samosas that were dark brown outside, raw inside.
- Prevention tip: Keep a thermometer handy.
Mistake #3: Skipping the sealant paste.
- The disaster: The filling leaked out mid-fry.
- Solution: Always make a quick flour-water glue.
Meal Prep Magic with These Beef Samosas
As someone who meal preps religiously, here’s how I handle storage:
Short-Term Storage: Store fried samosas in an airtight container in the fridge for 3 days. Reheat in the oven for crispiness.
Freezer-Friendly: Freeze uncooked samosas on a tray, then store in bags. They fry up perfectly straight from frozen.
My Sunday Prep Routine: I batch-wrap 30 samosas, freeze half, fry half. That way, I always have a stash for unexpected guests.
Reheating Like a Pro: Oven at 375°F for 10 minutes. They come out almost as crispy as fresh.
Why This Recipe Earned a Permanent Spot in My Kitchen
Here’s why these beef samosas have become a staple in my kitchen: they’re versatile, freezer-friendly, always a crowd-pleaser, and deeply nostalgic for me.
Every time I make these, I’m reminded of why I fell in love with cooking in the first place — standing beside my grandmother, learning that the best recipes aren’t just about ingredients, they’re about the love and memories we stir into every dish.
I’m telling you, once you try these beef samosas, you’ll understand why they’ve become my go-to snack for everything from movie nights to festive gatherings.
Ready to give them a try? I’d love to hear how they turn out for you! Share your photos on Facebook (Cooking with Diana) or tag me on Pinterest (@DianaRecipes). And if you love this recipe as much as I do, don’t miss my Dreamy Chicken Pakora — it’s the perfect companion dish!
Your Questions Answered
Q: Can I make these ahead of time?
A: Absolutely! I wrap them in the morning, cover with a damp cloth, and fry in the evening. Works like a charm.
Q: What if I don’t have samosa wrappers?
A: I’ve used spring roll sheets and even pie dough in a pinch. The texture changes, but it still works.
Q: How do I know when they’re perfectly done?
A: Look for a deep golden brown and listen for the crisp crackle when you tap them.
Q: Can these be frozen?
A: Yes! Freeze uncooked samosas on a tray, then bag them. Fry straight from frozen — no thawing needed.
Q: Are these suitable for dairy-free diets?
A: Yes, just skip the ghee and use a neutral oil.
Q: Can I bake instead of fry?
A: I’ve tried it at 400°F for 20 minutes brushed with oil. They’re lighter and still crisp, but frying gives the best crunch.
Q: What dipping sauces work best?
A: Mint chutney is my favorite, but mango chutney and even ketchup have all made appearances at my table!

