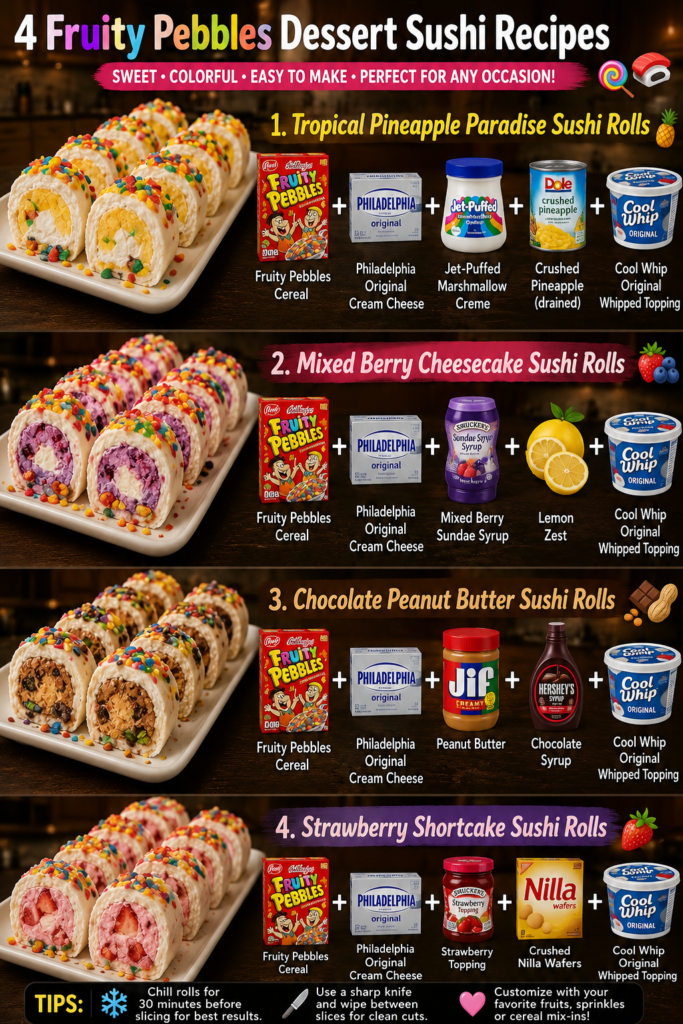
Fruity Pebbles Dessert Sushi Rolls
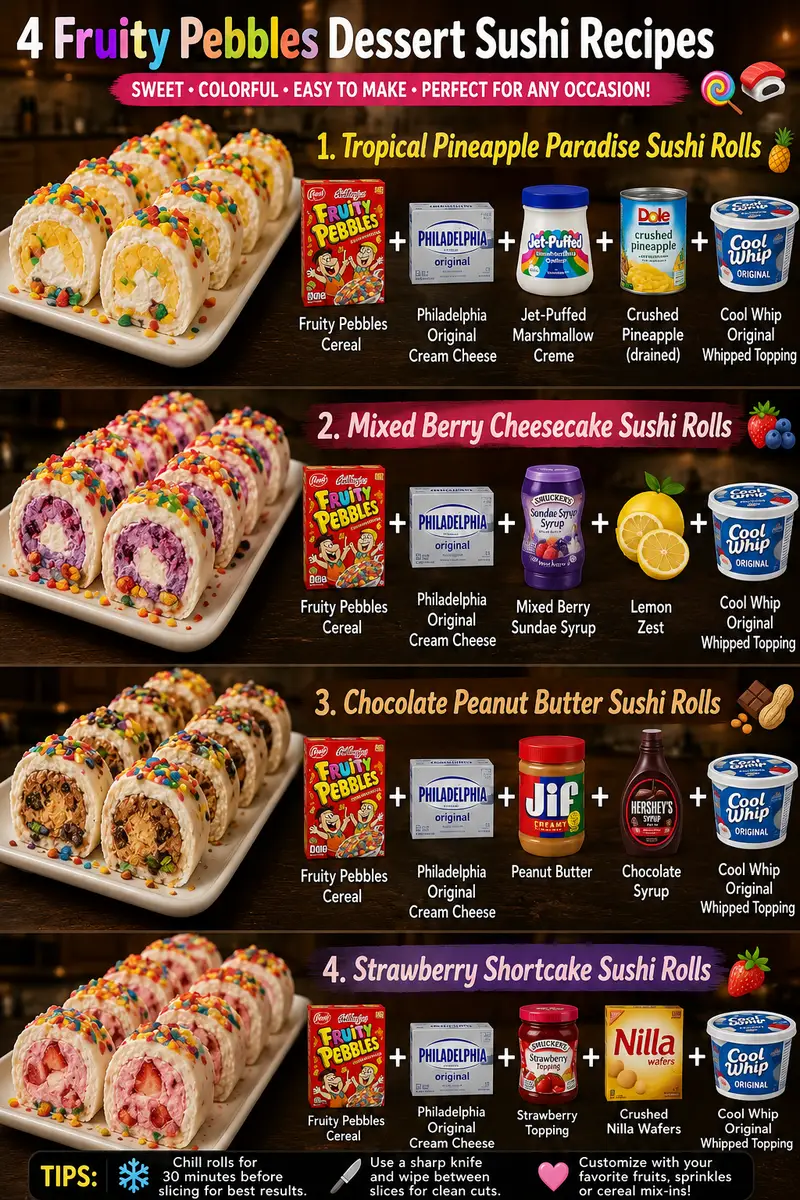
A Playful, No-Bake Treat That Looks Fancy But Tastes Like Childhood
I first made Fruity Pebbles Dessert Sushi Rolls on a rainy Tuesday afternoon when my kids were bouncing off the walls and I had exactly zero energy to turn on the oven. I was standing in my pantry, staring at a box of Fruity Pebbles that had been sitting there for weeks, when it hit me: what if I rolled them up like sushi, but with cream cheese and fruit instead of fish? My daughter watched me slice the first roll, her eyes got huge, and she said, “Mom, this is the coolest thing you’ve ever made.” That’s when I knew I was onto something.
These Fruity Pebbles Dessert Sushi Rolls are exactly what they sound like—a playful, no-bake dessert that mimics the look of sushi but tastes like pure fun. They’re made with a soft, pliable base (usually a tortilla or flatbread), spread with creamy filling, rolled tight, and sliced into pretty pinwheels. The Fruity Pebbles coat the outside, giving you that colorful crunch and nostalgic cereal flavor that makes them instantly recognizable and totally Instagram-worthy. I’ve made them for school parties, family gatherings, and quiet afternoons when I just need something sweet that doesn’t require baking.
The best part? They’re genuinely simple. No special skills needed. If you can spread, roll, and slice, you can make these. They’re perfect for anyone who loves no-bake desserts, wants something fun to do with kids, or needs a quick treat that looks way more impressive than the effort it takes. Follow me on DianaCookingE on Pinterest for more easy dessert ideas like this one.
Why You’ll Love This Recipe
I love these for so many reasons, and I think you will too. First, there’s the visual factor—they genuinely look like sushi, and that alone makes people smile. Second, they’re completely customizable. Want to swap the fruit? Done. Prefer a different spread? Easy. Need them dairy-free? I’ve got you covered with alternatives.
They’re also ridiculously fast. You’re looking at about 15 minutes of hands-on time, plus a little chill time in the fridge. No oven, no mixer, no stress. And honestly? They taste like a better version of the cereal you ate as a kid—creamy, crunchy, sweet, and just a little bit fancy.
They’re also a great way to use up fruit that’s about to go soft, and they freeze beautifully, which means you can make a batch on Sunday and have grab-and-go dessert all week. That’s my kind of meal prep.
Ingredients for Fruity Pebbles Dessert Sushi Rolls
- 2 large flour tortillas (about 10 inches each; I use regular whole wheat or plain white)
- 1/2 cup cream cheese, softened to room temperature
- 2 tablespoons butter, softened
- 1/4 cup powdered sugar
- 1/2 teaspoon vanilla extract
- 1 cup Fruity Pebbles cereal, crushed slightly (not into powder—you want some texture)
- 1 medium banana, sliced into thin rounds
- 1/2 cup fresh strawberries, sliced thin
- 1/4 cup fresh blueberries
- 2 tablespoons honey or jam (optional, for “gluing” the rolls closed)
Diana’s Tip: Room-temperature cream cheese is non-negotiable here. Cold cream cheese will tear your tortilla and make spreading a nightmare. I usually take mine out of the fridge about 20 minutes before I start. Also, don’t crush the Fruity Pebbles too much—you want those little colorful pebbles to stay visible and crunchy, not turn into fine crumbs.
Optional Add-Ins and Variations
This is where you get to play. I’ve tested quite a few variations, and here’s what works beautifully:
- Nutella or chocolate spread mixed into the cream cheese base for chocolate lovers
- Diced mango or pineapple instead of strawberries for a tropical vibe
- Mini chocolate chips sprinkled into the filling before rolling
- Sprinkles or edible glitter mixed with the Fruity Pebbles for extra sparkle
- A pinch of cinnamon in the cream cheese mixture for warmth
- Marshmallow fluff for a lighter, airier filling (use less, about 1/4 cup mixed with the cream cheese)
Step-by-Step Method
Step 1: Make Your Filling
In a small bowl, beat together the softened cream cheese, butter, powdered sugar, and vanilla extract until it’s smooth and fluffy. This should take about 2 minutes with a hand mixer or a solid minute of vigorous stirring. You’re looking for something that spreads easily but still holds its shape. If it feels too stiff, add a tiny splash of milk. If it’s too soft, refrigerate it for 5 minutes.
Diana’s Tip: I like to taste this filling straight up because, honestly, it’s delicious and I want to make sure the sweetness level is right for me. Adjust the powdered sugar if you like it sweeter.
Step 2: Prepare Your Work Surface
Lay one tortilla flat on a cutting board or clean countertop. If it’s a little stiff, microwave it for about 10 seconds to make it more pliable. You want it soft enough to roll without cracking, but not so hot that it tears.
Step 3: Spread the Filling
Using an offset spatula or the back of a spoon, spread about 1/4 cup of the cream cheese mixture evenly across the tortilla, leaving about 1/2 inch bare on the edges. Don’t go all the way to the edge—that bare strip helps seal the roll.
Step 4: Arrange Your Fruit
Now comes the fun part. Arrange your fruit in a thin line across the center of the tortilla, running horizontally. I usually do a line of banana slices, then strawberries, then blueberries, but you can arrange them however you like. Don’t overstuff—this isn’t a burrito. A thin, delicate line works better and rolls more easily.
Step 5: Roll It Up
Starting from the side closest to you, roll the tortilla tightly, using your fingers to tuck the filling and fruit as you go. Keep the pressure gentle but firm. When you get to the end, you can seal it with a tiny dab of honey or jam, or just press gently so it sticks to itself.
What I Messed Up At First: I used to roll mine too loose, and they’d fall apart when I sliced them. Now I roll firmly but not aggressively—think of it like rolling a yoga mat, not wringing out a towel.
Step 6: Coat with Fruity Pebbles
Pour the crushed Fruity Pebbles into a shallow bowl or onto a plate. Roll your finished sushi roll in the cereal, pressing gently so the pebbles stick to the outside. This is where the magic happens—your roll suddenly looks like actual sushi.
Step 7: Chill and Slice
Place your coated rolls on a plate and refrigerate for at least 30 minutes. This helps everything set and makes slicing cleaner. Using a sharp, slightly wet knife (the moisture helps prevent the tortilla from tearing), slice each roll into 6 to 8 pieces. Wipe your knife between cuts if needed.
Diana’s Tip: A serrated bread knife works beautifully here. The gentle sawing motion is much kinder to the tortilla than a sharp downward chop.
Common Mistakes to Avoid
Using cold cream cheese. This is the number one thing that goes wrong. Cold cream cheese doesn’t spread—it tears your tortilla and makes you want to cry. Let it sit out for 20 minutes.
Overstuffing. I know it’s tempting to load up your roll, but restraint is your friend here. A thin line of fruit rolls better and slices cleaner than a thick pile.
Not chilling before slicing. Patience pays off. Those 30 minutes in the fridge make the difference between clean, pretty slices and a crumbly mess.
Crushing the cereal too much. You want texture and color. If you crush it into powder, it won’t coat properly and you’ll lose that satisfying crunch.
My Tested Substitutions
For the tortillas: I’ve used whole wheat, spinach, flavored wraps, and even thin crepes. They all work. Just make sure whatever you use is thin and pliable. Thick, stiff tortillas crack when you roll them.
For the cream cheese: Mascarpone works beautifully and gives a slightly richer taste. Greek yogurt mixed with a little butter is a lighter option. Dairy-free cream cheese works fine too, though it can be a bit softer—chill it longer before rolling.
For the fruit: Honestly, use whatever you have. Kiwi, mango, raspberries, peaches, even canned pineapple (drained well) all work. The only rule is to slice thin so they roll easily.
For the Fruity Pebbles: I’ve tested this with other colorful cereals like Rainbow Sprinkles cereal or even crushed Lucky Charms. They all work, though Fruity Pebbles have the best flavor and texture for this specific recipe.
How to Customize
Want to make these your own? Here’s how. If you love chocolate, mix a couple tablespoons of cocoa powder or Nutella into your cream cheese base. If you want them less sweet, reduce the powdered sugar to 2 tablespoons. If you’re making these for a crowd with different preferences, make multiple batches with different fillings—it’s so easy that you can do it in stages.
You can also make a “dessert sushi platter” by combining different versions on one board. Some with Fruity Pebbles, some with sprinkles, some with shredded coconut on the outside. It looks stunning and lets everyone pick their favorite.
Serving Ideas
I serve these as a standalone dessert, but they’re also gorgeous on a dessert platter with other sweets. They pair beautifully with coffee, tea, or cold milk. For parties, I arrange them on a wooden board with a small bowl of whipped cream or a drizzle of chocolate sauce on the side.
They’re also perfect for lunchboxes, afternoon snacks, or that moment at 3 p.m. when you need something sweet and fun. My kids love them as an after-school treat, and honestly, I do too.
Pro tip: If you’re serving these at a gathering, slice them just before serving so they stay fresh and pretty. They can sit out for a couple of hours, but they’re best within the first few hours of slicing.
Meal Prep and Storage
These keep beautifully in the fridge for up to 3 days in an airtight container. I like to layer parchment paper between the slices so they don’t stick together. You can also freeze them for up to 2 weeks—just thaw them in the fridge for about 30 minutes before serving.
I usually make my Fruity Pebbles Dessert Sushi Rolls on Sunday and portion them into small containers for grab-and-go snacks all week. They travel well, don’t require heating, and honestly feel a little fancy for a weekday treat.
Diana’s Tip: If you’re freezing them, wait to coat them with Fruity Pebbles until after they’ve thawed. The cereal stays crunchier that way.
Nutritional Breakdown
These are a treat, so I’m not going to pretend they’re health food. But they’re made with real fruit, cream cheese, and whole grain tortillas, so there’s some actual nutrition in there. One slice (assuming 6 slices per roll) has roughly 120 to 140 calories, depending on your exact ingredients. The fruit adds fiber and vitamins, and the whole grain tortilla adds a bit more fiber too.
If you want to lighten them up, use Greek yogurt instead of some of the cream cheese, or add extra fruit and less filling. You can also make them smaller—8 slices per roll instead of 6—to keep portions in check.
Frequently Asked Questions
Can I make these ahead of time?
Yes! You can make the uncoated rolls up to 2 days ahead, wrap them tightly in plastic wrap, and refrigerate. Coat them with Fruity Pebbles just before serving for the best crunch. You can also coat them ahead and slice just before serving.
Do these need to be refrigerated?
They’re best served chilled or at room temperature, and they should be refrigerated if you’re storing them. The cream cheese filling is dairy-based, so don’t leave them out for more than a couple of hours.
Can I use a different type of cereal?
Absolutely. Any colorful, crunchy cereal works. I’ve tested Lucky Charms, Rainbow Sprinkles cereal, and even crushed Cap’n Crunch. Fruity Pebbles are my favorite because they taste better and stay crunchier, but others work in a pinch.
What if my tortillas keep cracking when I roll them?
They’re probably too cold or too dry. Try warming them in the microwave for 10 to 15 seconds before rolling. You can also try a different brand or type of tortilla—some are more pliable than others.
Can I make these without cream cheese?
Yes. Mascarpone, ricotta, Greek yogurt mixed with a bit of butter, or even whipped coconut cream all work. Adjust the sweetness based on what you use.
Final Thoughts
Making Fruity Pebbles Dessert Sushi Rolls has become one of my favorite ways to impress people with minimal effort. They look fancy, they taste fun, and they bring a smile to everyone’s face. Whether you’re making them for a party, a special afternoon with your kids, or just because you want something sweet and a little bit silly, I hope you love them as much as I do.
The beauty of this recipe is that it’s forgiving, flexible, and genuinely fun to make. There’s no pressure, no baking disasters, and plenty of room to make it your own. So grab some cream cheese, slice up some fruit, and roll. I promise you’ll be amazed at how impressive these look and how easy they are to make.
Let me know how yours turn out—I’d love to hear what variations you try!
Recipe Card
Recipe Card
Name
Fruity Pebbles Dessert Sushi Rolls
Ingredients
- 2 large flour tortillas (about 10 inches each)
- 1/2 cup cream cheese, softened to room temperature
- 2 tablespoons butter, softened
- 1/4 cup powdered sugar
- 1/2 teaspoon vanilla extract
- 1 cup Fruity Pebbles cereal, crushed slightly
- 1 medium banana, sliced into thin rounds
- 1/2 cup fresh strawberries, sliced thin
- 1/4 cup fresh blueberries
- 2 tablespoons honey or jam (optional, for sealing)
Details
- Servings: 12 pieces (2 rolls) | Course: Dessert | Cuisine: American
Equipment
- Prep Time: 15 minutes | Chill Time: 30 minutes | Total Time: 45 minutes
Method
- In a small bowl, beat together the softened cream cheese, butter, powdered sugar, and vanilla extract until smooth and fluffy, about 2 minutes.
- Lay one tortilla flat on a cutting board. If stiff, microwave for 10 seconds to soften.
- Spread about 1/4 cup of the cream cheese mixture evenly across the tortilla, leaving 1/2 inch bare on the edges.
- Arrange fruit in a thin line across the center of the tortilla, running horizontally.
- Starting from the side closest to you, roll the tortilla tightly, tucking the filling and fruit as you go. Seal the end with a dab of honey or jam if needed.
- Pour crushed Fruity Pebbles into a shallow bowl. Roll the finished sushi roll in the cereal, pressing gently so the pebbles stick to the outside.
- Place the coated roll on a plate and refrigerate for at least 30 minutes.
- Using a sharp, slightly wet knife, slice each roll into 6 to 8 pieces. Wipe the knife between cuts if needed.
- Repeat steps 2 through 8 with the second tortilla.
- Serve chilled or at room temperature.
Nutrition (per slice, assuming 12 pieces)
- Calories: 130 | Protein: 2g | Carbs: 18g | Fat: 5g | Fiber: 1g
Notes
Storage: Keep in an airtight container in the refrigerator for up to 3 days. Freeze unsliced rolls for up to 2 weeks; thaw in the fridge before serving. Coat with Fruity Pebbles just before serving for maximum crunch. Room-temperature cream cheese is essential for easy spreading and rolling.
Fruity Pebbles Dessert Sushi Rolls
Ingredients
Method
- In a small bowl, beat together the softened cream cheese, butter, powdered sugar, and vanilla extract until smooth and fluffy, about 2 minutes.
- Lay one tortilla flat on a cutting board. If stiff, microwave for 10 seconds to soften and make it more pliable.
- Spread about 1/4 cup of the cream cheese mixture evenly across the tortilla, leaving 1/2 inch bare on the edges.
- Arrange fruit in a thin line across the center of the tortilla, running horizontally, combining banana slices, strawberries, and blueberries.
- Starting from the side closest to you, roll the tortilla tightly, tucking the filling and fruit as you go. Seal the end with a small dab of honey or jam if needed.
- Pour the crushed Fruity Pebbles into a shallow bowl and roll the finished sushi roll in the cereal, pressing gently so the pebbles stick to the outside.
- Place the coated roll on a plate and refrigerate for at least 30 minutes to help everything set.
- Using a sharp, slightly wet knife, slice each roll into 6 to 8 pieces, wiping the knife between cuts as needed.