No-Bake Chocolate Oat Bars: Chewy, Decadent Treats in 20 Minutes
No-Bake Chocolate Oat Bars: Chewy, Decadent Treats in 20 Minutes
My No-Bake Chocolate Oat Bars Discovery Story
If you’d told me a year ago that no-bake chocolate oat bars would become my go-to sweet treat, I would’ve been skeptical. But let me tell you — these bars are everything: chewy, chocolatey, quick, and utterly addictive.
I first made them on one of those scorching summer afternoons when turning on the oven felt like torture. My grandmother never made these, of course — she was more of a traditional baker. But she always told me, “A smart cook finds a way to make something special without sweating in the kitchen.” And let me tell you, these bars prove her right.
I remember the first batch I made: I pressed the oats and chocolate mixture into a pan, stuck it in the fridge, and crossed my fingers. When I cut the first square and drizzled it with melted chocolate, something magical happened. My kids rushed in from the backyard, noses twitching like little detectives, and within minutes, half the tray was gone. My husband called them “the best chocolate bars you’ve ever made.” And honestly? I think he was right.
Welcome to DianaRecipes.com, where I share recipes that make life easier and sweeter. These no-bake oat bars aren’t just treats — they’re lifesavers for busy moms, quick fixes for sudden cravings, and proof that sometimes the simplest recipes pack the most joy.
What Makes These Bars So Special
Here’s what you’ll need for these dreamy oat bars:
The Foundation:
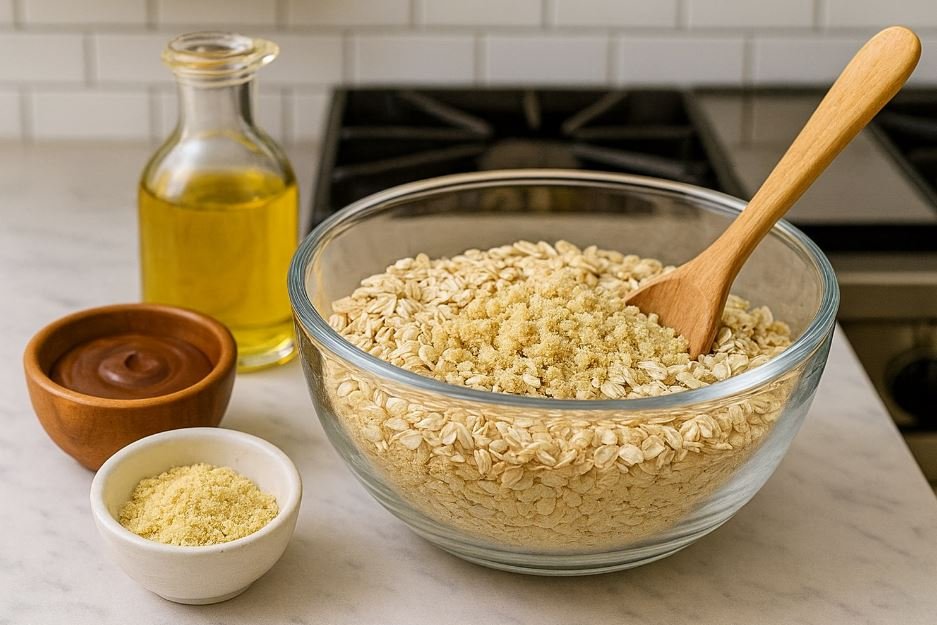
- 3 cups rolled oats – The heart of the bars. I once tried quick oats, but they turned out crumbly instead of chewy.
- 1 cup peanut butter – For creaminess and a rich base. I tested almond butter once, and it gave a nuttier, slightly more delicate flavor.
- ½ cup honey – Sweetens naturally and binds everything. I tried maple syrup once — delicious, but a bit softer in texture.
The Chocolate Magic:
- 1 ½ cups semi-sweet chocolate chips – The soul of the recipe. I once swapped with dark chocolate — richer, less sweet, and my husband’s favorite.
- 2 tbsp coconut oil – Makes the chocolate glossy and easy to drizzle.
Optional Touches:
- A sprinkle of sea salt – Trust me, it balances the sweetness beautifully.
- Shredded coconut or chopped nuts on top — for texture and flair.
Substitutions I’ve Actually Tested:
- Instead of honey: Maple syrup works, but the bars are softer.
- Instead of peanut butter: Almond butter is great, sunflower seed butter works for nut-free homes.
- For gluten-free: Use certified GF oats — I made this for a friend, and it turned out perfect.
Time Investment That’s Actually Worth It
Let’s be honest about the time commitment:
- Prep Time: 10 minutes
- Chill Time: 10–15 minutes
- Total Time: 20–25 minutes
Here’s the thing — I’m always on the lookout for recipes that fit into the chaos of daily life. These bars give you chewy, chocolatey goodness in less than half an hour, which is faster than running to the store for a dessert.
My Time-Saving Trick: I line my pan with parchment paper before pressing in the mixture. It makes lifting and slicing a breeze — no sticky mess, no crumbled bars.
Step-by-Step Instructions
Step 1: Prep Your Oats and Peanut Butter Base
Combine oats, peanut butter, and honey in a large bowl. Mix until everything is coated.
Diana’s Tip: Warm the peanut butter slightly before mixing — it blends like a dream.
What to Watch For: Make sure all oats are coated, or you’ll get dry bites.
Step 2: Press and Chill
Press the mixture firmly into a parchment-lined baking dish. Refrigerate for 10 minutes.
Diana’s Tip: Use the back of a spoon to smooth the top. My kids call it the “polished marble look.”
What to Watch For: Press hard enough so the bars stick together, but not so much that they’re rock solid.
Step 3: Melt the Chocolate
Melt chocolate chips with coconut oil over low heat or in the microwave.
Diana’s Tip: Stir every 30 seconds in the microwave. Burnt chocolate is heartbreaking — I’ve done it once, and I nearly cried.
What to Watch For: Smooth, glossy chocolate without lumps.
Step 4: Drizzle and Stack
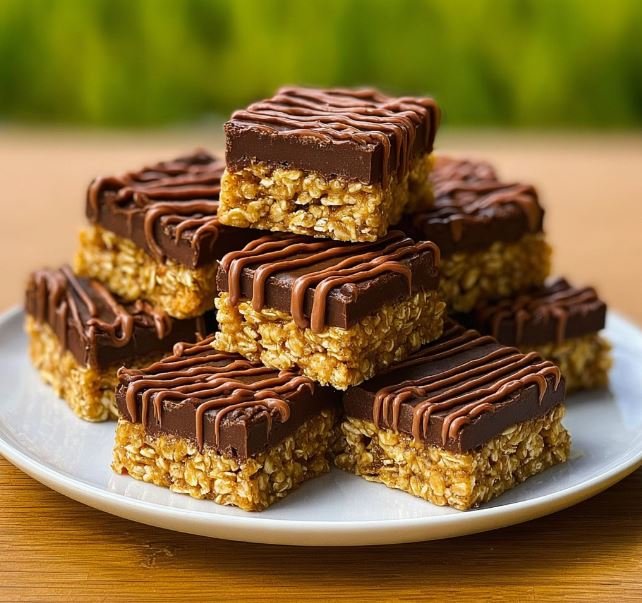
Drizzle melted chocolate over chilled bars, let set, then cut into squares. Stack them up for that picture-perfect look.
Diana’s Tip: Chill briefly again after drizzling for cleaner cuts.
What to Watch For: Don’t over-drizzle — you want balance, not a chocolate swamp.
Why I Feel Good About Serving These
Here’s the nutrition breakdown per bar (makes 16 squares):
- Calories: 210
- Net Carbs: 21g
- Protein: 6g
- Fat: 12g
- Fiber: 3g
The bottom line? They’re satisfying without being junky. The oats give fiber, the peanut butter adds protein, and the chocolate… well, the chocolate makes life better.
For my health-conscious friends: I’ve made these with dark chocolate and almond butter — less sweet, more protein, and my husband called it “grown-up fudge.”
Making These Even Better for You
I’m always experimenting with ways to lighten or boost my favorites:
For Lower Sugar: I’ve swapped half the honey for erythritol. Worked well, though the bars were slightly less chewy.
For Dairy-Free: Use vegan chocolate chips. I tried this once for a friend, and it was just as decadent.
To Boost Protein: Add 2 scoops of vanilla protein powder. My teenage son ate four in one sitting and said, “Mom, make these every week.”
How I Love to Serve These
Let me tell you about my favorite ways to serve these oat bars:
For Weeknight Desserts: I cut them small and serve with sliced strawberries. My daughter calls it her “fancy plate.”
When Entertaining: I stack them on a wooden board with fresh fruit. At a girls’ night, they disappeared faster than the wine!
Seasonal Twist: In fall, I add cinnamon to the oats. At Christmas, I top them with crushed peppermint candy for holiday sparkle.
My Go-To Combinations: Coffee for me, milk for the kids, and my husband crumbles his over vanilla ice cream (yes, he goes all out).
Learn from My Kitchen Disasters
I’ve made my fair share of mistakes with these bars:
Mistake #1: Melting chocolate too quickly.
- Why it happens: Rushing.
- My fix: Always low heat or microwave in short bursts.
Mistake #2: Skipping parchment paper.
- Lesson: I once had to scrape bars from the pan with a fork. Disaster!
- Fix: Always line the pan.
Mistake #3: Not chilling enough.
- Lesson: Bars fell apart mid-slice.
- Fix: Patience — chill at least 10 minutes.
Meal Prep Magic with These Bars
Here’s how I handle storage:
Short-Term Storage: Keep in the fridge up to 5 days. They stay chewy and perfect.
Freezer-Friendly: Yes! Freeze in layers with parchment paper between. They last 2 months. Just thaw in the fridge before serving.
My Sunday Prep Routine: I make a batch on Sundays. My kids grab them for after-school snacks all week. Saves me from hearing “Mom, I’m starving!” every afternoon.
Reheating Like a Pro: Honestly, no reheating needed. Straight from the fridge is best — chewy, cold, chocolatey bliss.
Why This Recipe Earned a Permanent Spot in My Kitchen
Here’s why these bars are a staple in my home:
- No oven required (summer lifesaver!).
- Chewy, chocolatey, and indulgent.
- Quick — ready in 20 minutes.
- Customizable with flavors and toppings.
Every time I slice into a chilled tray, I’m reminded that cooking doesn’t always mean sweating over a hot stove. Sometimes it’s about shortcuts that still feel homemade and special.
I’m telling you, once you try these no-bake chocolate oat bars with drizzle, you’ll wonder how you ever lived without them.
Ready to give them a try? Share your creations on Facebook (Cooking with Diana) or tag me on Pinterest (@DianaRecipes). And if you love these, don’t miss my no-bake cheesecake cups — another crowd-pleaser without turning on the oven!
Your Questions Answered
Q: Can I make these ahead of time?
A: Yes! I often make them at night, and they’re perfect the next day.
Q: What if I don’t have peanut butter?
A: Almond butter works beautifully, and sunflower seed butter makes them nut-free.
Q: How do I cut them cleanly?
A: Chill well, then use a sharp knife warmed under hot water. Wipe between cuts.
Q: Can these be frozen?
A: Absolutely. Freeze with parchment between layers, thaw in fridge.
Q: Are these suitable for vegans?
A: Yes, just use maple syrup and vegan chocolate chips.
Q: Can I add mix-ins?
A: Definitely — dried cranberries, coconut flakes, or chopped nuts all work.
Q: How do I make them less sweet?
A: Cut honey to ⅓ cup or use dark chocolate. I’ve done both, and they’re still delicious

