Texas Roadhouse Green Beans Recipe: Smoky, Savory Side in 25 Minutes
Texas Roadhouse Green Beans Recipe: Smoky, Savory Side in 25 Minutes
My Texas Roadhouse Green Beans Discovery Story
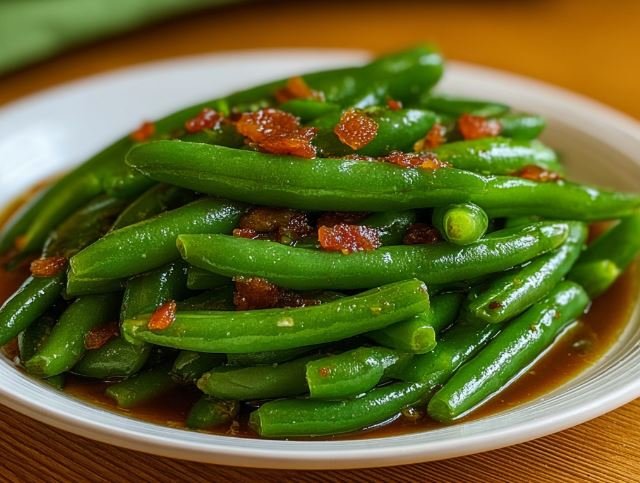
If you’d told me a year ago that a Texas Roadhouse green beans recipe would become one of my go-to side dishes, I would’ve been skeptical. Green beans? As the star? I would’ve laughed. But let me tell you — these aren’t your plain, boring beans. They’re smoky, savory, slightly tangy, and downright addictive.
I first tried recreating these during Thanksgiving last year. I was tired of the same old casserole and wanted something fresher but still indulgent. Something magical happened when I fried up some bacon, simmered green beans in a broth kissed with garlic, and served them at the table. Before the turkey was even carved, half the beans were gone. That’s when I knew this wasn’t just a holiday recipe — it was a keeper.
My grandmother didn’t make green beans like Texas Roadhouse, but she did believe that vegetables should never be boring. Standing on my wooden stool next to her, I watched her transform simple garden beans into something unforgettable with just butter, salt, and patience. She never used a recipe card, and yet her beans were always the first thing to disappear at family dinners. This version carries her same philosophy — simple ingredients, bold flavor, and no measuring spoons required if you trust your instincts.
What Makes These Green Beans So Special
Here’s what you’ll need for this dreamy side dish:
The Foundation:
- 1 lb fresh green beans, trimmed – I’ve used frozen in a pinch, but fresh always tastes brighter.
- 4 slices bacon, chopped – Smoky, salty, and the flavor backbone of this recipe.
- ½ small onion, diced – Adds sweetness and depth.
- 2 garlic cloves, minced – Because garlic makes everything better.
The Flavor Bath:
- 1 cup chicken broth – Infuses the beans with savory flavor.
- 1 tbsp apple cider vinegar – Balances richness with brightness.
- 1 tsp sugar – A touch of sweetness that makes everything pop.
- Salt and black pepper, to taste
Optional Add-Ins I’ve Tested:
- A dash of red pepper flakes for heat.
- Smoked paprika for extra depth.
- A splash of Worcestershire sauce — my husband swears it makes the beans taste “restaurant fancy.”
Substitutions I’ve Actually Tried:
- Bacon swap: Smoked turkey works if you want it lighter.
- Veggie twist: I tossed in mushrooms once, and they soaked up the broth beautifully.
- Vegetarian version: Skip bacon and use olive oil + liquid smoke for that smoky touch.
Time Investment That’s Actually Worth It
Let’s be honest about the time commitment:
- Prep Time: 10 minutes (trimming beans and chopping bacon)
- Cook Time: 15 minutes
- Total Time: 25 minutes
Compared to fussy casseroles, this is a side dish that actually respects your time. Plus, it tastes like it simmered for hours.
My Time-Saving Trick: I prep green beans the night before and keep them in a zip bag in the fridge. Come dinner, they’re ready to drop into the skillet.
Step-by-Step Instructions
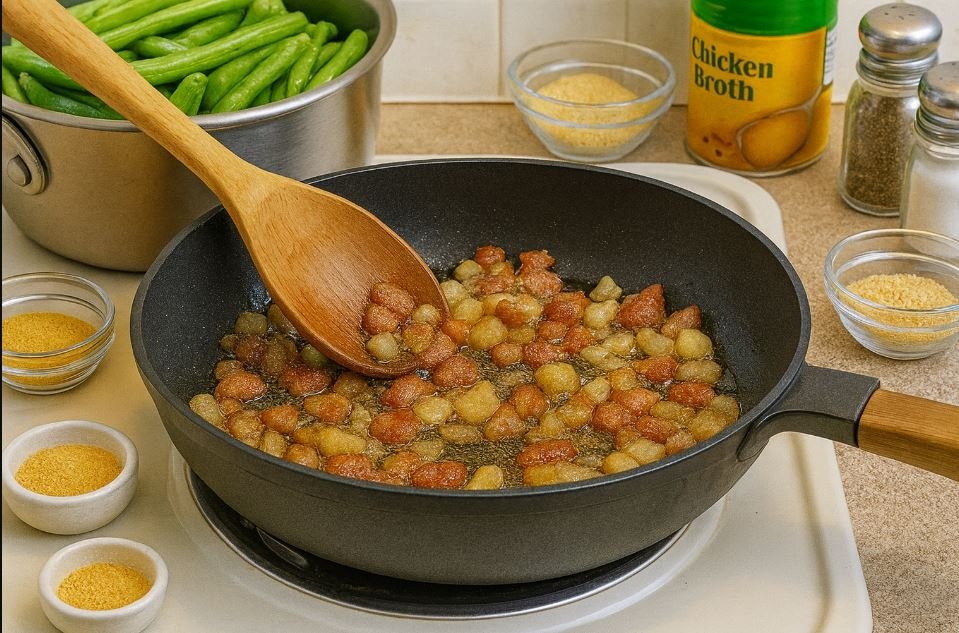
Step 1: Fry the Bacon
Cook chopped bacon in a large skillet until crisp. Remove and set aside, leaving drippings in the pan.
Diana’s Tip: Keep the bacon pieces chunky — they’re part of the bite, not just garnish.
What to Watch For: Don’t burn the bacon; burnt drippings = bitter beans.
Step 2: Sauté the Aromatics
Add onion and garlic to the bacon drippings. Cook until softened and fragrant.
Diana’s Tip: Stir constantly — garlic can go from golden to burnt in seconds.
What to Watch For: Onions should be translucent, not caramelized.
Step 3: Create the Flavor Bath
Add chicken broth, vinegar, sugar, salt, and pepper. Bring to a simmer.
Diana’s Tip: Taste the broth here. If it tastes good now, your beans will be amazing later.
What to Watch For: Balance — too much vinegar can overpower.
Step 4: Simmer the Beans
Add green beans and simmer 8-10 minutes until tender-crisp. Return bacon to the skillet and toss everything together.
Diana’s Tip: I like my beans still a little snappy. My grandmother used to say, “If they squeak between your teeth, they’re perfect.”
What to Watch For: Don’t overcook — mushy beans lose their magic.
Why I Feel Good About Serving These
Here’s the nutritional breakdown (per serving, serves 4):
- Calories: ~120
- Protein: 5g
- Carbs: 10g
- Fat: 7g
- Fiber: 3g
They’re light but flavorful, veggie-forward yet indulgent. It’s the best of both worlds.
For my keto friends: These beans fit perfectly — low carb, high flavor.
Making These Even Better for You
For Lower Sodium: Use low-sodium broth and cut soy-based add-ins.
For Dairy-Free: This recipe is naturally dairy-free — no swaps needed!
To Boost Protein: Add extra bacon or toss in leftover shredded chicken. I did this once for a weeknight dinner, and my husband thought it was a main dish.
How I Love to Serve These
For Weeknight Dinners: They’re the perfect side to grilled chicken or pork chops. My kids happily eat green beans this way — and that’s saying something.
When Entertaining: At a holiday dinner, I served these in a rustic cast-iron skillet right on the table. Guests went back for seconds and thirds.
Seasonal Twist: In summer, I add cherry tomatoes at the end for brightness. In winter, I toss in a pinch of cayenne for extra warmth.
My Go-To Combinations: Green beans + mashed potatoes + roasted chicken = comfort on a plate.
Learn from My Kitchen Disasters
Mistake #1: Using canned green beans.
- Why it happens: I thought I’d save time.
- Fix: Fresh or frozen only — canned turns mushy and bland.
Mistake #2: Too much vinegar.
- Lesson: One time, I poured in 3 tablespoons instead of 1. The beans tasted like pickles.
- Prevention: Measure vinegar carefully.
Mistake #3: Skipping the sugar.
- The disaster: The flavor was flat and sharp.
- Solution: A teaspoon of sugar makes all the difference.
Meal Prep Magic with These Green Beans
Short-Term Storage: Keep in the fridge up to 4 days. Reheat gently on the stove.
Freezer-Friendly: Freeze cooked beans in broth. Thaw overnight and warm in a skillet — still delicious.
My Sunday Prep Routine: I cook the bacon and chop the onion ahead. Then, midweek, all I need to do is simmer beans in broth and finish with bacon. Dinner magic in minutes.
Reheating Like a Pro: Skillet > microwave. A quick re-simmer in broth revives flavor.
Why This Recipe Earned a Permanent Spot in My Kitchen
Here’s why these beans are now a staple: they’re fast, they make vegetables exciting, they please picky eaters, and they taste just like the restaurant version (maybe better).
Every time I make these, I think of my grandmother teaching me that vegetables don’t have to be plain. Standing on that stool, watching her cook with love and instinct, I learned that even something as humble as green beans could bring people together.
I’m telling you, once you try these Texas Roadhouse green beans, you’ll wonder why you ever settled for plain steamed ones.
Ready to give them a try? Share your photos on Facebook (Cooking with Diana) or tag me on Pinterest (@DianaRecipes). And if you love this recipe, don’t miss my Crispy Bacon Brussels Sprouts — they’re the perfect partner!
Your Questions Answered
Q: Can I make these ahead of time?
A: Yes, they reheat beautifully. Just keep them in their broth.
Q: Can I use frozen green beans?
A: Definitely! Just add them straight to the skillet — no need to thaw.
Q: How do I keep the beans crisp?
A: Simmer gently and stop cooking as soon as they’re tender-crisp.
Q: Can I make this vegetarian?
A: Yes! Skip bacon and use olive oil + liquid smoke for flavor.
Q: What if I don’t have chicken broth?
A: I’ve used beef broth and even veggie broth — both work.
Q: How do I add spice?
A: Red pepper flakes or cayenne do the trick.
Q: Can I double the recipe?
A: Absolutely. Just use a larger skillet so the beans simmer evenly.

